Latest photos, Dec 2007:
Sun, Jupiter, Saturn, Comet 17p Holmes- under Solar System
M31, M51, Coma Cluster- under Galaxies
M3, M15, M27, M45, M53, M71, NGC5053- under Clusters
M45- under Nebulae
Rho Ophiuchus, The coolest panorama ever, Albiero double star, ISS, Barnards star- under Other
|
Earth, Moon, Sun, Planets, Asteroids and Comets-- objects within the confines of our solar system
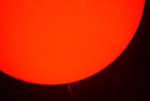
| All solar images here taken through the Coronado P.S.T.- personal solar telescope. The PST is a 2" diameter scope with (expensive) hydrogen alpha filters that show only this orange-red wavelength of light, allowing the viewer to see flares and prominences that you would not otherwise be able to see. The only time you can see prominences without this kind of filter is during a total eclipse. |
| Click pic for Full-size photo |
Description |
 |
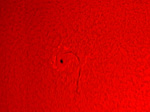
18 May 2007. A nice solar prominence captured with the Toucam. This is my last image of the sun, since I sold the PST. Hopefully I will soon be able to pick up another one. |
 |
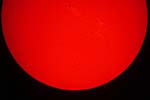
3 Feb 2007. My first attempt at sunspot imaging. There were no interesting prominences on the sun, but a very interesting sunspot. Of the times I've observed up to this point, this sunspot was by far the most interesting I'd seen. For some scale, this structure is probably about 5-8 times the size of Earth. This is a stack of 500/2000 frames processed in Registax 4 (software). Because weather has been so bad the last 2 months, a break in the clouds is the only astronomy I can do. Not a bad result. |
 |
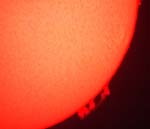
20 Dec 2006. My first attempt at Solar imaging with a webcam. Reasonably successful. The webcam has proven to be way better at imaging the sun. The only trouble is getting it to focus... I had to rig up adapters in order to make this happen, and even then I can't get the whole solar disc in the frame. Had bad weather for several weeks leading up to this, so this was the only astronomy I could participate in (until a few days later). This image shows a large prominence that would easily be 2x the size of the Earth... of course it isn't going to win any awards but it's a start! |
 |
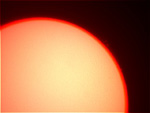
9 Apr 2006. First picture taken using Canon Rebel XT DSLR camera. I used the Meade camera adapter for ETX telescopes, unscrewed the main barrel, leaving only the portion that fits into the eyepiece slot and an adapter thread for the camera. It was really hard to focus the sun in the camera's viewfinder. Dim image and it was (duh!) bright outside. Anyway, I was pretty pleased with the result. The "best" solar images are generally taken using a webcam or video camera, not a DSLR. |
 |
9 Apr 2006. Closeup of the prominences in the above photo. Can also make out some of the surface detail of the sun. Contrast adjustments and sharpening in Adobe Photoshop (image editing program). |
 |
2 Apr 2006. This was taken afocally using a point-and-shoot Fuji Finepix A340 camera. I held the camera up to the eyepiece of the PST and snapped away. This first photo shows some sunspot and surface detail, but not much solar prominence detail. The prominences are dimmer than the solar disk- easy to see, hard to photograph, because the eye adjust to the contrast difference better. |
 |
2 Apr 2006. This is the second afocal photograph of the sun, using the Fuji Finepix A340. This image was brightened a bit to show the prominence detail. To put the size of this solar storm into perspective, the prominence on the bottom is many times the size of the Earth. |
| Detailed pictures of the moon are best captured with a webcam recording a video. All of the pictures pre-dating July 2006 were taken with a DSLR, through regular camera lenses or through the telescope. Webcam images have been added and both DSLR and webcam images will be featured here. There are countless features to study on Luna, so this section will be expanding. The moon also lends itself to more "artsy" photos since it can easily be captured by a camera, and is so large in our sky. |
| Click pic for Full-size photo |
Description |
 |
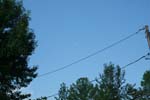
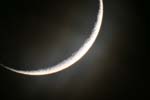
13 May 2007. A friend of a friend let me use their yard overnight to take astrophotos (they're sprinkled throughout the page here from 12 May), and I took this photo of their house at sunrise as a thank you. There's a nice crescent moon in the shot. A full-sized version can be seen here. |
 |
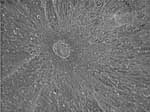
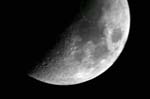
27 Mar 2007. A better attempt at imaging crater Platon on the moon than my first try. I used a 2x barlow lens + an extension tube from another barlow (without the 2nd lens). I guess I got about 3x magnification, which is a focal length of 6000mm (f/30). Stack of 200 from 1000 frames, prcessed in Registax 4. Some of the frames are misaligned which is why part of the image isn't stacked quite right. With some image processing skills I could perfect this image but I don't have them yet. You can see a couple of the "craterlets" in Plato. |
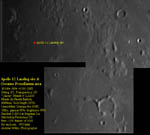 |
30 Nov 2006. The Apollo 12 moon landing site. Taken from my back yard using a webcam connected to the back of the telescope with a 2X barlow (magnifying) lens. This is a composite of 3 separate movies recorded with the camera, taking 150 frames from each movie and stacking, then combining the three in Photoshop to create a panorama of sorts. All of the technical details are in the image itself
This was a submission for the same contest I won with the moon image below. The prize when you win is to pick the subject two months later (I won in Sept, chose November's target). So, this target was what I chose. Why did I choose this somewhat dull area? Well, in 1969, November 11-14th, Apollo 12 flew it's mission.. so in honor of the November landing, I chose this spot of the lunar disk. This webcam stuff takes a lot of practice.. moreso on the image processing side of things. It's like learning astrophotography all over again. |
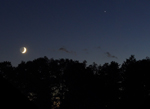 |
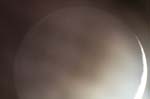
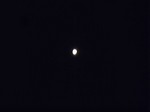
26 Sep 2006. Taken from Cherry Springs State Park, the nearest dark sky site from Rochester NY. 0.8 sec exposure, ISO 800, using Sigma 70-300mm DG APO lens at 70mm. This is a good photo of earthshine, which is light reflected off of the earth illuminating the darkend portion of the moon. Springtime offers starker contrast for earthshine in the Northern hemisphere, mainly because the moon isn't as low on the horizon due to the orientation of the earth's tilt, however fall offers a decent opportunity as well. This picture started out a good night of astronomy at Cherry Springs.
The "pixel peepers" in the crowd will notice when you zoom in on Jupiter (the bright "star" in the upper right) you can actually make out the moons! The light wisp on the left side of Jupiter is Io and Callisto mashed together, and Ganeymede (the largest moon of Jupiter, and largest moon in the solar system, bigger than Mercury) is the bright dot to the right of Jupiter. Amazing that these can be resolved with just 70mm of focal length (~1.5x zoom for a regular digital camera)!
This photo won a monthly contest- for best "Bright" image for September. Click on the link for more info. |
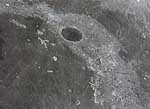 |
7 Sep 2006. Picture of the crater Plato, which is visible with the naked eye near the top of the moon, on the border of one of larger Mare, or seas (dark areas of lava flow). What's special about this one is I photographed it "proper" using the method the best planetary pictures come out-- using a webcam. I captured ~1000 frames at 30 fps, then combined, stacked and wavelet sharpened in a freeware program called Registax. I then touched up the photo in Photoshop.
You can see a couple of the "craterlets" in Plato. A favorite test of your telescope is how many of the small craters can one see in the basin of the crater Plato. An 8" telescope is the smallest size one can view all 7 craterlets with-- but you need an exceptionally steady atmosphere (which was not the case this night). In order to image all of the craterlets, I would need to add some magnification by inserting an eyepiece in between the webcam and the telescope. You can see the 3 largest ones in this photo. |
 |
7 Sep 2006. Picture of the crater Copernicus, a bright crater that has many rays from the ejecta from the impact that created it. I also took a picture of this with the webcam, capturing 500 frames, but keeping only 471 frames at 30 fps, then combined, stacked and wavelet sharpened in Registax like the Plato image above. I then touched up the photo in Photoshop. |
 |
9 Aug 2006. Daytime photo of the moon from my backyard. Used Canon EFS 18-55mm lens on the Rebel XT. Hard to see, but it's in the center of the pic... |
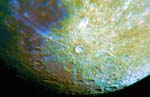 |
6 Apr 2006. While observing through the telescope this night, I swore I saw colors- faint amber/orangish color. I found information on the internet that confirms the moon indeed does have colors! The colors can be shown in a photograph by stretching the color saturation in Adobe Photoshop (image editing program). I did so and came up with this image. The big crater with the rays eminating from it is Tycho, named after Tycho Brahe, 16th century astronomer who died 9 years before the telescope was invented. |
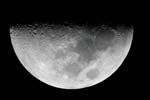 |
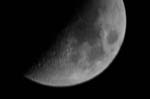
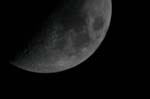
6 Mar 2006. First quarter moon. This time the composition of the photo is better, as well as the tracking and sharpness. A lot of moon is visible only 5 days after the previous picture! |
 |
1 Mar 2006. What I was attempting in the photo below, to capture the Earthshine. The light reflected off the surface of the earth lights up the dark portion of the moon. Earthshine is easiest to see in the northern hemisphere in springtime- March, April timeframe. |
 |
1 Mar 2006. Following the tradition with the ETX-125, my first astrophoto taken through LX200 8" scope. I sold the ETX-125 on eBay because it wasn't well suited for astrophotography. The fork mount wasn't rigid enough to support the weight of the digital SLR camera and maintain good tracking. So I picked up a used 8" scope from a guy in Buffalo nearby. Of course, it promply was cloudy for the next 2 weeks. |
 |
My very first astrophoto ever. 7 Dec 2005. Shown here for reference purposes. Pretty bad, huh? Totally overexposed. The image is smeared because I didn't have the telescope's clock drive running. Given the moon is relatively easy to photograph, figured I'd use it as my test shot. Taken with Canon Digital Rebel, prime focus through ETX-125. |
 |
7 Dec 2005. More polished shot taken right after the one above. Taken with Canon Digital Rebel, prime focus through ETX-125. |
 |
7 Dec 2005. More polished shot taken right after the one above. Taken with Canon Digital Rebel, prime focus through ETX-125. |
 |
7 Dec 2005. Last of the initial astrophoto batch. Taken right after the one above, adjusted the exposure too dark. For better photos, I need to turn the telescope tracking on. Otherwise the Earth rotates enough to be seen in the picture. Taken with Canon Digital Rebel, prime focus through ETX-125. |
| The best kind of camera for the brighter planets is a webcam. In order to capture an image when the atmosphere is momentarily still, a video recording works best. Free processing programs are available on the web to pull out the best frames of the video stream, which are then added together in a "stack" and then processed. I purchased a Toucam Pro 840K webcam in June 2006, and got the appropriate adapter in July 2006. Cloudy weather promptly followed for 3 weeks. Then the only bright planet left in the sky, Jupiter, was behind trees from my backyard. So, there are only DSLR images for now. Not ideal for planetary photos, but great for capturing moons. As astronomers decide what exactly is a "planet", for ease and convenience I will include Pluto in this category.
Images will be grouped by planet, ordered by closest to furthest from the sun. |
| Click pic for Full-size photo |
Name |
Description |
 |
Mercury |
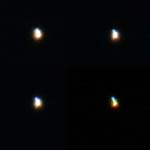
12 June 2006. Taken near the maximum western elongation. Because Mercury is so close to the sun, the planet is difficult to see through a telescope. The best vantage still forces the viewer to look through a lot of atmosphere becuase of it's low angle. The the image boils ("bad seeing") in the telescope's view due to atmospheric turbulence, the same as a mirage does on a hot day. When I took this pic, the air was moving so much, you could even see colors- it was acting like a prism. I took many photos, and these 4 were the only ones that showed any shape. Mercury does show "phases" like the moon, because it is inside Earth's orbit. The best I could do is show the phase of the planet. Ideal imaging conditions are at eastern elongation near sunrise- the air is more still- and using a webcam. Taken through a 127mm / 4" Orion Apex Maksutov-Cassegrain spotting scope, prime focus, Canon Rebel XT, from a nearby field with a clear western horizon view. |
 |
Venus |
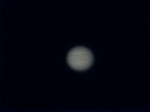
19 Apr 2007. Taken from my backyard, this is my first attempt at imaging Venus with a webcam. Venus is best imaged in the ultraviolet wavelength, in order to get details in the planet's clouds. Otherwise, its just a white shape like this one, indicating only phase. This was shot during twilight near sunset, when the sky was still rather bright. I was waiting to do other astrophotos that night. |
 |
Venus |
8 July 2006. Taken from Cherry Springs State Park, the nearest dark sky site from Rochester NY. This picture was taken through the eyepiece using a special eyepiece to camera adapter, in order to magnify the image. Venus was low on the horizon, so the atmospheric turbulence was high. This evening was also very humid and hazy (astronomers regard this as bad transparency). The sun was down and to the left in this photo. Like Mercury, you can see the phase of the planet like the phase of the moon.
Venus has no surface features, and cloud details can only be seen in UV light. The planet is permanently shrouded in thick clouds and has temperatures of 900 degrees F on the surface. Venus is the third brightest object in the sky, the sun and moon being the brightest. You can often see it as a bright star just before sunrise or just after sunset near the sunrise/set. |
 |
Mars |
7 Mar 2006. Mars was not ideally positioned for photography. The best time was in August 2003 when Mars and the Earth were closest to one another in 60,000 years. But I took this pic to see if I could resolve any surface detail at all. I couldn't. DSLR is not well suited for Mars photos. So when it comes back around in a favorable position in 2007, I will have better Mars pictures. What you see here is about all I could see through an eyepiece. A reddish blob... |
 |
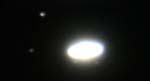
Jupiter |
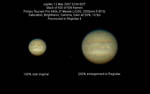
12 May 2007. Expecting this one to turn out like the one below (my first webcam attempt on Jupiter) I didn't bother to hook up the 2x barlow lens and extension tube. So with a relatively small magnification I actually captured details on Jupiter's cloud surface without expecting it. I couldn't even see these details in the webcam preview window.. the magic of stacking and wavelet sharpening filters brought out these details. You can make out the Great Red Spot (GRS) in the upper left of the globe, and some cloud band details in the equitorial zone! Now I wish I had set up the barlow lens! |
 |
Jupiter |
20 Mar 2007. My first try at imaging Jupiter with a webcam. The planet was so low in altitude, no details on the surface could be made out. The two main bands are barely visible. I posted this on a message board with the title "you can't polish a turd". |
 |
Jupiter |
27 Mar 2006. This image was intentionally overexposed to show 3 of the Gallilean moons of Jupiter. They are, left to right, Io, Europa and Callisto. Ganeymede, Jupiter's largest moon, is bigger than Mercury and Pluto, and was oriented just outside the frame of this shot on the right. Taken through 9mm eyepiece projection at 11:22 pm.
The moons often cast a shadow on the planet, but as of this writing I haven't seen this. These moon transit events were used to make the first measurement of the speed of light! This was accomplished by comparing the actual vs. predicted time of the shadow transit. Light takes approximately 20-40 minutes to get to the Earth from Jupiter. A 7 second error was observed, and using that, a value of the speed of light was calculated. |
 |
Jupiter |
7 Mar 2006. Jupiter was well positioned for folks in the southern hemisphere this year, but low on the horizon for those of us up north. Any DSLR photo I took of Jupiter did not show nearly any of the details I could see through the eyepiece. Webcams are much better suited for this purpose. Here is the best single frame image I could get of Jupiter that night, which isn't very good. |
 |
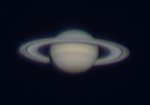
Saturn |
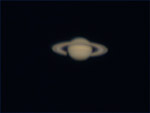
17 May 2007. Quick webcam shot of Saturn captured in my back yard. Saturn was pretty low by this point. Seeing was 2/5. Transparency 3/5. Stack of 200 frames from 1000, using Registax version 4. Not my best effort, but learning... |
 |
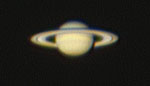
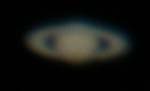
Saturn |
20 Mar 2007. By far my best Saturn image to date. Had difficulty aligning all portions of the frame to get a completely clear sharp shot. Seeing was a 2/5. Transparency 3/5. Stack of 200 frames from 1000, using Registax version 4. |
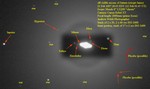 |
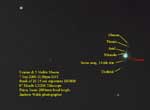
Saturn |
21 Feb 2007. Details on exposure etc. in the image. This is my attempt at imaging all the visible moons of Saturn simultaneously in one frame. Phoebe is a dim magnitude 16 moon, which is at the photographic limit of my scope and camera combination. The other moons are only aligned favorably about 1 or 2 times a month for imaging them all at once. Mimas and Enceladus are so close to Saturn, they get lost in the glare unless they are as far away from the rings as possible. Phoebe has a slow orbit that lasts 8-10 months and thus is rarely within the same field of view of Saturn. The only other visible moon by amateur equipment is Janus, which orbits inside the rings, and can only be seen when the rings are edge on (which happens every 26 or so years, next time is in 2008). This is the only amateur photograph I know of of all saturns visible moons at once! |
 |
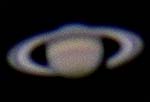
Saturn |
22 Nov 2006. Best saturn image to date, but pretty crummy by webcam standards. This is a stack of 109 individual frames, aligned using Registax 3.1 (image editing program), then processed in Adobe Photoshop (image editing program). Notice the improvement over the earlier Saturn photographs, especially the DSLR one. By and far, a video or webcam is the way to go when photographing planets. It's the easiest way to get a large number of frames in a short period of time. Clearly this result demonstrates that- the detail is an order of magnitude better than the DSLR photo. However, because of a roiling atmosphere ("poor seeing" in astronomy parlance), the blue portion of the image in particular is blurred. Even though the software rescued a lot of data out of this image, it can only go so far. Expect more and better results in the near future as Saturn becomes favorably positioned over the next several months. |
 |
Saturn |
7 Mar 2006. Best saturn image to date, and probably the best anyone could achieve with a DSLR camera (unless on top of a mountain with very still air). This is a stack of 24 individual frames, aligned then combined in Adobe Photoshop (image editing program). With this one you can see cloud bands on the planet, the shadow on the rings, and the Cassini division in the rings. Of course, eyepiece views are still much better than the picture. Notice the improvement over the earlier Saturn photographs. |
 |
Saturn |
5 Mar 2006. An animated movie showing the moons of Saturn orbiting. 4 frames, each taken 1 hour apart. |
 |
Saturn |
4 Mar 2006. Taken through the LX200, all but one of the easily visible moons of saturn is included in this picture. Be sure to scroll right after opening the large image to see Hyperion. There are a couple more visible moons, but those require the rings to be seen edge on, which happens only once every 15 years or so. The missing moon in this photo is Iapetus, one of the strangest objects in the solar system. Iapetus is half black, half white. The moons rotate around Saturn quickly. I took a series of 4 pictures the next night, each one hour apart to make this animated movie.
Some of the other moons of Saturn have unique and interesting features. Titan has its own atmosphere, and has been the subject of intense study of the Cassini probe, which is actively taking pictures and collecting data around Saturn. Mimas has an enormous crater that makes it look like the Death Star from Star Wars. Enceladus is smooth and covered in ice, and features volcanic activity, discovered 2-3 years ago. Hyperion is egg-shaped and has odd collapsed craters like it was made of styrofoam. Rhea, Tethys and Dione are the ordinary looking moons. |
 |
Saturn |
20 Feb 2006. The best single frame snapshot I could capture of Saturn using the DSLR camera. Taken through the 8" LX200, using eyepiece projection to magnify the image. |
 |
Saturn |
27 Jan 2006. A better result than my first try at saturn (including 3 moons in the pic), all taken through the ETX-125. The photos don't do the eyepiece view justice, however. This evening featured the sharpest view I've ever had of Saturn. The cloud band details, the planet shadow on the rings, and details in the rings themselves, as well as several moons were all easily visible. The ETX-125 was an optically awesome piece of equipment, but just not sturdy enough for astrophotography with a DSLR camera. |
 |
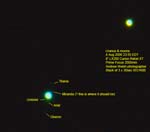
Uranus |
21 Sep 2006. See description below for info on Uranus. This was another attempt with the planet out of the way of that pesky background star on the 7th of September. I was happy to get my clearest shot yet of Miranda which proved to be elusive to photograph. I didn't have to stretch the data so much to get this photo. The larger image has the exposure details incorporated. |
 |
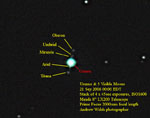
Uranus |
7 Sep 2006. Taken from my backyard in the 8" LX200. The goal here was to image all 5 visible moons of Uranus, which I did achieve! Given the sheer distance this planet is from ours, resolving these small objects is no small feat! Uranus is relatively bright, easily visible with the naked eye if you know where to look and have reasonably dark skies. It wasn't discovered as a planet until the 1700's because of it's relatively slow movement against the background stars, unlike Saturn, Jupiter, Mars, Venus and Mercury, despite being well within the reach of anchient astronomers. As Uranus is favorably positioned in the evening sky, this is an ongoing project to image all 5 visible moons in one shot. The rest of Uranus' moons are only visible from the largest telescope on Earth (Keck) or the Hubble Space Telescope. The object in the upper right of the picture is a nearby star.
This photo took some more massaging than the 4 Aug 06 picture to tease the moons into visibility. The challenge here was trying to image with a full moon less than 10 degrees away! It didn't help that the air was really hazy making the moonglow even worse. I had to take an extra 2 minutes of exposures compared to my first picture below when there was no moon in the sky. |
 |
Uranus |
4 Aug 2006. Taken from my backyard in the 8" LX200. The moons of Uranus are almost all completely visible in this photo. The object in the upper right of the picture is a nearby star. |
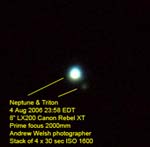 |
Neptune |
4 Aug 2006. Even further away, Neptune is a moderately bright object that can only be seen through a telescope. Neptune was discovered by close examination of the orbital motions of Jupiter, Saturn and Uranus. The mass of Neptune peturbs their orbits slightly, and soon after calculating the predicted location, Neptune was found. The moon Triton is an icy world covered in frozen methane, and is visible in this picture. The remainder of Neptune's satellites are only visible with professional telescopes. A recent batch of really tiny, dim moons were discovered by Hubble in 2005. Because of the distance, no features can be resolved on the disk of Neptune other than it's blue color. |
 |
Pluto |
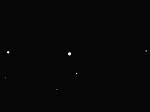
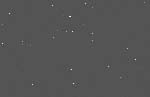
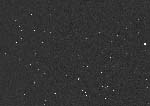
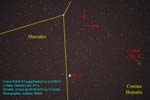
8 July 2006. Cherry Springs State Park, the nearest dark sky site from Rochester NY. The dark skies there were needed to image this very dim object (it's status as a planet is currently under debate). This image is simply the planet and star background, with Pluto identified.
I was able to fish out which one was Pluto by comparing my photo with the Digitized Sky Survey, which combines images from ground telescopes and the Hubble Guide Star catalog. After correctly scaling and rotating the image provided by that site to match the orientation and scale of my photo, I was able to determine which dot was Pluto. This comparison image shows the sky survey photo on the right, and my photo on the left with an arrow showing Pluto. You'll notice Pluto isn't in the picture on the right. By "blinking" the reference image on and off, I was able to see where Pluto was. Another method to find Pluto is to take pictures one night apart in the same patch of sky and compare the two, looking for movement. Pluto does move noticeably in one day. |
 |
Pluto |
8 July 2006. Same photo as the one above, except an accurate finder chart was superimposed over my image to show where Pluto was. The finder chart matches pretty accurately with Pluto's position. |
| This section is dedicated to the small objects orbiting the sun- comets and asteroids. Some of the brighter asteroids in the asteroid belt between Mars and Jupiter will be included, as well as any relatively bright comets that come along at favorable times for imaging. |
| Click pic for Full-size photo |
Description |
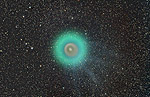 |
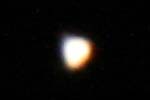
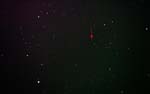
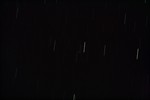
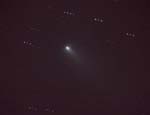
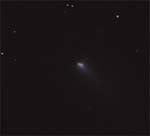
2 Nov 2007 Comet 17p Holmes. Discovered in the 1800's this periodic comet is normally dim. However, around October 24th 2007, the comet experienced an outburst going from Mag 17 to 2 (brightness increase of well over a million times). An outburst in the 1800s is what caused this comet to be discovered in the first place. The comet is in it's orbit between Mars and Jupiter at the time of this photograph. The comet had reached an angular size near that of the full moon! This made the comet the largest object in the solar system at the time-- bigger than the sun.
The image presented above is a merge of three stacks of images. Visually, one would only see something like this. The long exposure shows the green halow and the extended blue tail trailing behind the comet. An inverted image shows some of the faint tail details a little clearer. The comet has an unusual shape due to the almost straight-on view we have of it. The comet also moves very slowly. As of Dec 6th 2007, it still is visible by naked eye and larger than the full moon in size (much more spread out than in this photo). The comet at the time of the photograph was in the constellation of Perseus and was visible all night.
This is a Stack of 36 x 8 sec, 17 x 90 sec, 14 x 300sec exposures all at ISO1600, using a Canon 400mm f/5.6L @ f/6.3 piggybacked on my 8" LX200. Shots were taken at the Rochester Astronomy club's obvserving site in Ionia, NY, accompanied by my friend Will. The exposures were not guided and some of the stars are distorted as a result. |
 |
30 Mar 2006 Asteroid 2006 VV2. This asteroid passed really close to Earth around the 30th of March 2007. Catching onto the buzz on messageboards, I attempted to image this object. This guy was hard to find. I took pictures of random slices of sky in the neighborhood of where it 'should' be. Once I did find I had imaged it (in my 400mm camera lens), I was fortuitous enough to have it also be in the FOV of the 9mm plossl eyepiece (~222x power) which was in the scope on which the camera lens was mounted. I then got the idea to try a photograph that is different (instead of a streak or an animated movie). I kept the asteroid centered in the eyepiece and used the telescope controls to follow it. Little bugger was moving fast!
This is a Stack of 23 x30 sec images using a Canon 400mm f/5.6L @ f/8 piggybacked on my 8" LX200. Shot at ISO1600 on 30 Mar 2007. I used my illuminated reticle in the 8" scope to track on the asteroid. I figured I do an offbeat image just to be different. |
 |
16 Aug 2006 Ceres. A series of 2 exposure stacks (4 x 30 sec at ISO1600, prime focus 8" LX200 telescope), taken approximately 30-40 minutes apart. This shows the fast motion of the first asteroid discovered in orbit between Mars and Jupiter. Ceres accounts for a significant portion (1/3) of the mass of the entire asteroid belt, that is, it is exceptionally large compared to most of the rocks floating about there. Due to recent controversy over what is a planet or not, a proposed definition sent for approval by the IAU (the group that decides these sorts of things) gives a definition of a planet that would make Ceres a planet- techinically, the 5th planet, given it's between Mars and Jupiter. For many years, Ceres was considered a planet, until more asteroids were discovered. Click on the image for an animation blinking between the earlier and later frames. |
 |
16 Aug 2006 Pallas. A series of 2 exposure stacks (4 x 30 sec at ISO1600, prime focus 8" LX200 telescope), taken approximately 30-40 minutes apart. Another asteroid orbiting between Mars and Jupiter, Pallas, was the second asteroid discovered in 1802. According to Wikipedia, it contains 7% of the total mass of the asteroid belt. Click on the image for an animation blinking between the earlier and later frames. Pallas is slightly unique to the other asteroids in that it orbits at an inclination of approximately 60 degrees from the earth's orbit. |
 |
16 Aug 2006 6 Hebe. Hebe was the 6th asteroid discovered. As you can see, sometimes astrophotography is hard, especially when dealing with ephemerides like asteroids. I failed to image this. I got 4 x 30 second exposures of the same patch of sky 30-40 minutes apart, but, no asteroid. Bummer. |
 |
16 Aug 2006 10 Hygiea. As you can see, sometimes astrophotography is hard, especially when dealing with ephemerides like asteroids. I failed to image this. I got 4 x 30 second exposures of the same patch of sky 30-40 minutes apart, but, no asteroid. Bummer again. |
 |
16 Aug 2006 15 Eunomia. As you can see, sometimes astrophotography is hard, especially when dealing with ephemerides like asteroids. I failed to image this. I got 4 x 30 second exposures of the same patch of sky 30-40 minutes apart, but, no asteroid. Bummer again! I even included a third frame from the STScI Digitized Sky Survey which is a professional astronomer resource- a bunch of reference star pictures so you can see if you've found a new moon or asteroid or comet, essentially. I thought maybe this asteroid was really dim, but no luck. I'll have to try again some other time. |
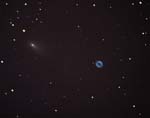 |
7-8 May 2006. The comet 73P Schwassmann-Wachmann 3 had broken up into multiple fragments before the closest approach to the Earth. One of the fragments passed by the "famous" ring nebula, M57 (M = Messier). This picture shows what the comet looked like through the eyepiece. The picure isn't that great because I did not have time to complete an accurate alignment with the north celestial pole (the telescope's tracking was slightly off). The comet fragment arrived ahead of schedule, rushing my alignment preparations.
A special "trick" in image processing was used to create a stationary comet and 'round' stationary stars. Each of the exposures are aligned, then added together. Two separate "stacks", one with the stars aligned, and the other with the comet aligned are created. Then the picture of the still comet is copy-pasted onto the still star image, and the residual multiple comet images are removed from the background. This took some time to complete, but I'm pleased with the result. Not many amateurs captured the comet and the nebula together, so this image is relatively rare! |
 |
3 May 2006. A stack of images of the "B" fragment of the comet 73P Schwassmann-Wachmann 3. The rows of dots are the background stars moving in relation to the comet. Even within the 30-second exposures, the comet moved noticeably and smeared across the image sensor. The images are aligned on the center of the comet, then added together to create the stack. Since the stars moved in the background, they each appear 3 times. There are some image processing "tricks" that can create a comet image and stationary background stars for a more asthetic look, but those techniques were not applied in this picture. |
 |
3 May 2006. An animated movie showing the movement of the comet in the previous picture against the background of stars. The time between the first and last images was about 4 minutes. |
 |
3 May 2006. Taken with a Tamron 80-210mm f/4.5-5.6 zoom telephoto lens on the Canon Rebel XT. The camera was mounted "piggyback" on the 8" LX200 telescope, which provided the tracking to follow the earth's rotation and eliminate streaked stars. The constellation lines and labels were added in Adobe Photoshop (image processing program). In this picture, you can clearly see M13, the best and brightest Globular cluster (see "clusters" section above) in the northern night sky. The subject of interest, however, was the comet fragment coming across this section of sky. By the next night, the comet was outside of this field of view. |
|
|
Galaxies in the Messier and NGC catalogs, including portions of our own galaxy, the Milky Way.
Objects are sorted by catalog number, then the most recent photo on top if of the same object.
| Click on Thumbnail for Full-size photo |
Name |
Description |
 |
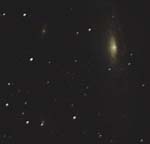
M31 Andromeda Galaxy
M32 M110 |
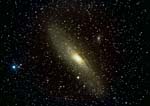
15 Sep 2007. One single exposure, ISO1600, 10 minutes from Cherry Springs State Park in PA. Used the 400mm f/5.6L lens with my Rebel XT at f/6.3. I was ecstatic when I saw this exposure on the laptop screen. I set the system up to take more 10 min exposures to get by far the best M31 I was going to get.... however clouds rolled in 5 minutes into exposure #2, and they didn't go away until dawn. Bummer. This one exposure is still pretty darn good and I'm happy to post it. |
 |
M31 Andromeda Galaxy
M32 M110 |
27 Sep 2006. Update to the image below, with a few more exposures. Not much difference, even though I added an hour of exposure! A lesson that light-polluted suburban backyards don't yield as much data as dark skies like Cherry Springs. A huge full-size image is availble for your viewing pleasure. |
 |
M31 Andromeda Galaxy
M32 M110 |
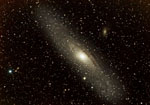
17 Sep 2006. 40x180 sec exposures at ISO800. Used my Sigma DG APO 70-300mm f/4-5.6 zoom telephoto lens at 300mm, combined with my Sigma DG APO 1.4x teleconverter, giving a focal length of 300mm x 1.4 = 420mm. Piggyback mounted on the 8" LX200, unguided. Used DSLR Focus (software) to automatically open and close the shutter and save the images over the 2-hour period. Would have added more, but when I went out to check the camera, the fog was so thick I couldn't see 10 feet in front of me. Took some Photoshop gymnastics to get it to look right- this object has extreme brightness range (bright core, faint arms) and it's hard not to blow out the center and see the dim outer arms simultaneously. Even with 2 hours of exposure, it could use another 2.
M31 is also known as the Andromeda Galaxy, named as such since it is in the constellation Andromeda. This is the nearest galaxy to our own at about 3 million light years away, and is visible as a fuzzy blob from suburban skies with the naked eye. The small oval blob to the right of M31 is M110, and the smaller fuzzy star/blob at the 6 o'clock position below the center of M31 is M32, both small satellite galaxies to M31 (much like the large and small magellanic clouds, visible only in the southern hemisphere, are satellite galaxies to our own). This is a very bright galaxy, and is a favorite photographic target because it doesn't require a telescope to photograph. In fact most scopes zoom in too close to get the whole galaxy in the frame. It is, after all, several times larger in angular size than the full moon. |
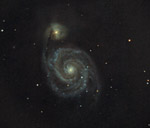 |
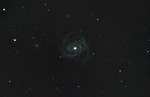
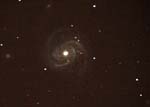
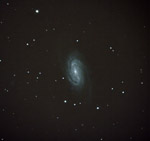
M51 Whirlpool Galaxy |
6 & 18 May 2007. 68 x 5min exposures at ISO1600. My first real try at M51 besides my snapshot from last year. Seeing and transparency were average this night... having the autoguided setup made this a lot simpler to do. Taken at 2000mm f/10 prime focus through the 8" LX200 with the usual processing :) This galaxy is an exposure hog and my bright skies don't help matters. |
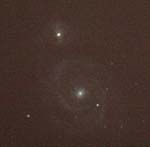 |
M51 Whirlpool Galaxy |
7 Mar 2006. 2x30 sec, 3x60sec exposures at ISO1600. Excited by the results from M66 and M67 below, I decided to give M51, a bright and well known photogenic galaxy, a try. I had to wait until late because there was a tree in the way. I took several short, 30-sec exposures to align the scope, then a couple of 1-minute exposures to try to collect some light. I learned quickly during the image processing that you need lots and lots of exposures to collect lots of light. On the order of hours... this is one that deserves a better treatment next spring. |
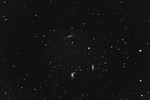 |
M65 M66 NGC 3628
"Leo Trio" |
23 Mar 2007. Equipped with a quality widefield "scope" (my 400mm camera lens), I made an attempt to image these three clustered galaxies in March. I tried to image this using the IDAS-LPS light pollution filter, but discovered the red channel (all of the red information) was "killed" by the filter. Despite 7 minute exposures, the picture came out miserably poor (and out of focus to boot). Sigh :) I had intended to enter this in a contest but the result was bad enough that it wasn't worth bothering to enter. The light pollution filter is better suited for nebulae than galaxies. I found this out of course after the fact.. oh well! I discussed it here and here. |
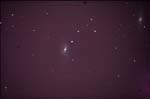 |
M65 M66 |
7 Mar 2006. My first attempt at photographing another galaxy. Prime focus through 8" LX200. Stack of 1x30 sec, 1x60sec, 1x119 sec at ISO1600. No darks or flat frames subtracted. These two galaxies are in the constellation Leo, and are nearby one enough visually to both be included in the frame (these 3 galaxies make up the "Leo Trio"). I was quite excited to see galactic spiral arms in the camera's LCD! I was not able to see these visually through the scope, due to bright light pollution in my back yard. |
 |
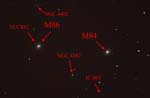
M84 M86
Markarian's Chain |
21 Apr 2007. Using my 400mm lens piggybacked on the LX200 8" scope, I imaged this wide supercluster of galaxies. The two fuzzies to the right-center are M86 and M84, respectively. The fuzzy below the right center is M87, and the one to the far right is M89. You can see the chain of galaxies curving up and to the left of M86 and M84, which make up "Markarians Chain". Also in the image are NGC's 4438, 4473, 4477, 4459, 4387, 4407, 4425, 4440, 4351, 4476, 4478, 4402, 4435, 4458, 4461, 4550, 4551 and 4531. Each a galaxy, each with 50 billion + stars... |
 |
M84 M86 |
28 Mar 2006. 3 exposures of 10 minutes each, ISO400. Darks but no flats subtracted. This is an image of part of Makarain's chain, which is part of the larger Virgo cluster of galaxies (named after the constellation Virgo, which is the direction in which they appear). Our galaxy is part of an even larger structure called the Virgo Supercluster, which this cluster is part of. Our own galactic cluster includes the small and large magellanic clouds, the andromeda galaxy and M33 the triangulum galaxy, among others. With longer exposures even more galaxies, each with billions of their own stars, would appear in this image. The universe is enormously huge!
M84 and M86 appear in this image. M84 and M86 in particular are super-massive galaxies many times larger than ours, and are the gravitational glue for the Virgo cluster. Visually bland, they are of scientific interest in other wavelengths of light. |
 |
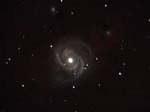
M100 |
Click on the image for details and labels on the other galaxies. I set up my autoguiding kit to record 5 hours of 7 min exposures at ISO1600, the limit of what I could do with my bad light pollution (using the IDAS-LPS filter) and 2/5 transparency. The results from the first night (11th March) were underwhelming. I could barely make out spiral arms in each image. I had to throw out 16 exposures, because the guidescope lost it's mag 5 star due to the transparency dropping to 1/5 (the stars were trailed as the autoguider told the scope to move all over the place fruitlessly searching for the star). So I spent a second night (20th March) repeating the goal of 5 hours of photography. This picture combines two night's data for a total of exactly 100 x 7 min exposures (that's 11 hours and 40 minutes folks). Dark skies would be best for this object, but the weather was miserable all spring, preventing a trip to a better site.
Compared to last years' result, this one is orders of magnitude better! You can see many other galaxies in this image, as well as few that are so dim, they aren't even catalouged! Click here for a full-size version without labels (warning: 2.5 MB file!).
|
 |
M100 |
1 May 2006. 3 x 10min exposures, ISO400. Darks and flats subtracted, although I didn't take the flat frames properly. Stacking done in IRIS, sharpening, levels, curves adjustment in Photoshop CS, noise reduction with Neat Image.
This image improved considerably with the implementation of the off-axis guider. Although it looks just as noisy as the one below, note the background is much darker- that means I didn't have to stretch the contrast as much as before to get the same detail to show. The guider permitted me to take 10 minute exposures, collecting enough light in those 3 pictures to get a better image. The raw frames look orange- just like street lights- but with some Photoshop magic, I produced this. It's a stretch (pun intended), and M100 will be the focus of my efforts come next spring. Stay tuned.
Image processing aside, if you notice in this image of M100 and the one next to it (6 o'clock on the image below, 8 o'clock position on this image), you'll see two stars near the central core of the galaxy. The star that is further from the core is a supernova that was first detected Feb 18th, 2006. Not only is a supernova remarkable, this particular one had a gamma ray burst of 33 minutes, instead of the usual 3-4 seconds! Astronomers calculate that such a gamma ray burst anywhere in our galaxy would sterilize Earth, or at the very least, strip the ozone layer completely away. If there was any life in M100, it's gone now. Of course, since M100 is ~470 million light years away, we're safe. For several days this particular supernova shined brighter than all the 100 billion other suns in M100 combined. My favorite NFL columnist, Gregg Easterbrook, mused on this topic (scroll about 2/3rds the way down). |
 |
M100 |
17 Apr 2006. This was the beginning of an exercise in frustration, and a learning experience for me. I learned that there are limitations to deep sky object (non-planetary) imaging from my backyard due to light pollution. I also learned that image processing is tough, and learned what happens without proper dark frame and flat frame subtraction. M100 quickly became my galactic imaging obsession, and the subject of my observing sessions for the next 3 weeks. During this timeframe, I acquired the off-axis guider, which permitted me to guide the image during a 10 minute exposure. This picture is before the off-axis guider, so the stars aren't as round. I couldn't take long exposures here. |
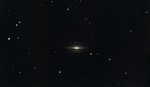 |
M104 |
18-19 Apr 2007. The Sombrero Galaxy. Stack of 41 x 240sec, 17 x 300 sec, ISO 1600, prime focus on Meade LX200. Autoguided w/Philips Toucam Pro 840K on a 4" Mak-Cass guidescope. Darks, flats, stacked in Iris. Final processing in Photoshop CS2, Noel's Astronomy tools, Noise Ninja and GradientXTerminator used. See first M104 picture below for more info about this galaxy. Not much improvement over last years' result, other than reduced graniness.. hard to get details at that low altitude (~30 degrees). This galaxy is really south in the sky. |
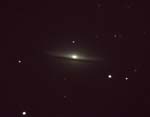 |
M104 |
23 May 2006. The Sombrero Galaxy. 3 x 10 minute exposures, ISO400. Darks and flats subtracted. Stacking done in IRIS, sharpening, levels, curves adjustment in Photoshop CS.
What a difference a month of experience makes. The addition of the off-axis guider permitted me to take 10 minute exposures without guiding errors. Fortunately, M104 and M100 have guide stars in similar spots relative to the object, making the transition between photographing each easier. See first M104 picture below for more info about this galaxy. |
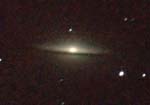 |
M104 |
26 Apr 2006. The Sombrero Galaxy. Stack of 5 minute exposures, ISO400. Darks and flats subtracted. Stacking done in IRIS, sharpening, levels, curves adjustment in Photoshop CS, noise reduction with Neat Image.
This is another bright galaxy that is relatively low on the horizon preventing the Hubble-esque photos with my 8" telescope :) Called the Sombrero galaxy due to the dark dust band clearly visible along the galactic edge giving it a sombrero-like shape. The faint halo around this galaxy 65 million light years away includes thousands of globular clusters just like the ones in our galaxy. |
Objects are sorted by catalog number, then the most recent photo on top if of the same object.
| Click on Thumbnail for Full-size photo |
Name |
Description |
 |
NGC2903 |
24 Dec 2006. 68 x 150s (2m 30sec) exposures, ISO800 (2h 50m total). Darks and flats subtracted. Stacking done in IRIS, sharpening, levels, curves adjustment in Photoshop CS.
This galaxy happened to be the very, very first one I ever imaged. I was so excited to see spiral arms when the exposure was done. You can see my first attempt here taken on March 7, 2006. This one is much better and a striking example of how far I've come in astrophotography in 1 year. This image utilized autoguiding and automated camera shutter control.. I set it to run and it happily snapped away for 3 hours automatically (it was Christmas eve, after all). This galaxy is relatively bright and is in the constellation Leo. There are two faint star 'tails' that spiral off the galaxy that make it visually striking. |
|
M84 M86
Markarian's Chain |
21 Apr 2007. Using my 400mm lens piggybacked on the LX200 8" scope, I imaged this wide supercluster of galaxies. The two fuzzies to the right-center are M86 and M84, respectively. The fuzzy below the right center is M87, and the one to the far right is M89. You can see the chain of galaxies curving up and to the left of M86 and M84, which make up "Markarians Chain". Also in the image are NGC's 4438, 4473, 4477, 4459, 4387, 4407, 4425, 4440, 4351, 4476, 4478, 4402, 4435, 4458, 4461, 4550, 4551 and 4531. Each a galaxy, each with 50 billion + stars... |
 |
NGC3543
NGC3589 |
24 Apr 2007. On the 5th clear night in a row, I had the chance to image for the beginner's DSO contest (M97 and M108). Using my Cannon 400/5.6 L lens piggybacked and SkyMap pro, I knew these guys would be in the FOV in addition to Beta Ursa Major (the lower front star of the big dipper).
I got my 8" LX200 lined up on the bright star to give an easy guidestar for the webcam to guide with. It was easy to line up the camera lens (using the guidescope rings) such that M97 and M108 would be in the FOV (as well as the star).
I take a test 2min picture to verify framing. I don't see M108 or M97, but I thought that's OK, there's a 1/4 moon and maybe they're just buried in the dimness. I set DSLR focus off to record 3 hours of pictures (91 exposures). Once I was able to process the stack, 32 frames had to be tossed (turns out the guidestar got lost behind my house so guidedog lost it's mind.. no big deal, right? I still have 58 frames and a good 2 hours of data). Well, even after a hard stretch there was no M108 or M97. I didn't think these would be that hard to see... then I realized I may have pointed to the wrong star! After searching the STScI database reference images for 2 hours I realized I was imaging and guiding around Alpha Ursa Major. DOH!
Here is the result of my pointing mistake. Buried slightly below and to the left of the center of the frame is NGC 3543, and NGC 3589 is below and left of 3543. |
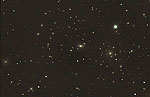 |
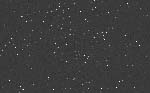
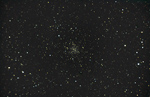
Coma cluster |
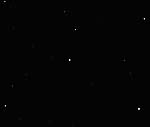
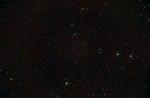
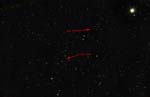
12 May 2007. 24 x 7min exposures @ ISO1600, taken at 2000mm focal length and f/10 throught the LX200 8" scope with the Canon Rebel XT. While visually uninteresting, it's intellectually interesting. There are over 150 visible galaxies in this image. Astronomers estimate a galaxy has on average 100 billion (that's 100,000,000,000) stars. Super long (10 hour +) exposures with big telescopes reveal over 1000 members of this cluster of galaxies. This cluster occupies an area of the sky smaller than the full moon.. imagine how many more such clusters exist!
I took the same image and marked it up with tick marks to identify which dots and blobs are galaxies. Click on the picture to see which ones are galaxies (and I know I missed some), kind of a cosmic "where's waldo"... |
|
NGC4387
NGC4402 |
28 Mar 2006. 3 exposures of 10 minutes each, ISO400. Darks but no flats subtracted. This is an image of part of Makarain's chain, which is part of the larger Virgo cluster of galaxies (named after the constellation Virgo, which is the direction in which they appear). Our galaxy is part of the larger Virgo Supercluster. This image shows a subset of the Virgo cluster (separate from our own cluster, which includes the small and large magellanic clouds, the andromeda galaxy and M33 the triangulum galaxy, among others). With longer exposures even more galaxies, each with billions of their own stars, would appear in this image. The universe is enormously huge! This image includes NGC 4387 and NGC 4402 |
 |
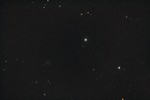
NGC7331 |
8 July 2006. The Deer Lick Group. 6 x 10 minute exposures, ISO400. Darks and flats subtracted. Stacking done in IRIS, sharpening, levels, curves adjustment in Photoshop CS.
This was one of the main targets I wanted to get at Cherry Springs State Park, the nearest dark sky site from Rochester NY. I knew from my imaging experience with M100, that this object in particular wasn't going to be something I could get a decent photo of from my backyard. Especially since it is in the northern part of the sky, which is towards the city of Rochester. I was sorely disappointed by the results, and had to consult the kind folks at the Cloudy Nights message boards to find out why. The conclusion is the sky wasn't very transparent that night- too much water vapor, hence the dim noisy image. All my papers were wet by midnight; the grass was wet at 10pm. Everthing was literally dripping wet by 5am, except the scope. The dew shield I constructed out of homemade materials performed superbly. Anyway, this is quite a visually pleasing cluster of 3 galaxies- when you can see them! The best photos of this cluster usually have 2-3 hours of exposure, and I "only" have one. This will be my main target at the Black Forest Star Party at the end of August 2006. |
|
|
Open & Globular clusters of thousands of stars
| Click on Thumbnail for Full-size photo |
Name |
Description |
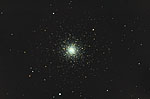 |
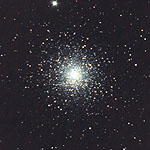
M3 |
3 May 2007. One of the largest and brightest globular clusters in the sky, M3 is noteable by scientists by the large number of variable stars in the image. Some have brightness changes over a couple of hours that are noticeable in images (I need to compare my first and last frames taken to see if there is a difference). This image represents one of my better results, as far as sharpness and star color. A full-frame full size version can be viewed here.
The imaging details... 38 x 4min, Canon Rebel XT, unmodded, ISO 1600, Seeing, Transparency both 3/5, Taken through Meade 8" LX200 "classic" telescope, prime focus, 2000mm focal length, Autoguided with a 4"/102mm Mak-Cass Orion Apex scope using a Philips Toucam Pro 840k webcam and Guidedog, Darks, Flats calibrated in Iris, color balance, asinh stretch and gradient removal in Iris, Final color balance, GradientXTerminator, Noels Astronomy Actions, FredMiranda.com's Intellisharpen in Photoshop CS. |
 |
M4 |
1 May 2006. 1 x 10 minute exposure, ISO 400, no dark subtracted. Taken through 8" LX200 classic with Canon Digial Rebel XT. Artifical flat removed in Adobe Photoshop (image editing program), then the levels/curves/color balance adjustment.
Globular cluster in Scoprio, visually towards the center of the galaxy, although this cluster isn't near the center. I took this picture on a whim that night, just to see what M4 looked like- I had the camera hooked up and didn't want to bother getting the eyepiece kit out knowing I probably wouldn't see much through my backyard anyway. I stretched the blue a bit to exaggerate the color of the big blue stars in this cluster. Most of the stars in this cluster (and most globular clusters) are old orange ones born near the beginning of the universe. |
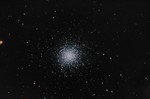 |
M13 |
21 Apr 2007. A much better result than last years' effort. I'm getting better at image processing as well as acquiring the image. This image just needs to be reprocessed with dark frames that better match the image. Then it will be poster-print worthy IMO! The full-size full frame image can be viewed here.
Imaging details: Seeing 3/5 transparency 3/5, Stack of 51 x 120sec exposures, ISO 800, Prime focus of Meade LX200 8" "classic" SCT, 2000mm focal length, Autoguided using Philips Toucam 840K Pro webcam and Guidedog through a 102mm/4" Mak-Cass guidescope, Dark, flat calibrated, kappa-sigma stacked, stretched and color balanced in Iris, Final processing in Photoshop (curves, saturation etc), Neil's Astronomy Tools and Noise Ninja used. (see last years' M13 for info on this cluster). |
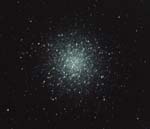 |
M13 |
30 Jun 2006. Stack of 10x30 sec and 4x10 min exposures, ISO400. Darks and flats subtracted in IRIS, final curves, color, levels adjustment and sharpening in Adobe Photoshop CS (image editing program). Taken through 8" LX200 classic telescope with Canon Digital Rebel XT.
This globular cluster is above the galactic plane and is on an orbit to pass through. You are seeing only a few of the hundreds of thousands of stars in this cluster. M13 is the best globular cluster to view in the northern hemisphere, and was a joy to view through the eyepiece the first time I saw it. I had *zero* interest in globular clusters until I saw this jewel box in the sky. A bunch of stars, yeah great... boy was I wrong!
Even though I consider this my first "good" photograph (finally got the whole process down and took good pictures), the photo doesn't do the cluster justice. No one knows for sure how many stars are in this cluster- even Hubble can't resolve them all. Despite looking so closely packed, the stars are still light years- millions of kilomoters/miles- apart. The cluster passes through the galactic arms in its orbit without ever (or rarely) colliding with anything. This cluster is considered the 2nd best overall, the #1 cluster being visible only from extreme southern US and points south (Omega Centauri, visually the same size as the moon). |
 |
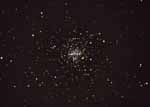
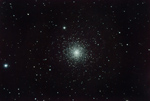
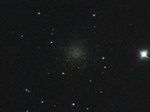
M15 |
17 Sep 2007, Seeing 3/5 Transparency 4/5, Stack of 42 x 300sec (5min) exposures, ISO 1600, taken with Canon Rebel XT/350D at prime focus (2000mm focal length) of Meade 8"/200cm LX200 "classic" @ f/10. Levels/curves/color balance adjustment in Adobe Photoshop (image editing program). A reduced in size, but full-frame version can be seen here.
Globular cluster in Pegasus, about 37,000 light years from Earth. M15 is of scientific interest because of its particularly tightly packed core. Scientists used the Hubble Space Telescope to see how tightly packed the stars are in the core. Of note, this cluster has 9 pulsars and a rare planetary nebula (for a globular cluster). I took these photos as part of a monthly contest. I didn't win. |
 |
M15 |
21 Nov 2006. 23 x 2m 30sec exposure, ISO 800, dark subtracted, flat removal in Iris (image editing program). Taken through 8" LX200 classic with Canon Digial Rebel XT. Levels/curves/color balance adjustment in Adobe Photoshop (image editing program).
Globular cluster in Pegasus, about 37,000 light years from Earth. M15 is of scientific interest because of its particularly tightly packed core. Scientists used the Hubble Space Telescope to see how tightly packed the stars are in the core. Of note, this cluster has 9 pulsars and a rare planetary nebula (for a globular cluster). I took these photos while waiting for Orion to rise later in the night- might as well use the time! M15 through the eyepiece looks a lot like M13, but smaller. So far this is my best globular photograph. |
 |
M35 NGC2158 |
28 Jan 2008. 35 x 2m exposure, ISO 1600, dark subtracted, flat removal in Iris (image editing program). Taken with Canon EF 400mm f/5.6L @ f/6.3 and first light for my Canon 40D. Levels/curves/color balance adjustment in Adobe Photoshop (image editing program).
There was a 4 hour break in the clouds before rain/snow came in allowing me to finally, finally take a first light image with my 40D.
Keep in mind I bought this camera around Thanksgiving in November 2007...
Anyway, as suspected this camera is a breeze for astrophotos. And even more so with live view focusing in combination with the 400/5.6L. I love clicking on an arrow to micro-step the focus. Super easy. I didn't think it possible, but it is actually faster than autofocusing on a bright star.. because I didn't need to slew the scope at all, just aim it at my target and focus. Might not work in star-poor areas of the sky, but it did for the area around M35.
I never thought it possible, but the 40D is so pixel-dense that it starts to show a few warts in my otherwise perfect 400/5.6 lens. The detail is incredible, and the full size images are awesome in my book. Of course the target would've benefitted from better transparency and non-light polluted skies. At 2 minutes (120 sec), f/6.3, ISO1600, the histogram was 4/5ths the way to the right, almost completely washed out. Light pollution is killer in the wintertime, due to extra water vapor in the air and snow on the ground reflecting all those lights. Could only see 4 stars in Leo, and barely saw the nearby bright stars in Gemini with averted vision. I'd say mag 4-4.5 skies. |
 |
M44 |
20 Mar 2007. Also known as "The Beehive" or "Praesepe". This large (in angular size) open cluster is near the contellation Leo and is visible with the naked eye. It covers roughly the width of your thumb stretched out to arm's length, an area larger than the full moon. This was my "first light" image using my new Canon EF 400mm f/5.6 L lens, mounted piggyback on the 8" Lx200 scope. The 400/5.6 L is a superb astro-lens because it has round, sharp stars from corner to corner in the image, as well as excellent color rendition. This image was my first attempt at boosting the star color saturation to show the colors. I imaged this using the IDAS-LPS filter before I learned that the filter isn't as useful for "white light" targets (i.e. NOT nebulae). I should probably re-shoot this with longer exposures and no filter.
The imaging details... taken at approx 9:30pm EDT, Canon Rebel XT w/Canon EF 400mm f/5.6 L @ f/8, IDAS-LPS front filter used. Stack of 26 x 90sec exposures, ISO 800, Stacked + Registered in Iris, no darks/flats, Final processing in Photoshop CS. |
 |
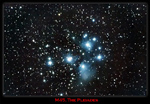
M45 |
2 Nov 2007. Stack of 27 x 5min exposures, ISO1600. Canon Rebel XT & Canon EF 400mm f/5.6L at f/6.3, piggyback mounted on the LX200 8" scope.
Probably my best astrophoto to date. Taken at the Rochester Astronomy club's "dark sky" site in Ionia, NY. Dark enough for sure! After acquiring pictures of Comet 17p (see solar system section) I turned my attention to this lovely cluster.
Visually the brightest open cluster in the sky. Known as the Pleiades in the western world, and as "Subaru" in Japan (the Subaru automotive logo is a stylized version of this star cluster). This cluster was known since anchient times, since it's easily visible with the naked eye. Heck, I can even see it in my suburban backyard! It's in the constellation Taurus, which is just west of Orion in the night sky. Long exposures of the Pleiades reveal a relatively rare blue nebula, known as a reflection nebula- because the hot, bright young stars of the open cluster illuminate the tenuous gas around them. Keep in mind these strutctures are light years across in size. Most nebula are of the type emission, where the tenuous gas is atomically excited by a nearby star and emit their own light (usually red in color).
The Pleiades are both an open cluster and a nebula. Through the 8" telescope, the cluster is too big to fit inside the field of view. The camera lens (and other small telescopes) frame this cluster nicely. |
 |
M45 |
27 Sep 2006, 21 Nov 2006. Composite of 5 x 5 minutes, ISO 1600 and 1 x 10 minutes, ISO1600 (at Cherry Springs) and 5 x 2 minutes 30sec ISO1600 (backyard); 62 x 2m 30sec at ISO800 (backyard). Used my Sigma DG APO 70-300mm f/4-5.6 zoom telephoto lens at 300mm, combined with my Sigma DG APO 1.4x teleconverter, giving a focal length of 300mm x 1.4 = 420mm. Piggyback mounted on the 8" LX200, unguided. Used DSLR Focus (software) to automatically open and close the shutter and save the images over the ~3 hour period. Used Adobe Photoshop (image editing program) to adjust levels, curves and color balance.
A closer crop of the center is available here. A note about light pollution and its effect on astrophotography- 35 minutes of exposure at Cherry Springs (dark skies) had more information than 2 hours 47minutes from my backyard using the exact same equipment. |
 |
M53
NGC 5053 |
21 Apr 2007. This was an interesting target for me, because these two globular clusters fit into the field of view of my 400mm lens. They are a study in contrasting structure, as NGC 5053 is barely a globular cluster (it's on the fence between an open and a globular cluster). Like always, this could probably use more exposures and exposure time. A full-size frame can be viewed here, and the same version with labels here. The 400mm is awesome for astrophotos! I had won a weekly photo contest which had a prize of my choice in Photoshop plugin, and I chose "Intellisharpen". It works great when resizing an image down, and is available at fredmiranda.com
The imaging details... m53 (tight glob) and NGC 5053 (loose glob). Stack of 9 x 120sec exposures, ISO 800, f/6.3, Using Canon EF 400mm f/5.6 L lens and unmodded Canon Rebel XT, piggybacked on a Meade LX200 8" "classic", Autogudied through 8" scope with a Philips Toucam Pro 840k and Guidedog, Camera focus and shutter control with DSLR focus, Darks and bias calibration in Iris, kappa-sigma stack, asinh stretch and color balancing in Iris, Final processing in Photoshop CS, using Noels Astronomy tools, GradientXTerminator, Noise Ninja and Fredmiranda.com's Intellisharpen II. |
 |
M71 |
28 Aug 2007. Stack of 60 x 120sec exposures at ISO1600, Canon Rebel XT at prime focus (2000mm focal length). Used DSLR Focus (software) to automatically open and close the shutter and save the images over the ~3 hour period. Used Adobe Photoshop (image editing program) to adjust levels, curves and color balance. With a near full moon, and lousy transparency I chose to photograph this object since I'd beaten M27 to death. The focus is soft so all in all not a tremendous effort.
This is an object that has been debated for decades as to whether it's a globular or open cluster. It was decided in 1985 to call it an intermediate type, and the only other one classified as such is 47 Tucane. M71 is in the Saggita constellation. |
| Click on Thumbnail for Full-size photo |
Name |
Description |
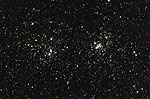 |
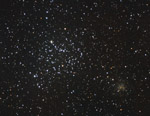
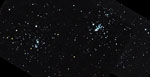
NGC869, NGC 884 |
19 Sep 2007. Stack of 15 x 1 min exposures, ISO 1600 through the Canon EF 400mm f/5.6L lens @ f/6.3 with the Canon Rebel XT camera, mounted piggyback on the LX200 8" scope, unguided. Seeing was a 3/5 and transparency was good at 4/5.
The "Double Cluster" in Perseus. A much better job than my last attempt, and this time I had the proper kind of lens/scope to take a decent picture. The full-size version is best to look at. I did not collect more subs because I was intending to shoot M33 (triangulum galaxy) later in the evening. |
 |
NGC884, NGC 869 |
30 Oct 2006. Mosaic of 11 x 30sec exposure, ISO 800, no darks or flats subtracted. Taken through 8" LX200 classic with Canon Digial Rebel XT. Levels/curves/color balance adjustment in Adobe Photoshop (image editing program).
The "Double Cluster" in Perseus. This is another target that smaller scopes favor, because it is spread out over a larger section of sky. I had to mosaic several pictures to get this image. This is a visual favorite of many in the fall. I had to move my scope close to the pool's edge in my back yard in order to image it--- these clusters are close to the north celestial pole. I didn't really try too hard with this one as my main objective this night was to image the Pleiades cluster. It was a last-minute entry into a monthly imaging contest (I didn't win with my $1000 8" scope; the guy with the $1600 3" scope did). This photo doesn't do the cluster justice; it begs for way, way more exposure than my paltry 6 minutes. |
|
NGC2158 M35 |
28 Jan 2008. 35 x 2m exposure, ISO 1600, dark subtracted, flat removal in Iris (image editing program). Taken with Canon EF 400mm f/5.6L @ f/6.3 and first light for my Canon 40D. Levels/curves/color balance adjustment in Adobe Photoshop (image editing program). See the M35 entry in the Messier section for the story behind this image. |
 |
NGC 2419 |
20 Apr 2007. This somewhat dim globular cluster in Lynx (near Gemini, Castor) is known as the "Intergalactic Wanderer". It is the furthest known globular cluster under the influence of our galaxy-- it's further away than the large and small Magellanic clouds! The distance is estimated at 250,000 light years. Astronomers initially thought it wasn't associated with our galaxy (hence the name). I had desired to image this last year, but weather and time did not cooperate, and it ended up too low in the sky in May. I got a chance to image it this year, but I had other targets for this night, so this was just a quick grab.. I'm still pleased with the result. Clicking on the thumbnail will show a full-frame view. Click here for a 100% crop closeup of the cluster itself.
The imaging details... Taken through 8" Meade LX200 classic telescope, Seeing 3/5 Transparency 3/5, unmodded Canon Rebel XT/350D, Stack of 5 x 5 min exposures, ISO 1600, using DSLR focus for camera control, Prime focus, 2000mm focal length, Autoguided using GuideDog through a 4"/102mm Mak-Cass guidescope, Dark/flat calibrated (using my new technique), stacked and color balanced in Iris, Final processing in Photoshop using Noel's Astronomy Tools, Noise Ninja |
|
NGC 5053
M53 |
21 Apr 2007. This was an interesting target for me, because these two globular clusters fit into the field of view of my 400mm lens. They are a study in contrasting structure, as NGC 5053 is barely a globular cluster (it's on the fence between an open and a globular cluster). Like always, this could probably use more exposures and exposure time. A full-size frame can be viewed here, and the same version with labels here. The 400mm is awesome for astrophotos! I had won a weekly photo contest which had a prize of my choice in Photoshop plugin, and I chose "Intellisharpen". It works great when resizing an image down, and is available at fredmiranda.com
The imaging details... m53 (tight glob) and NGC 5053 (loose glob). Stack of 9 x 120sec exposures, ISO 800, f/6.3, Using Canon EF 400mm f/5.6 L lens and unmodded Canon Rebel XT, piggybacked on a Meade LX200 8" "classic", Autogudied through 8" scope with a Philips Toucam Pro 840k and Guidedog, Camera focus and shutter control with DSLR focus, Darks and bias calibration in Iris, kappa-sigma stack, asinh stretch and color balancing in Iris, Final processing in Photoshop CS, using Noels Astronomy tools, GradientXTerminator, Noise Ninja and Fredmiranda.com's Intellisharpen II. |
|
|
Nebulae- emission, reflection (birthplace of new stars) and planetary (remnants of dead and dying stars)
Click on Thumbnail
for full-size photo |
Date Taken |
Exposure info & description |
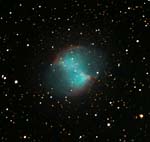
M27
The Dumbell Nebula
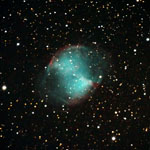 |
July, Aug, Sept 2006 |
Super-composite of all my M27 images, 19 x 5 min at ISO 800, 9 x 600 sec (10 min) exposures at ISO400; 20 x 150 sec exposures (2.5 min) at ISO1600. Darks and flats subtracted. Kappa-sigma stacking and RGB balancing done in IRIS. Sharpening, levels, curves adjustment in Photoshop CS. Added additional exposures taken from Cherry Springs State Park. This image has manually guided and automatically guided images, using both a guidescope and an off-axis guider. I used M27 as a practice target as I learned to use a guidescope, then to autoguide. Marginally better than the ones below, IMO. |
M27
The Dumbell Nebula
 |
16 Aug 2006 |
9 x 600 sec (10 min) exposures at ISO400; 20 x 150 sec exposures (2.5 min) at ISO1600. Darks and flats subtracted. Kappa-sigma stacking and RGB balancing done in IRIS. Sharpening, levels, curves adjustment in Photoshop CS. Had to work some Photoshop magic, as the red channel was really weak. After hard stretching of the red channel to bring out the red color, a lot of noise/pixellation was introduced. So I took the red channel and applied a gaussian blur, then an unsharp mask to smooth out the noise. Big difference. Did level and saturation adjustments on just the nebula, then just the background. Did mild noise reduction on the nebula using Neat Image (demo version) to smooth it a bit.
This is a composite of all the images I collected at home, plus the exposures I took at Cherry Springs State Park to make my previous M27 image. Although the result is slightly better, it took a lot more work to get it this way. Nothing beats a dark sky site! I have also finished a lession in ISO settings. Even though going from ISO400 to ISO1600 reduced the exposure times from 10 min to 2.5 minutes, it introduced more noise than it was worth... that is, 6 good ten minute exposures at ISO400 has the same data but less noise than 24 two and a half minute exposures at ISO1600. Maybe I'll try 5 minute exposures at ISO800 as a compromise. Maybe it won't be so noisy in the wintertime when the camera is cooler. |
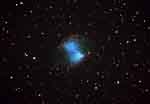
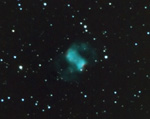
M27
The Dumbell Nebula
 |
8 July 2006 |
6 x 10 minute exposures, ISO400. Darks and flats subtracted. Stacking done in IRIS, sharpening, levels, curves adjustment in Photoshop CS (click here for an previous version to show what a big difference image processing can do to the same raw frames- I learned along the way).
This was one of the main targets I wanted to get at Cherry Springs State Park, the nearest dark sky site from Rochester NY. Despite poor transparency due to the high humidity and water vapor content in the air, M27 was easy to photograph. M27 is a planetary nebula, named after the planet-like appearance in a small telescope. These nebula are common. This is an expanding shell of hot gas ejected from the surface of a dying star, which you can see in this picture. Our sun will become a planetary nebula in it's future as well. M27 is one of the brighter planetaries in the sky. I have been attempting to image this object from my backyard to supplement this image, but discovered quickly that nothing beats a dark sky site! I consider this my best deep sky photo yet... the quality improves! |
M42
The Orion Nebula
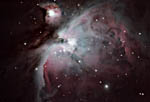 |
24 Nov 2006 |
My 2nd attempt at imaging M42 and M43, the Orion Nebula and The Running Man (respectively). This huge star forming region is the closest star incubator to our solar system, only 1500 light years away. The nebula structure extends well beyond the field of view of my scope.. it envelops almost all of the constellation Orion. This nebula is usually the first astrophoto that people take pictures of, besides the moon. This has been imaged in far more intricate detail by many, many amateurs. This nebula (literally) shines in hydrogen alpha emissions (an orangey-red color) which my camera isn't very sensitive to with it's factory filter in place (the filter maintains a white balance to images that is similar to eyesight, the sensor is actually very sensitive to red colors). People pay $600 to have the filter removed so they can image nebulas like this one. This is my first try at imaging this nebula with autoguiding and hours of exposure, so the result is decent in comparison to my first feeble attempt. I had trouble balancing the color in this one. |
|
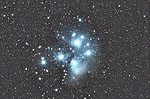
M45 |
2 Nov 2007. Stack of 27 x 5min exposures, ISO1600. Canon Rebel XT & Canon EF 400mm f/5.6L at f/6.3, piggyback mounted on the LX200 8" scope.
Probably my best astrophoto to date. Taken at the Rochester Astronomy club's "dark sky" site in Ionia, NY. Dark enough for sure! After acquiring pictures of Comet 17p (see solar system section) I turned my attention to this lovely cluster.
Visually the brightest open cluster in the sky. Known as the Pleiades in the western world, and as "Subaru" in Japan (the Subaru automotive logo is a stylized version of this star cluster). This cluster was known since anchient times, since it's easily visible with the naked eye. Heck, I can even see it in my suburban backyard! It's in the constellation Taurus, which is just west of Orion in the night sky. Long exposures of the Pleiades reveal a relatively rare blue nebula, known as a reflection nebula- because the hot, bright young stars of the open cluster illuminate the tenuous gas around them. Keep in mind these strutctures are light years across in size. Most nebula are of the type emission, where the tenuous gas is atomically excited by a nearby star and emit their own light (usually red in color).
The Pleiades are both an open cluster and a nebula. Through the 8" telescope, the cluster is too big to fit inside the field of view. The camera lens (and other small telescopes) frame this cluster nicely. |
M45
The Pleiades
|
27 Sep 2006
21 Nov 2006. |
Composite of 5 x 5 minutes, ISO 1600 and 1 x 10 minutes, ISO1600 (at Cherry Springs) and 5 x 2 minutes 30sec ISO1600 (backyard); 62 x 2m 30sec at ISO800 (backyard). Used my Sigma DG APO 70-300mm f/4-5.6 zoom telephoto lens at 300mm, combined with my Sigma DG APO 1.4x teleconverter, giving a focal length of 300mm x 1.4 = 420mm. Piggyback mounted on the 8" LX200, unguided. Used DSLR Focus (software) to automatically open and close the shutter and save the images over the ~3 hour period. Used Adobe Photoshop (image editing program) to adjust levels, curves and color balance.
Visually the brightest open cluster in the sky. Known as the Pleiades in the western world, and as "Subaru" in Japan (the Subaru automotive logo is a stylized version of this star cluster). This cluster was known since anchient times, since it's easily visible with the naked eye. Heck, I can even see it in my suburban backyard! It's in the constellation Taurus, which is just west of Orion in the night sky. Long exposures of the Pleiades reveal a relatively rare blue nebula, known as a reflection nebula- because the hot, bright young stars of the open cluster illuminate the tenuous gas around them. Keep in mind these strutctures are light years across in size. Most nebula are of the type emission, where the tenuous gas is atomically excited by a nearby star and emit their own light (usually red in color).
The Pleiades are both an open cluster and a nebula. Visually, through the 8" telescope, the cluster is too big to fit inside the field of view. The camera lens (and other small telescopes) frame this cluster nicely. I added some nice artifical 'diffraction spikes' to the image. A closer crop of the center is available here. A note about light pollution and its effect on astrophotography- 35 minutes of exposure at Cherry Springs (dark skies) had more information than 2 hours 47minutes from my backyard using the exact same equipment. |
M57
Ring Nebula
|
7-8 May 2006 |
A fragment of the comet 73P Schwassmann-Wachmann 3 passed by the "famous" ring nebula, M57. This picture shows what the comet and nebula looked like through the eyepiece. The picure isn't that great because I did not have time to complete an accurate alignment with the north celestial pole (the telescope's tracking was slightly off). The comet fragment arrived ahead of schedule, rushing my alignment preparations. See the comet section in the solar system for more about the comet in the photo.
The Ring Nebula really isn't a ring- research suggests we're looking edge-on a cylindrical tube, although scientists aren't sure of the exact shape. M57 is a planetary nebula, named after the planet-like appearance in a small telescope. These nebula are common. This is an expanding shell of hot gas ejected from the surface of a dying star. Our sun will become a planetary nebula in it's future as well. One common observing challenge is to see the dim magnitude 14 star in the center of the nebula. I captured the star for certain in this photograph (here is a contrast-streched crop of this photo). I had never observed M57 before photographing it this night, because it was low in the NE sky, which is behind trees (which is why I had to set up in a special location to take this pic). |
M76
The Little Dumbell Nebula
 |
24 Nov 2006 |
21 x 330 sec (5 min 30 sec) exposures at ISO800. Darks subtracted in IRIS. Stacked using simple addition, which gives best signal to noise ratio. Gradient from vignetting removal in Iris. Sharpening, levels, curves adjustment in Photoshop CS. Removed dust motes and used Neil Carboni's Astronomy Actions to enhance the image.
AKA the Little Dumbell, Cork, Butterfly or Barbell Nebula, this little bugger is hard to capture any detail from. Maybe I had bad seeing, maybe my scope needs a couple of collimation tweaks, maybe both. Maybe I need more image scale. Who knows. My handbox controller listed this as a magnitude 12 something object, which was a surprise. I could see it through the camera viewfinder. It was at zenith (directly overhead = least air to go through) when I photographed it, but still. I couldn't make out other sky objects that were supposedly brighter. The need for 5 minute exposures proved it's dimness. This could probably use more exposure time to get more detail. After looking up information on this nebula, it is a rare case where it's brighter visually (~10) instead of photographically (~12). That would explain my observation...
Like all planetary nebulae, the distance to it is uncertain. Estimates range around 3500 light years. Looking at a high quality photo of this object (through a 20" scope using a $12.5K mount and an $11K astro-CCD camera), the central star (which can be seen in my image) is really two close stars.. but the resolving power of my scope / camera / or atmospheric conditions prevents me from resolving them separately. I'm pretty pleased with the results here since my guiding is rock solid, with nice round stars. |
| Click on Thumbnail for Full-size photo |
Name |
Description |
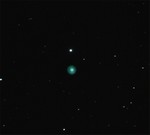 |
NGC2392
Eskimo Nebula |
11 Mar 2007. This planetary nebula, called the Eskimo nebula, looks like a head inside of a parka through the telescope. I was able to get some pretty good detail in this image when compared to other amateur images in far larger telescopes (16"-20"). Only the Hubble Space Telescope can resolve more details in this particular nebula.
The image details: Meade 8" LX200 "classic" telescope, Autoguided using a Orion Apex 102mm Mak-Cass and unmodded Toucam Pro 840K running Guidedog, taken at ~9-10pm EDT, Transparency 2/5, Seeing 2/5, Canon Rebel XT/350D unmodded, IDAS-LPS Front filter, Prime Focus, 2000mm focal length, Stack of 51 x 30 sec exposures, ISO1600, No darks no flats, Registered and Sigma Clip combined in Iris, Adjustments in Photoshop CS (levels, curves, sharpening), Noel's Astronomy Actions used (noise reduction, reduce stars), 100% crop of center of frame |
 |
NGC7662
Blue Snowball Nebula |
21 Nov 2006. Composite of 5 x 30 sec and 1 x 2min 30sec, ISO 800 from my backyard. Prime focus (2000mm) using my Meade 8" LX200 classic telescope and Rebel XT camera. No darks or flats subtracted when preprocessed in Iris.Used Adobe Photoshop (image editing program) to adjust levels, curves and color balance.
I was waiting for M45 (Pleiades) to rise and had some imaging time. After M15 set, I photographed this target very briefly just to see what it looks like. This object doesn't really have many faint parts that are within the reach of an amateur telescope. And given that the atmosphere was turbulent ("bad seeing" in astronomical parlance) I didn't capture much detail on this guy. It looks like a little blue snowball through the eyepiece, hence it's name. Even though it's supposedly dim, it's actually quite easy to see from my backyard. |
|
|
Wide-angle photographs, non Messier/NGC catalog/solar system objects, and stars.
| Click pic for Full-size photo |
Description |
| The Coolest Panorama Ever (Quicktime Movie) |
15 Sep 2007. THE COOLEST PANORAMA EVER. This is a Quicktime movie, which requires Quicktime to view. Once you open the file by clicking on the link at left, you may look around by left-clicking and dragging your mouse while you hold the left mouse button down in the direction you wish to look. You can also use the arrow keys on the keyboard. I took this using a Canon 20D and the Peleng 8mm fisheye lens on the Panosaurus tripod head. This was taken at the Cherry Springs State Park "Black Forest Star Party" in September 07. It was still twilight-ish and I was aligning my telescope at the time. Just goes to show what people are missing buried under the city lights! |
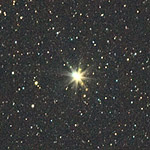 |
2 Nov 2007. Albiero double star. A visual favorite through telescopes, as this pair of stars has a dramatic color contrast that one can see through the eyepiece. I was attempting to test the resolution of the 400mm lens, and indeed the double star is resolved.. barely. The glare from the primary star almost swamps out the smaller blue star, but it can be seen in this photo. |
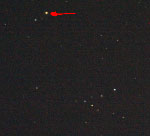 |
18 Sep 2007. While visually unimpressive, Barnards star has the distinction of having the largest apparent motion of any star in the night sky. Over the course of 1 year, the star moved perceptibly in the star field. The arrow asterism is a good reference for the location of barnards star. This image clearly demonstrates that the stars are not so fixed! The full size image is an animated GIF to "blink" between the picture I took in 2006 and 2007 to show the motion difference. You can also see a variable star and an asteroid. |
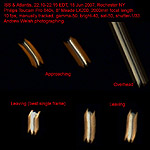 |
18 Jun 2007. My feeble attempt at imaging the ISS with the space shuttle atlantis attached as it passed overhead at my house in Rochester NY. You can see the solar panels in the image-- but I was using a shutter speed that was too slow. The imaging details are in the image itself. |
 |
12 May 2007. Jupiter and the constellation Scorpius. You can make out some of the dust lanes towards the center of the Milky Way galaxy. Stack of 1 x 1 min and 2 x 2min exposures, f/5.6, ISO1600. Taken with Canon Rebel XT and Sigma 24-70 f/2.8 lens (@ f/5.6) mounted piggyback on the LX200 8" scope. The trees interfered with part of the shot so I did not take any more. |
 |
21 Apr 2007. My attempt at the Rho Ophiuchus region right near the constellation Scorpio. This region has a dark, reflection and emission nebula all rolled into one, with a rainbow of colors (including a rare yellow nebula). However my attempt was a failure. Not only did I point it at the wrong spot (only captured part of the region), the lens I used has too much focal length (400mm is too much!) and because of my light pollution and the low angle of this region I captured very little detail. Longer exposures are required (but impossible from my backyard). I did capture some of the reflection nebula, and you can see where the stars aren't in the photo (this is where the dark nebula is). The clump of stars to the right of center is the globular cluster M80. We all learn from our mistakes, and I present this one to help you!
Image details: Canon Rebel XT/350D unmodded, Used Canon EF 400mm f/5.6 L lens @ f/6.3 piggybacked, Stack of 60 x 120 sec exposures, ISO 800, Autoguided using Philips Toucam Pro 840K webcam and Guidedog through 8" Meade LX200 classic guidescope, Dark, flat (wrong one used oops) calibrated (using my new technique), color balanced in Iris, Final processing in Photoshop CS (quickly though) using Neil's Astronomy Tools |
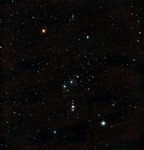 |
21 Feb 2007. Using my lens present from Christmas (50mm f/1.8) I mounted it piggyback and took a few exposures of Orion. The wide field of view (in astro terms) of the 50mm lens allows the full constellation of Orion to fit inside. However, my mounting screw only lets me put the camera in "landscape" orientation, and Orion is oriented in "portrait", so I had to combine 2 images. Due to the distortions in the lens, it was a bit hard to combine these two together accurately. Next winter with a proper mounting plate, I will photograph this in "portait" orientation. The colors of the stars show up nicely, however. This is a mosaic of 2 stacks of 4 x 30 sec each, and I stopped the lens down to f/2.2 at ISO 1600. This lens, based on other reports, performs much better edge-to-edge at f/4, so I'll give that a try on some other targets. |
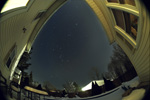 |
6 Feb 2007. Full size image is here (clicking on the picture at left will give you a web-sized verison). Having not used my telescope since Christmas Eve, I was growing tired of the bad weather. On this day, there was a brief, 2 hour break in the clouds, so I figured I've give something new a try. I had recently purchased a Peleng 8mm Fisheye lens for my Rebel XT, and thought I'd give fixed tripod astrophotography with this lens a try. The incredibly small 8mm focal length means I can leave the shutter open for over 30 seconds without the stars trailing in the image... no need to attach it to the telescope, and setup was less than a minute. I chose 20 second exposures due to the house and bright light from the neighbors being in the shot. When you have 107 degrees by 180 degrees field of view, EVERYTHING gets in the shot. Image processing was difficult.. aligning the stars required a special alignment routine that I needed help in identifying as the right one to use. I then used the "star freeze" trick I learned from comet photography (see the solar system section) to have a still foreground and still stars using 2 separate stacks, then carefully blending them in Photoshop.
This picture was taken with the Peleng 8mm fisheye lens, Canon Digital Rebel XT / 350D, ISO 800, stopped down to f/5.6, set on a fixed tripod. DSLR Focus controlled the camera shutter from a laptop so I didn't have to sit outside in the 7 degree weather for an hour. This is a stack of 61 x 20 sec frames. I threw out 20 pictures due to thin, high clouds. It was snowing within 20 minutes of the last picture. No darks or flats subtracted; stacking and RGB balance done in Iris. Levels and curves adjustment in Photoshop CS. This was a time consuming one to process. |
 |
16 Aug 2006. While out imaging the asteroids, I noticed that I could make out the milky way. Considering that my backyard generally has a limiting magnitude of 4.5, maybe 5, this was a phenominal event! The skies were particularly transparent/clear that night, so I decided to do a couple of wide field shots to show the milky way.
This image is of the Cygnus region, with the constellation Cygnus in the center of the image. Lyra is also included in the shot. Click here for this image with the constellations marked. Just to the left of the star at the top of the cross is the North America nebula- my trained eye can make it out, but the average person probably couldnt. Besides, the Rebel XT isn't very sensitive to red, the color of the nebula, due to the filters inside the camera. The black edge on the upper left is the roof of my house.
This picture was taken with the 18-55mm kit lens that came with the camera, set at about 40mm and f/4.0. This is a stack of 10 x 30 sec frames, ISO1600. Darks but no flats subtracted; stacking and RGB balance done in Iris. Levels and curves adjustment in Photoshop CS. |
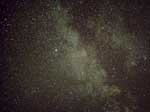 |
16 Aug 2006. While out imaging the asteroids, I noticed that I could make out the milky way. Considering that my backyard generally has a limiting magnitude of 4.5, maybe 5, this was a phenominal event! The skies were particularly transparent/clear that night, so I decided to do a couple of wide field shots to show the milky way.
This image is of the Aquilus region, with the constellations Delphini and Sagittae on the left and top of the image, respectively. I took this image first, because it included a dark dust lane that is part of our galaxy. Click here for this image with the constellations marked.
This picture was taken with the 18-55mm kit lens that came with the camera, set at about 40mm and f/4.0. This is a stack of 6 x 30 sec frames, ISO1600. Darks but no flats subtracted; stacking and RGB balance done in Iris. Levels and curves adjustment in Photoshop CS. |
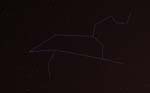 |
10 May 2006. The constellation Leo, which is easily visible to the south right as it gets dark in the springtime. The light blue lines for the constellation were added in Adobe Photoshop to show the outline. The backwards question mark asterism (pattern of stars) is easily identifiable. Leo is nearby a large cluster of telescope-visible galaxies. Taken with a Tamron 80-210mm f/4.5-5.6 zoom telephoto lens on the Canon Rebel XT. The camera was mounted "piggyback" on the 8" LX200 telescope, which provided the tracking to follow the earth's rotation and eliminate streaked stars. |
|
3 May 2006. Taken with a Tamron 80-210mm f/4.5-5.6 zoom telephoto lens on the Canon Rebel XT. The camera was mounted "piggyback" on the 8" LX200 telescope, which provided the tracking to follow the earth's rotation and eliminate streaked stars. The constellation lines and labels were added in Adobe Photoshop (image processing program). In this picture, you can clearly see M13, the best and brightest Globular cluster (see "clusters" section above) in the northern night sky. The subject of interest, however, was the comet fragment coming across this section of sky. By the next night, the comet was outside of this field of view. |
|
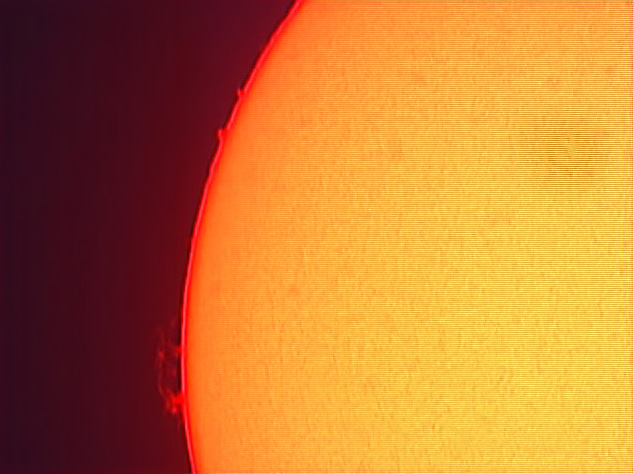
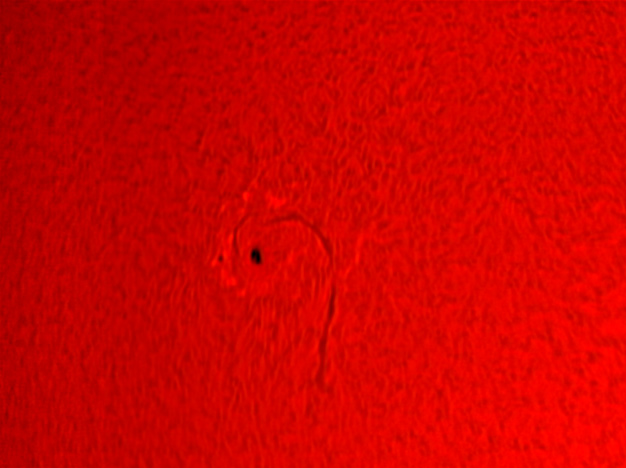
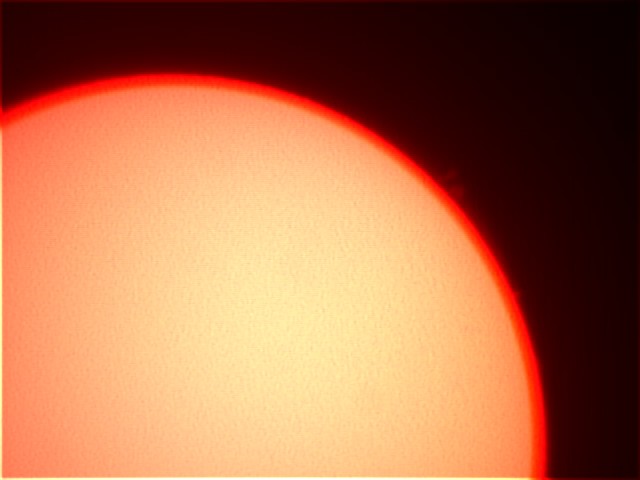

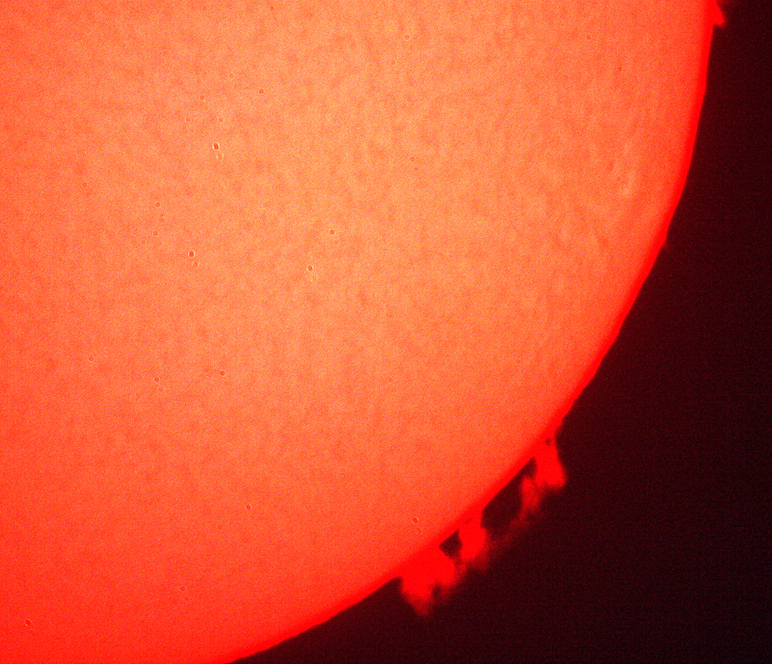


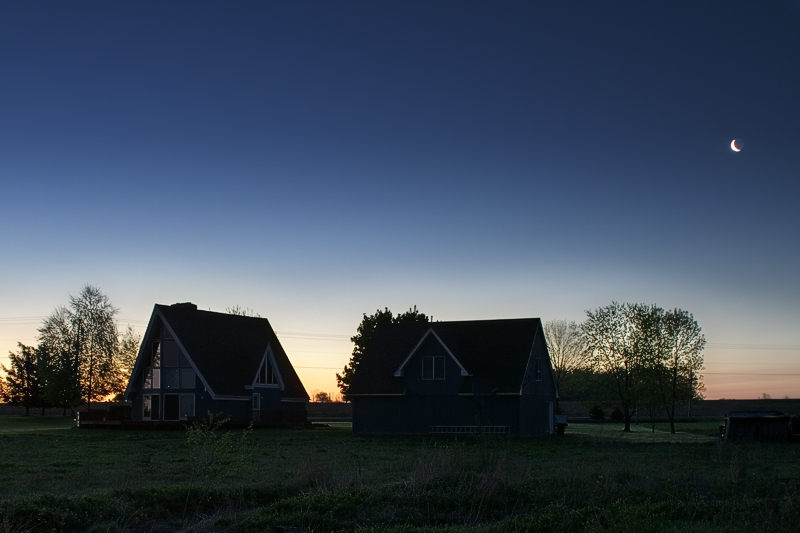
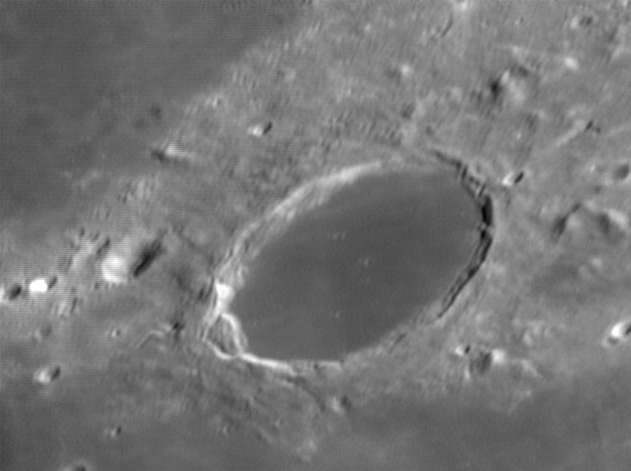
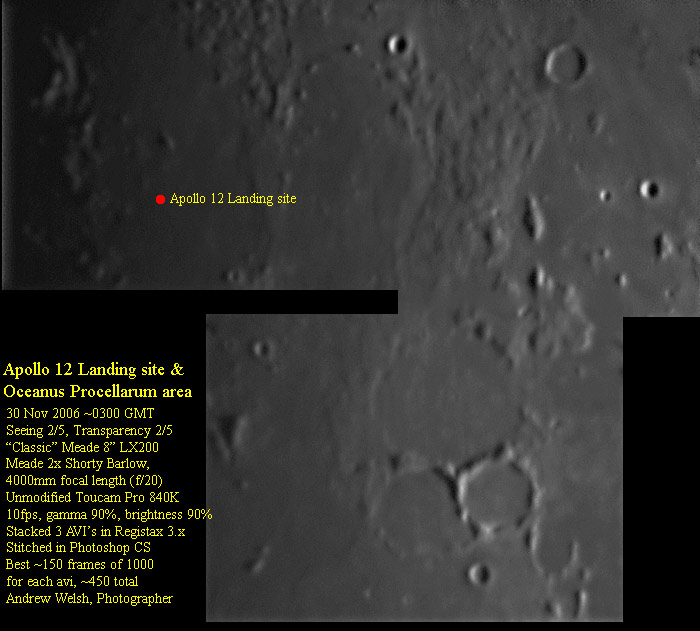
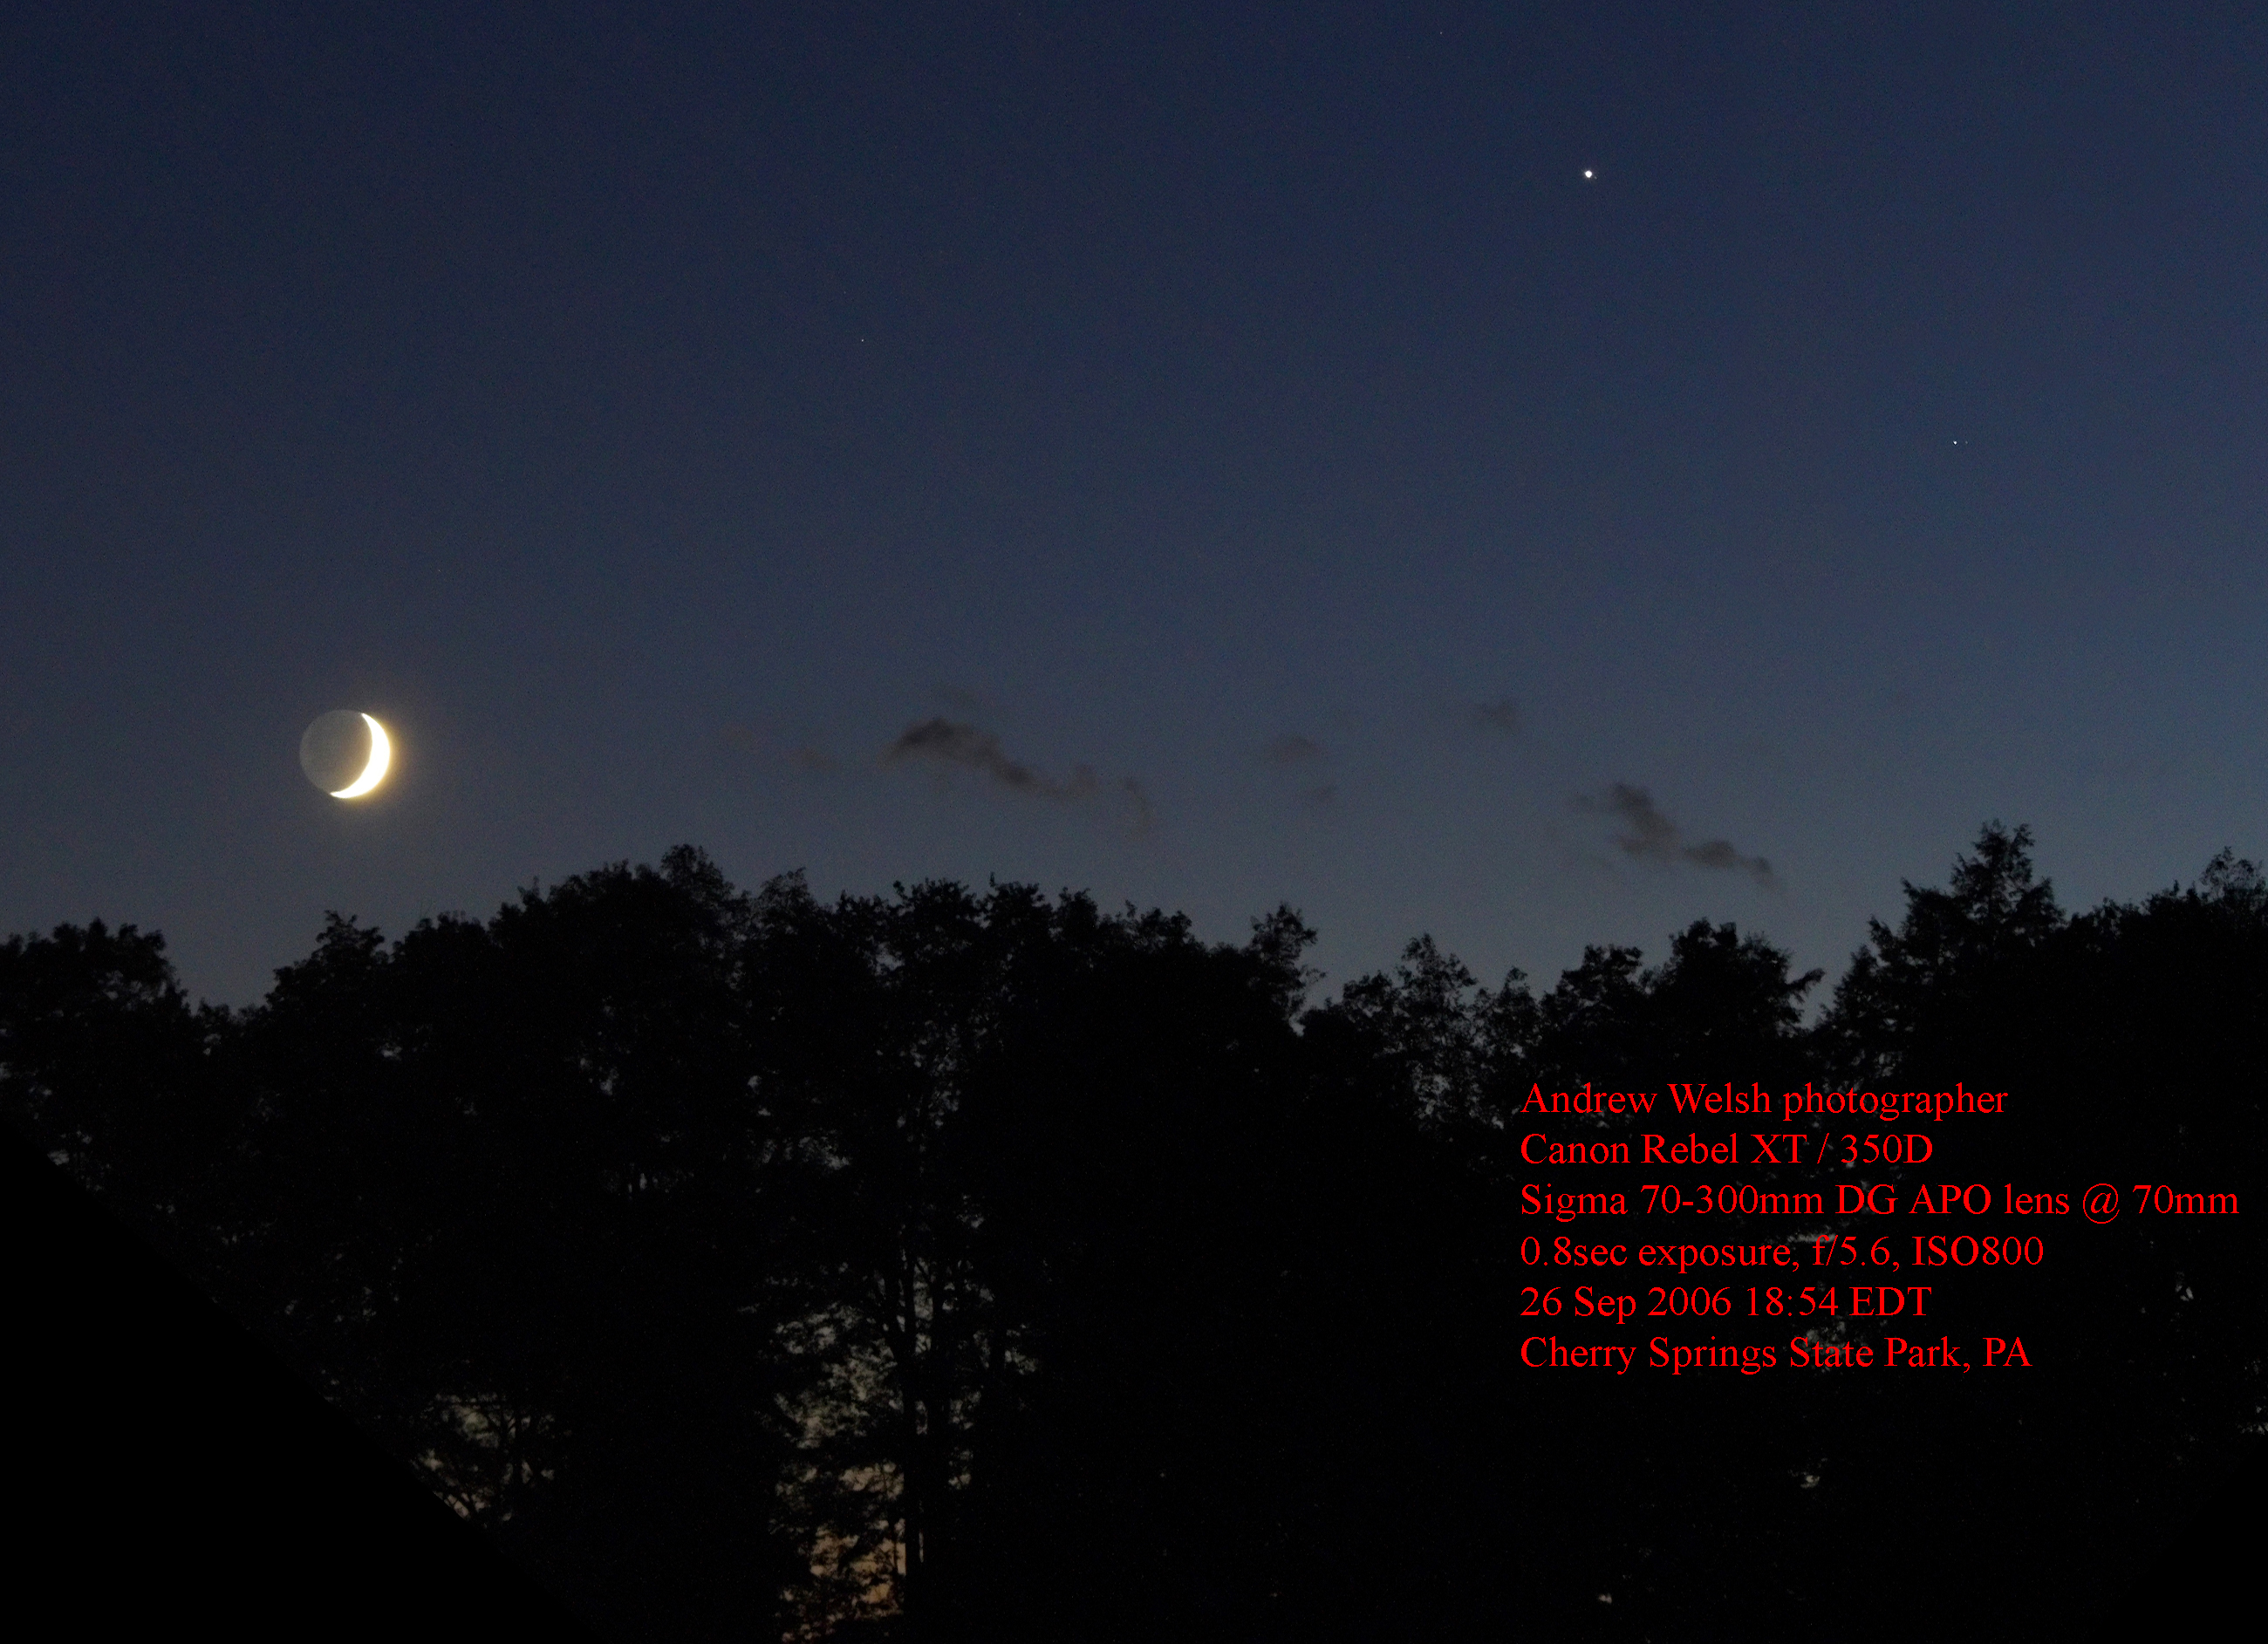
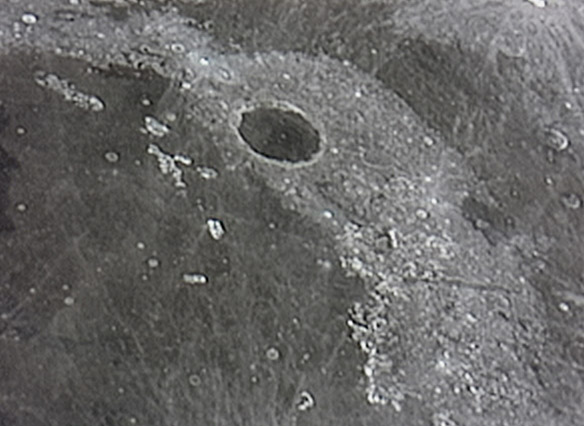
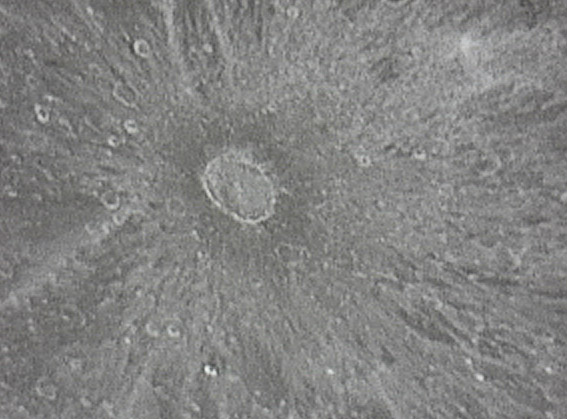

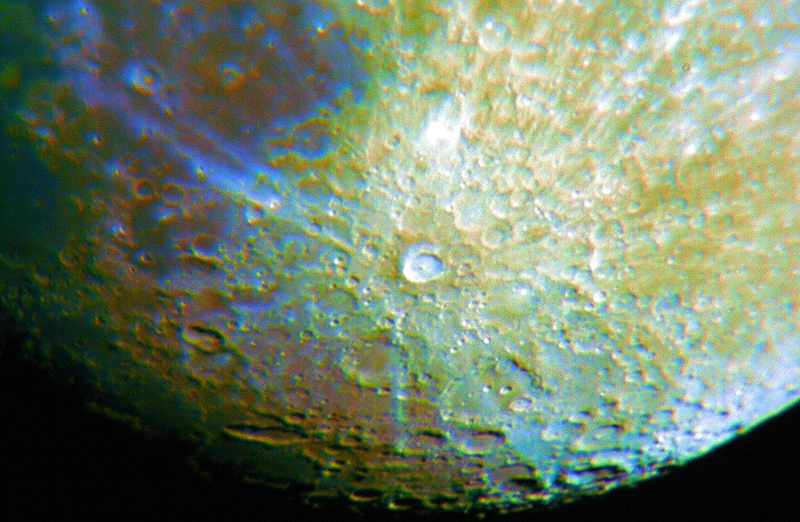
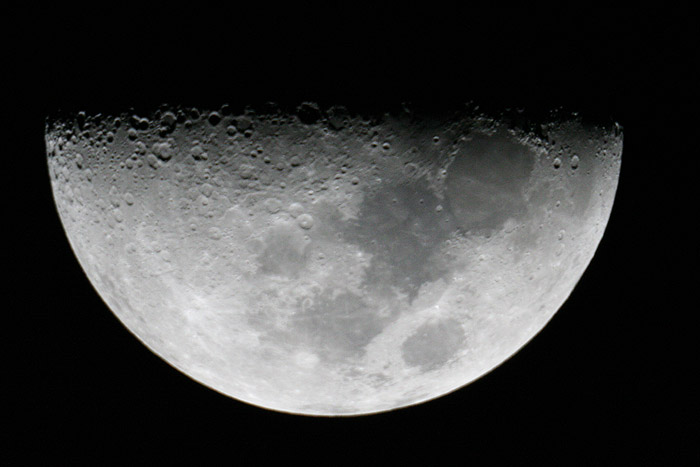
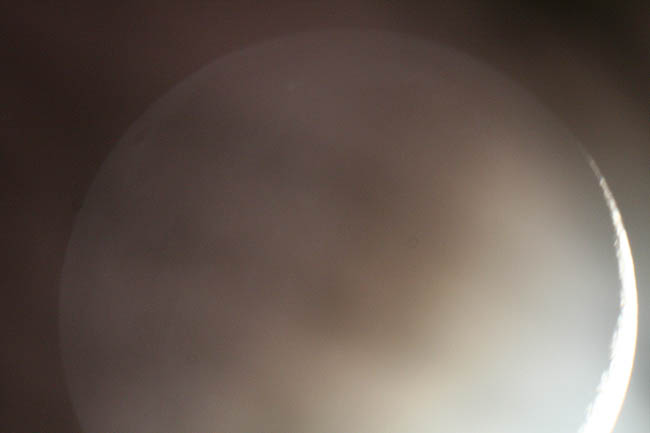
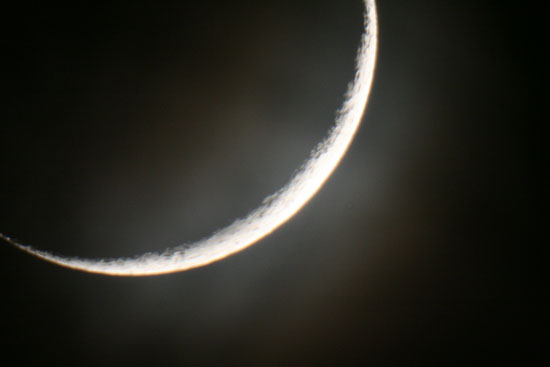
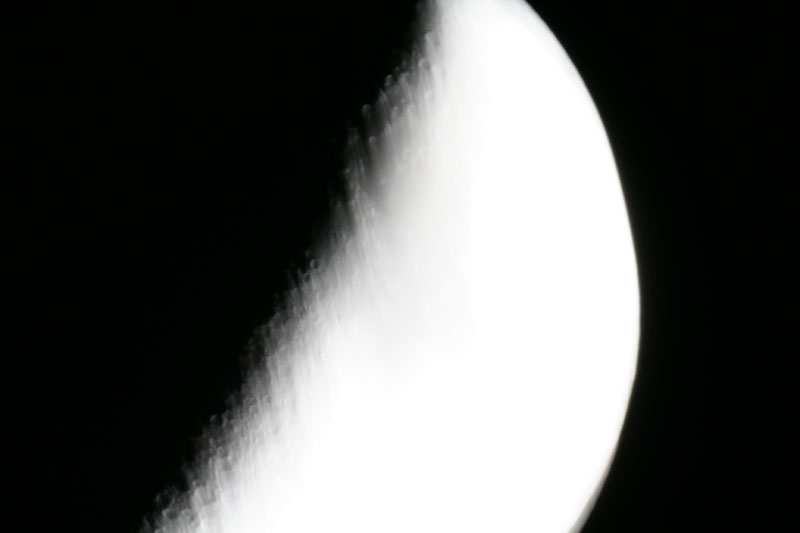
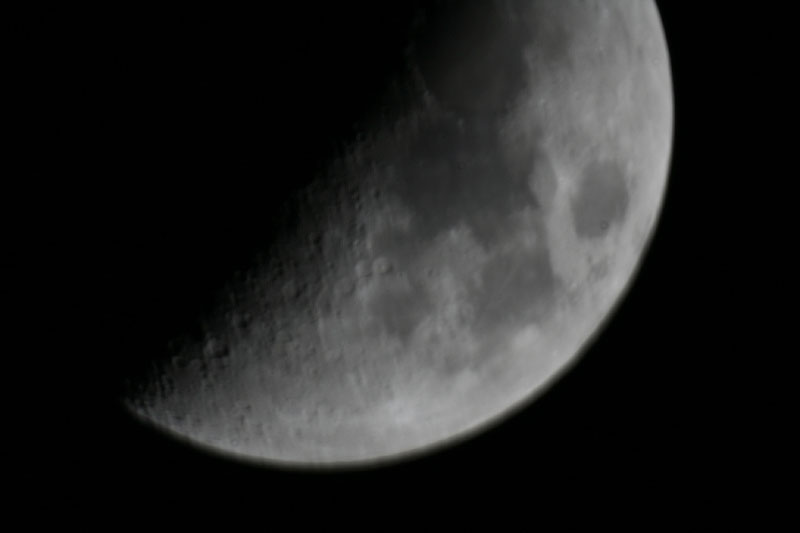
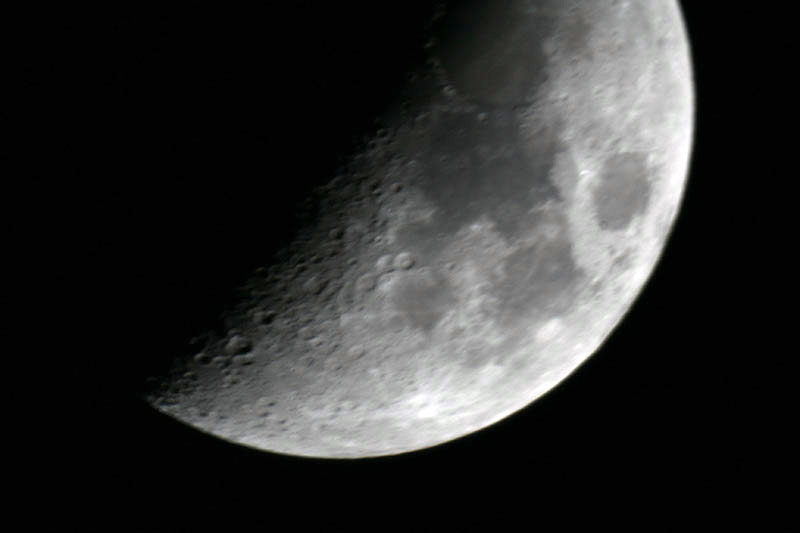
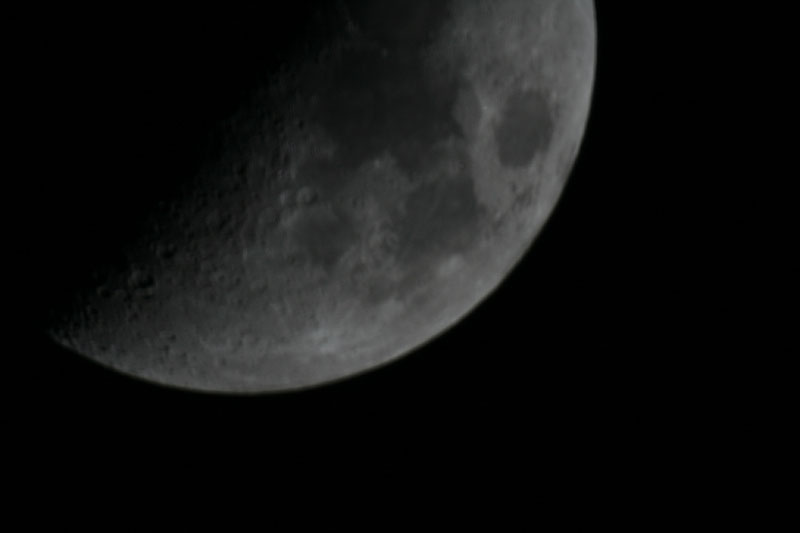
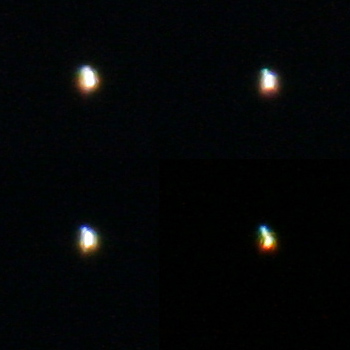
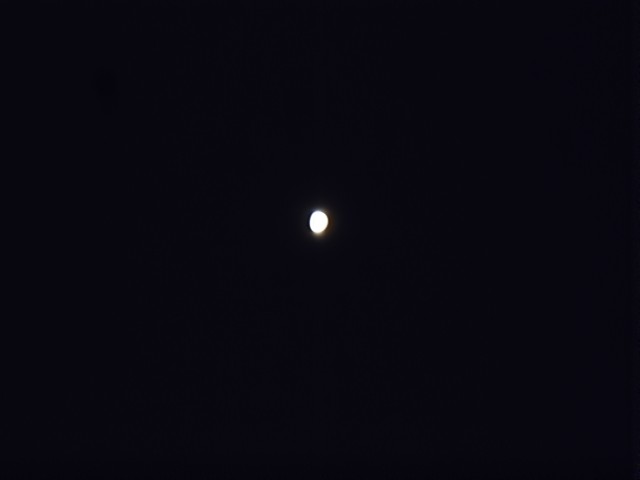
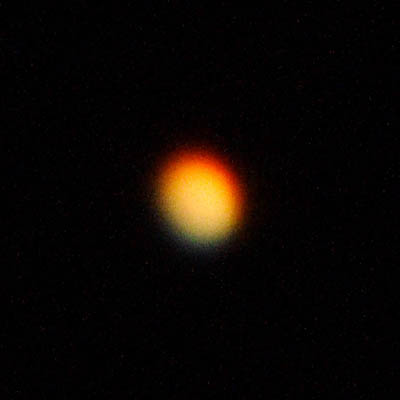
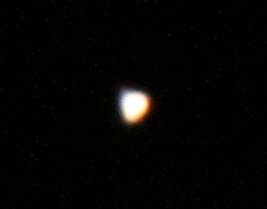
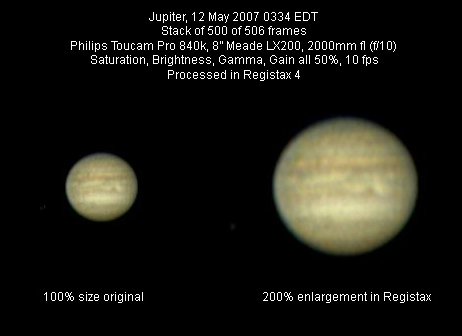
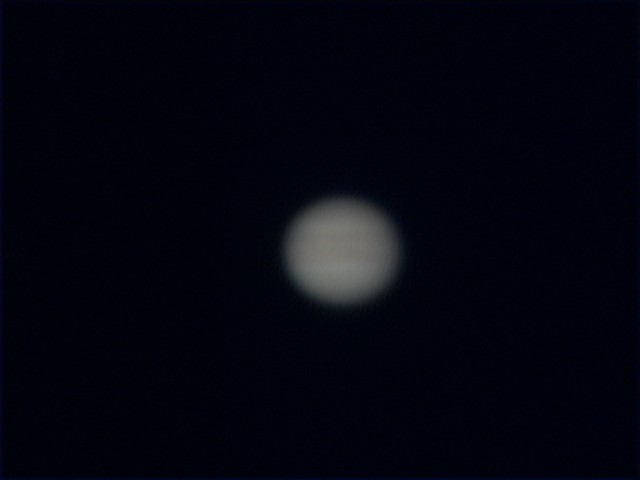
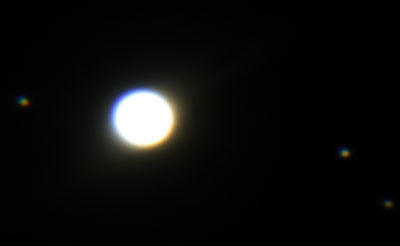
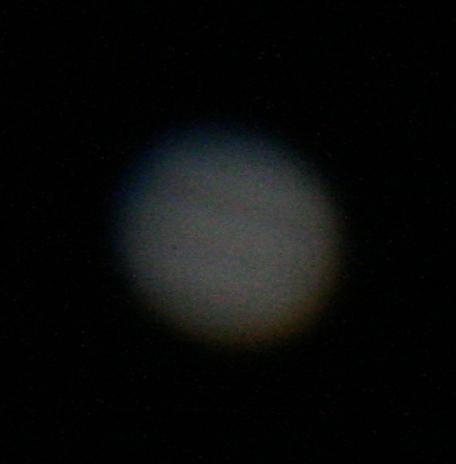
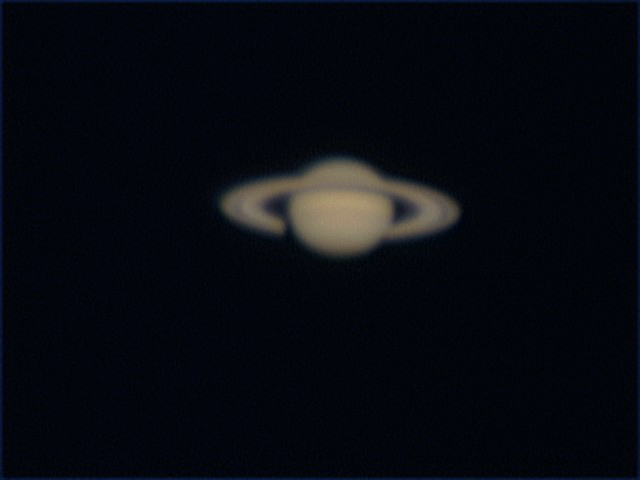
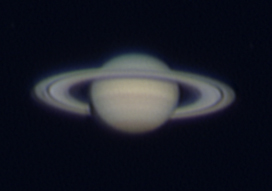

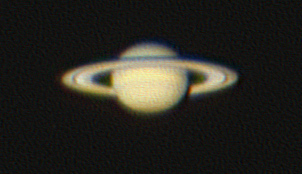

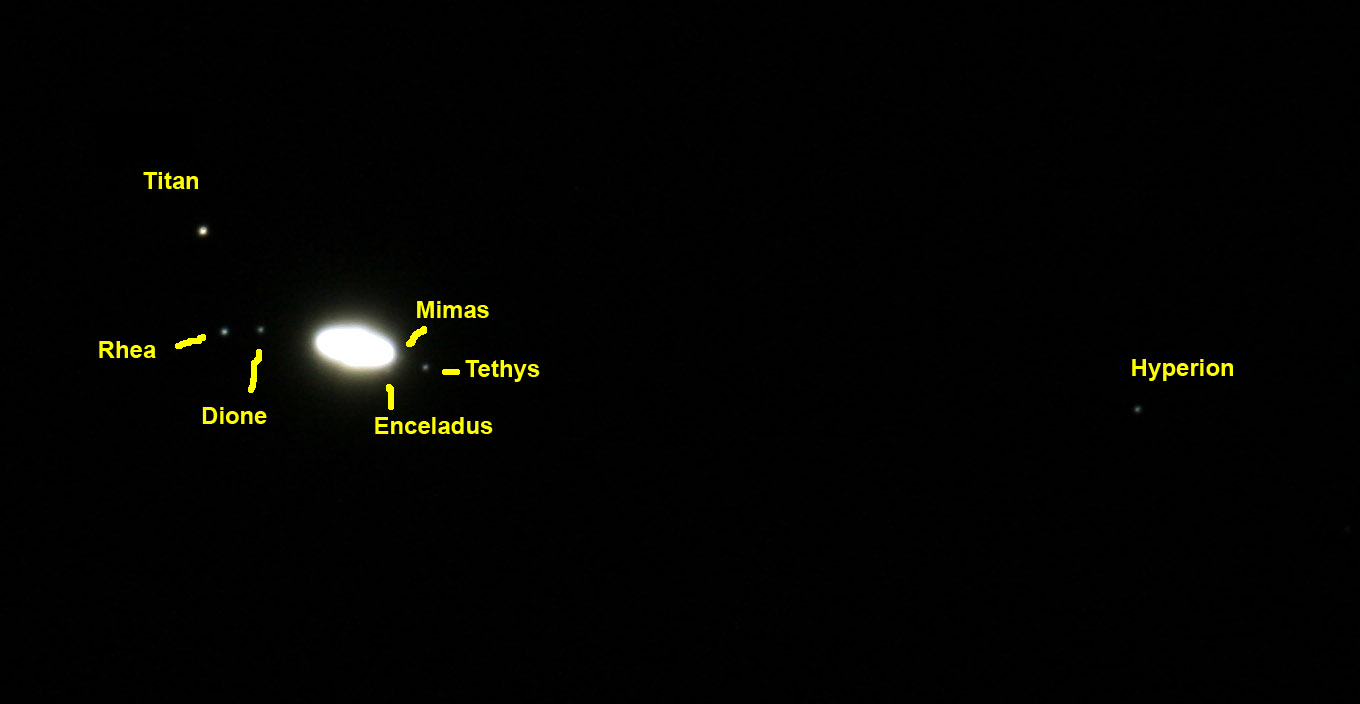
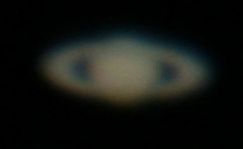
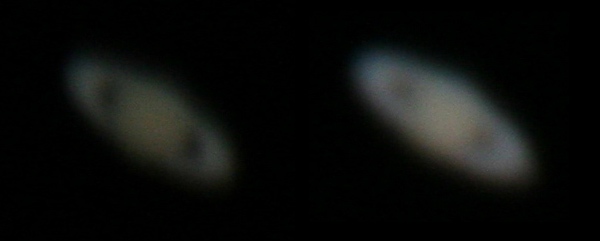

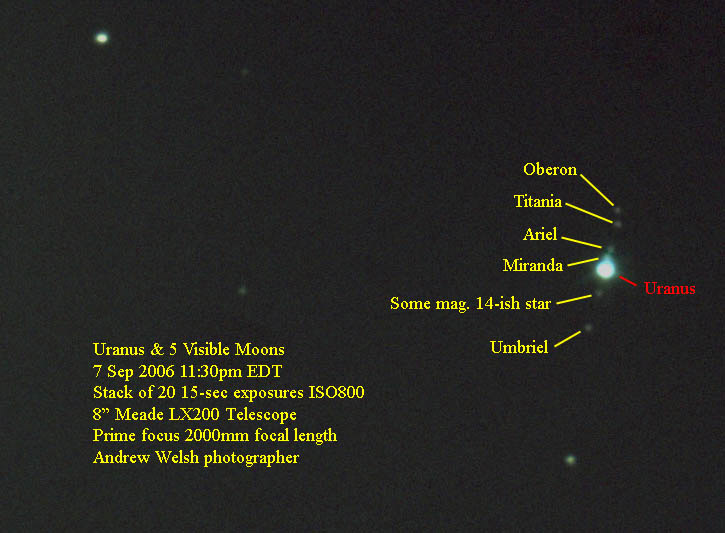
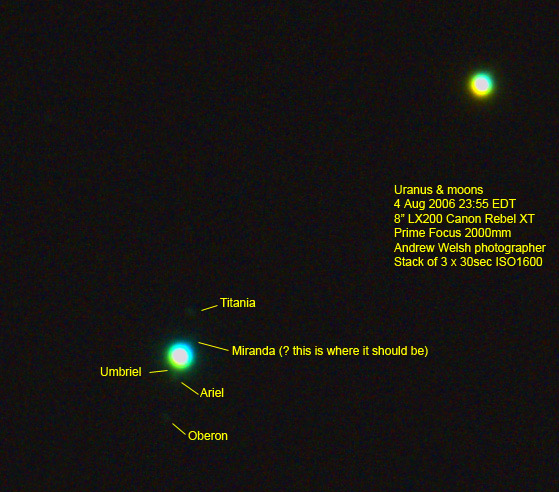

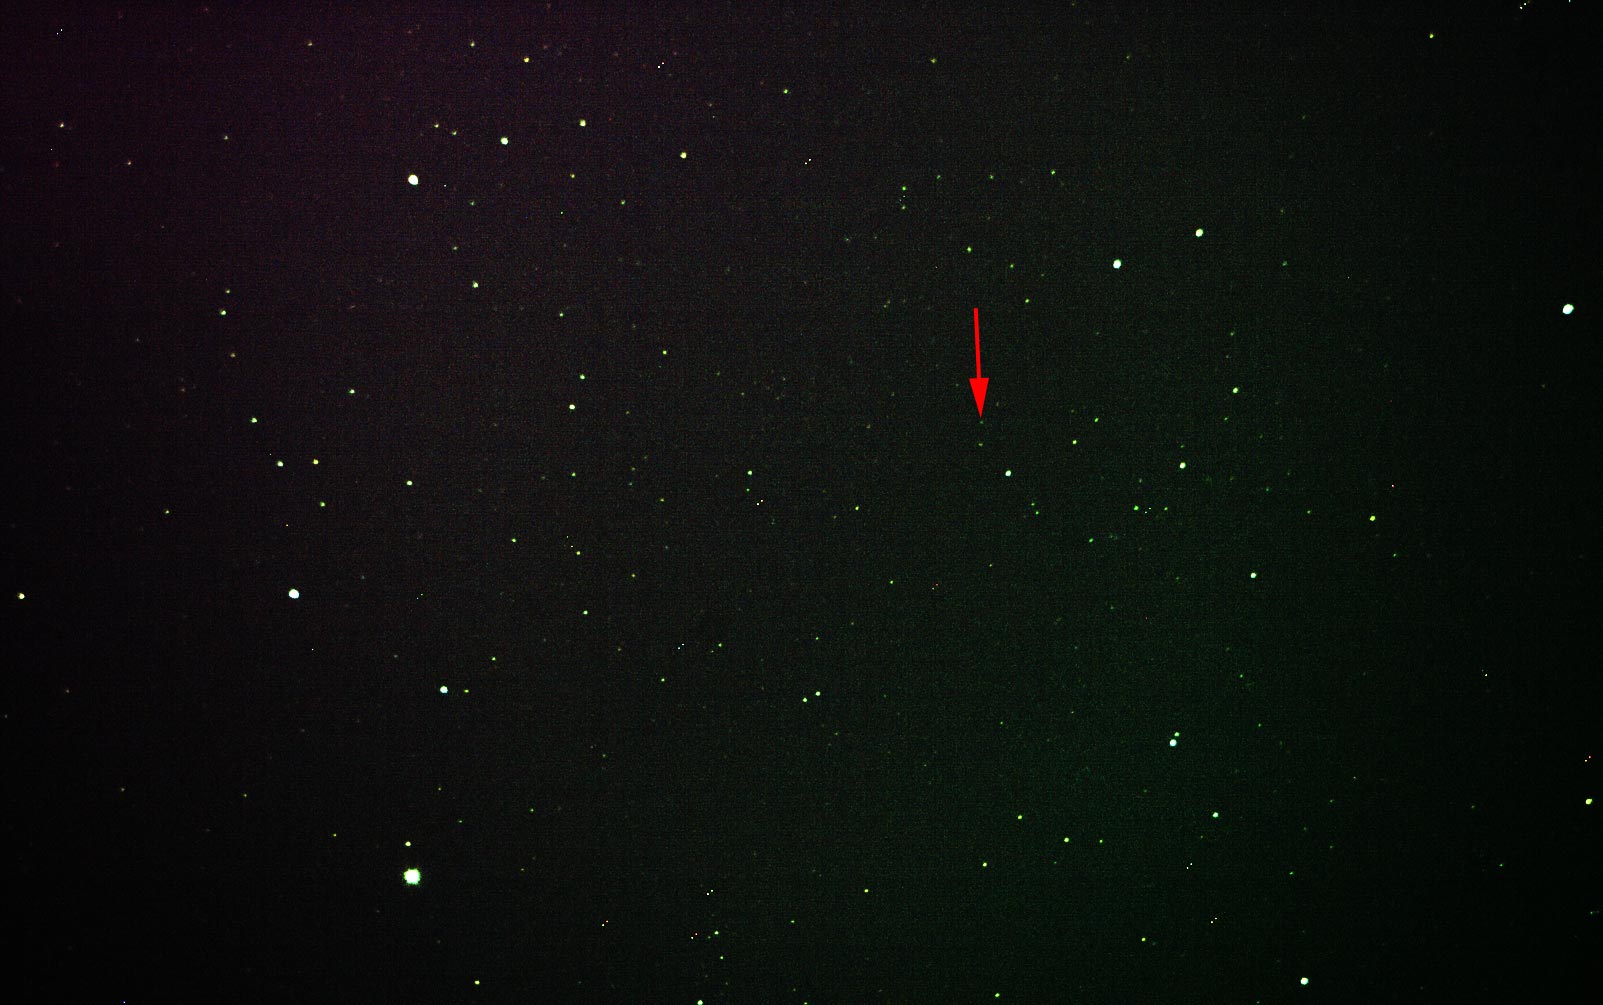
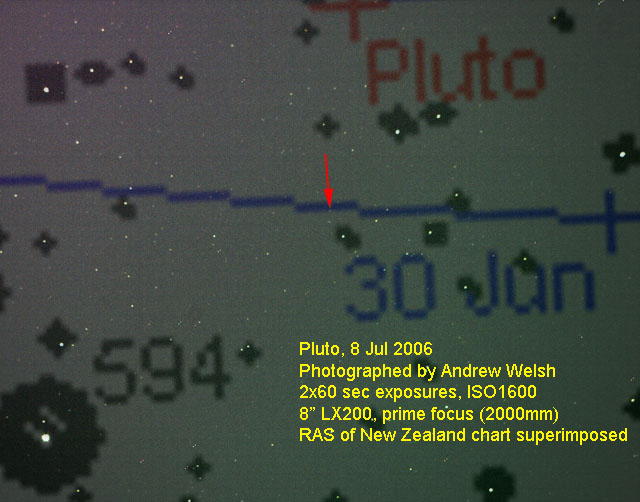
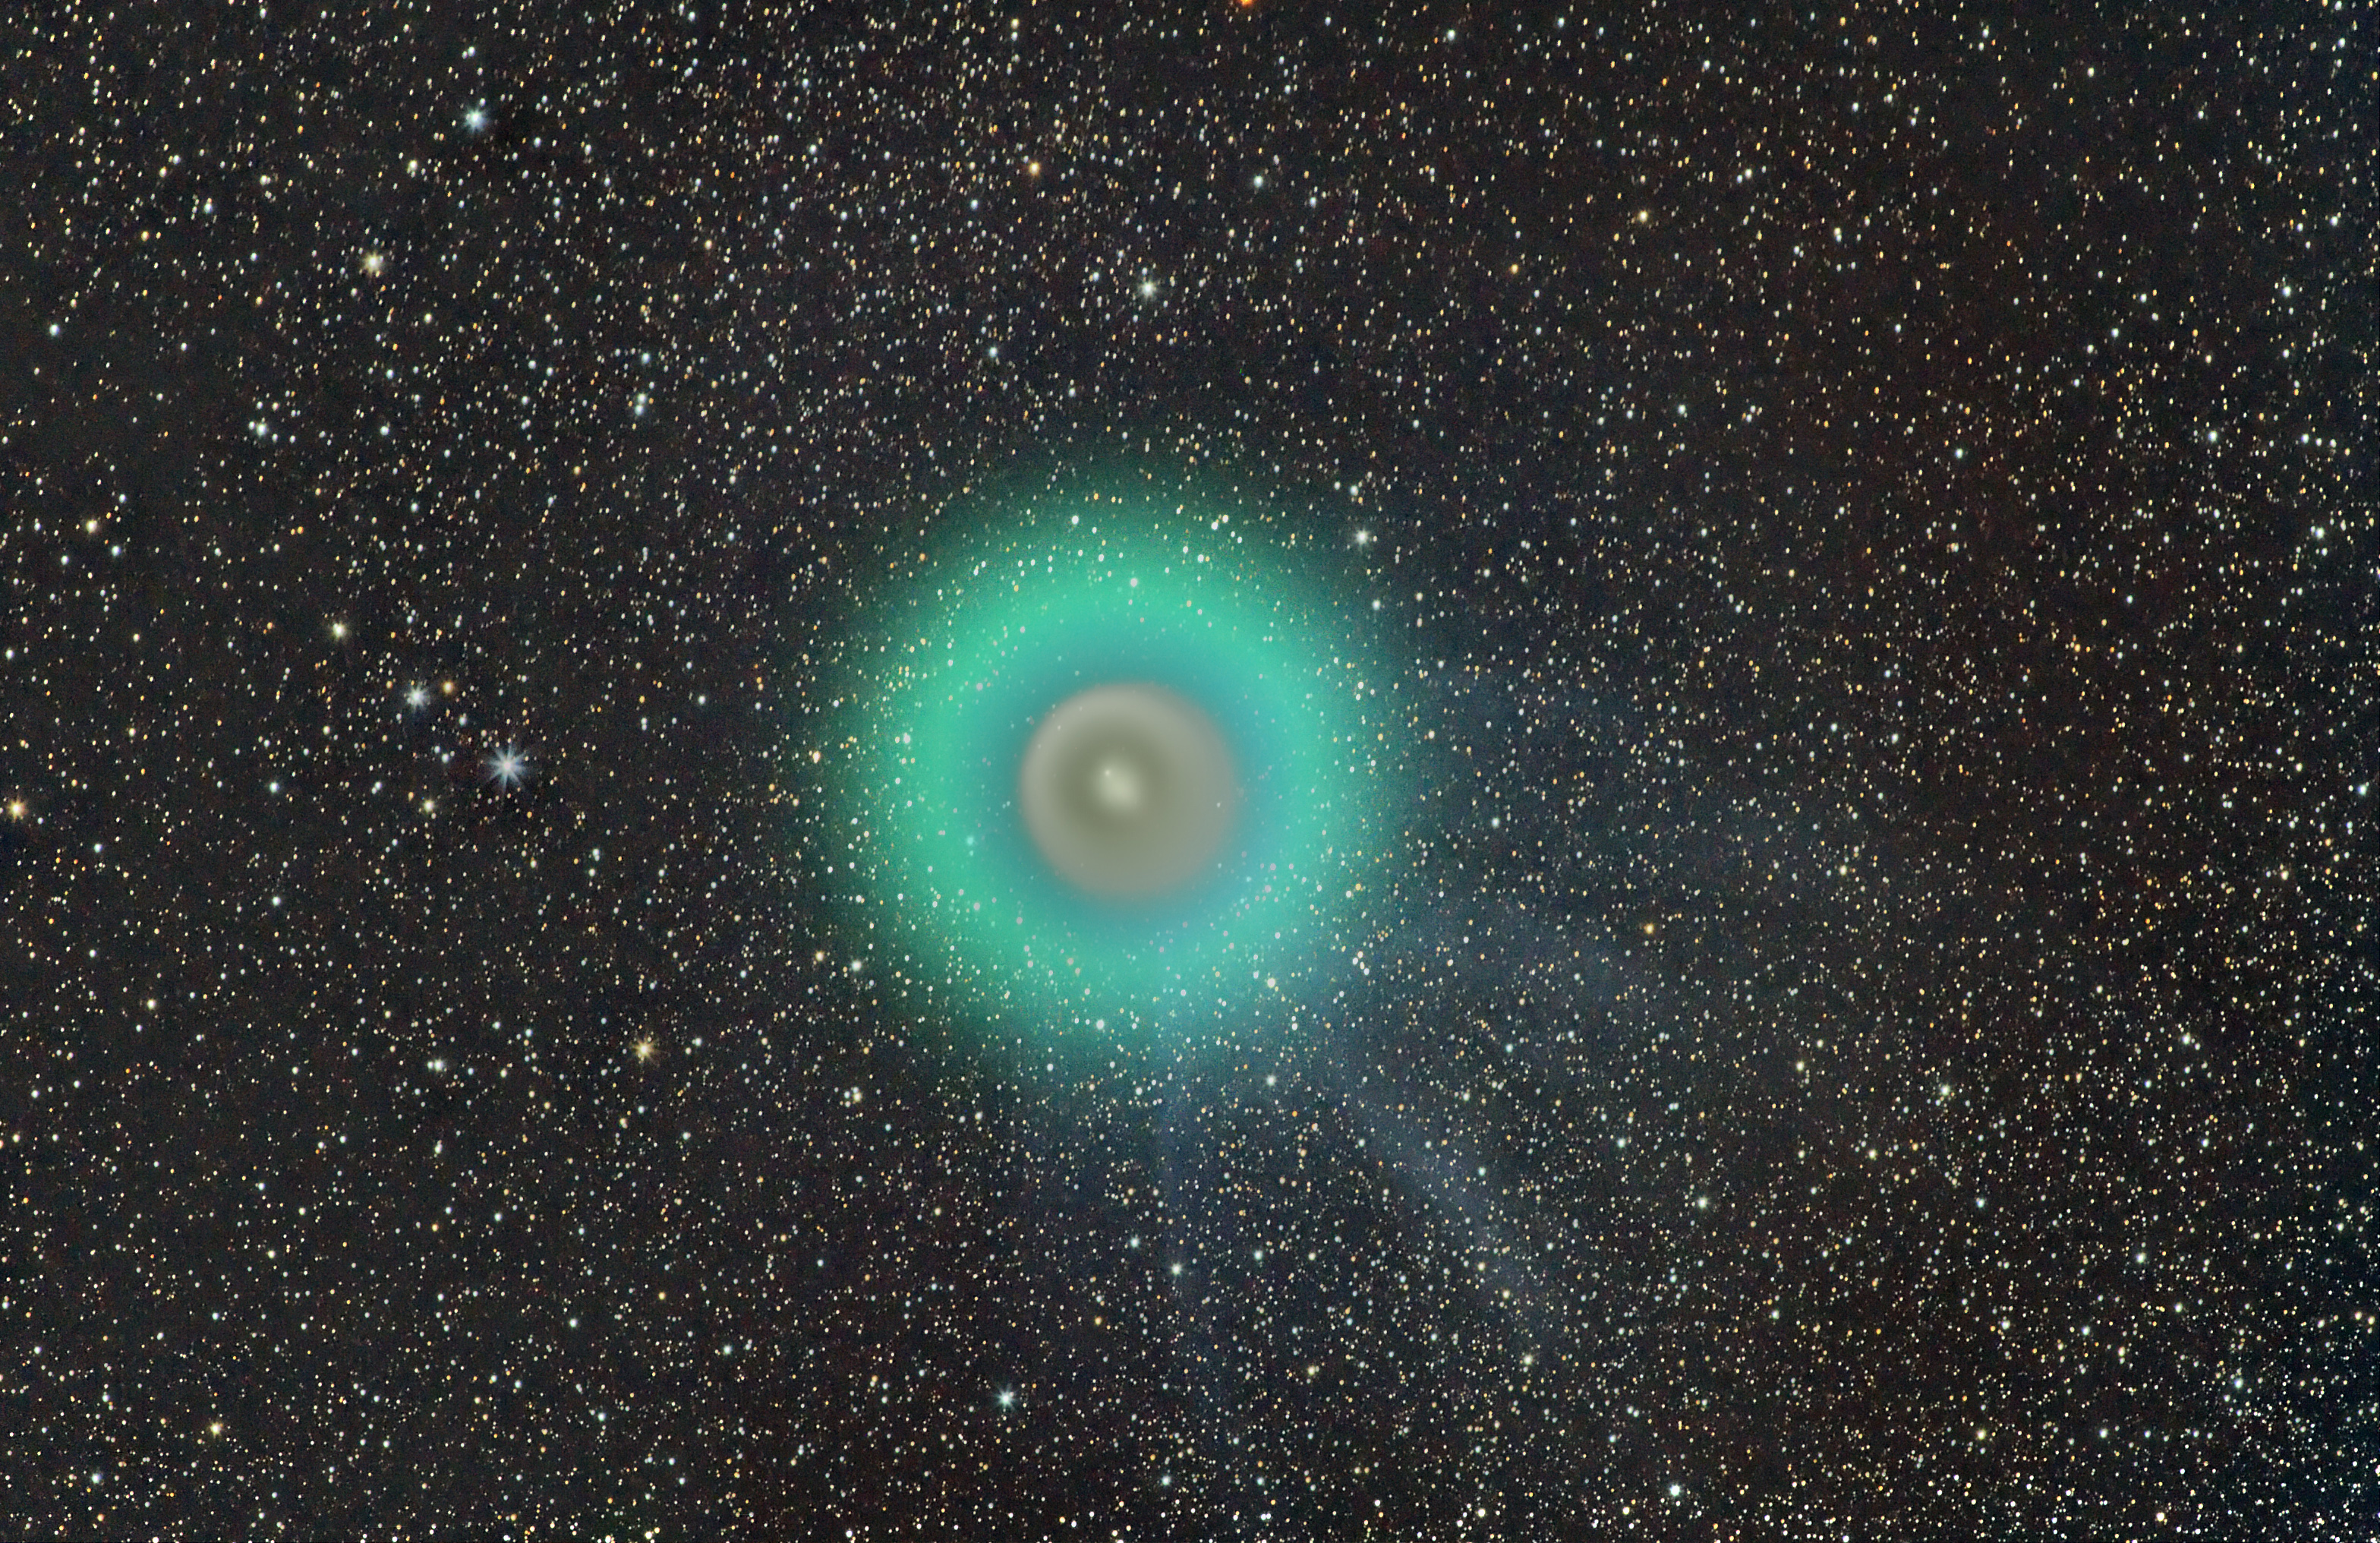
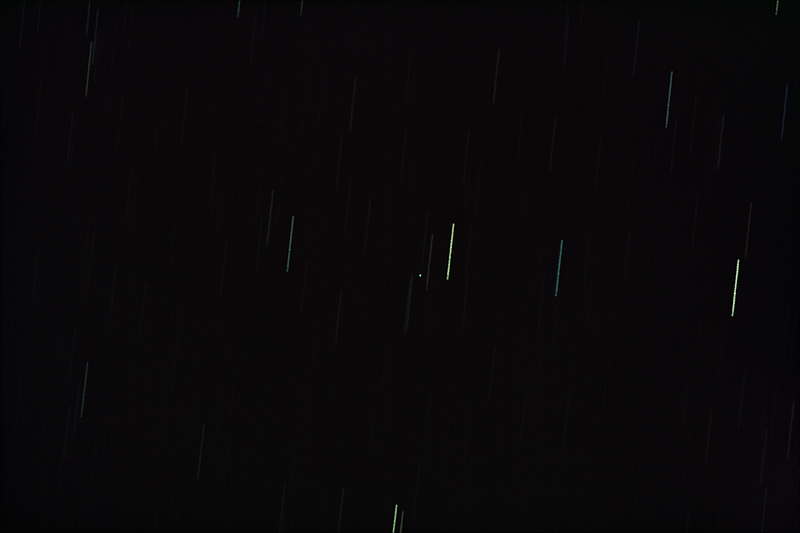

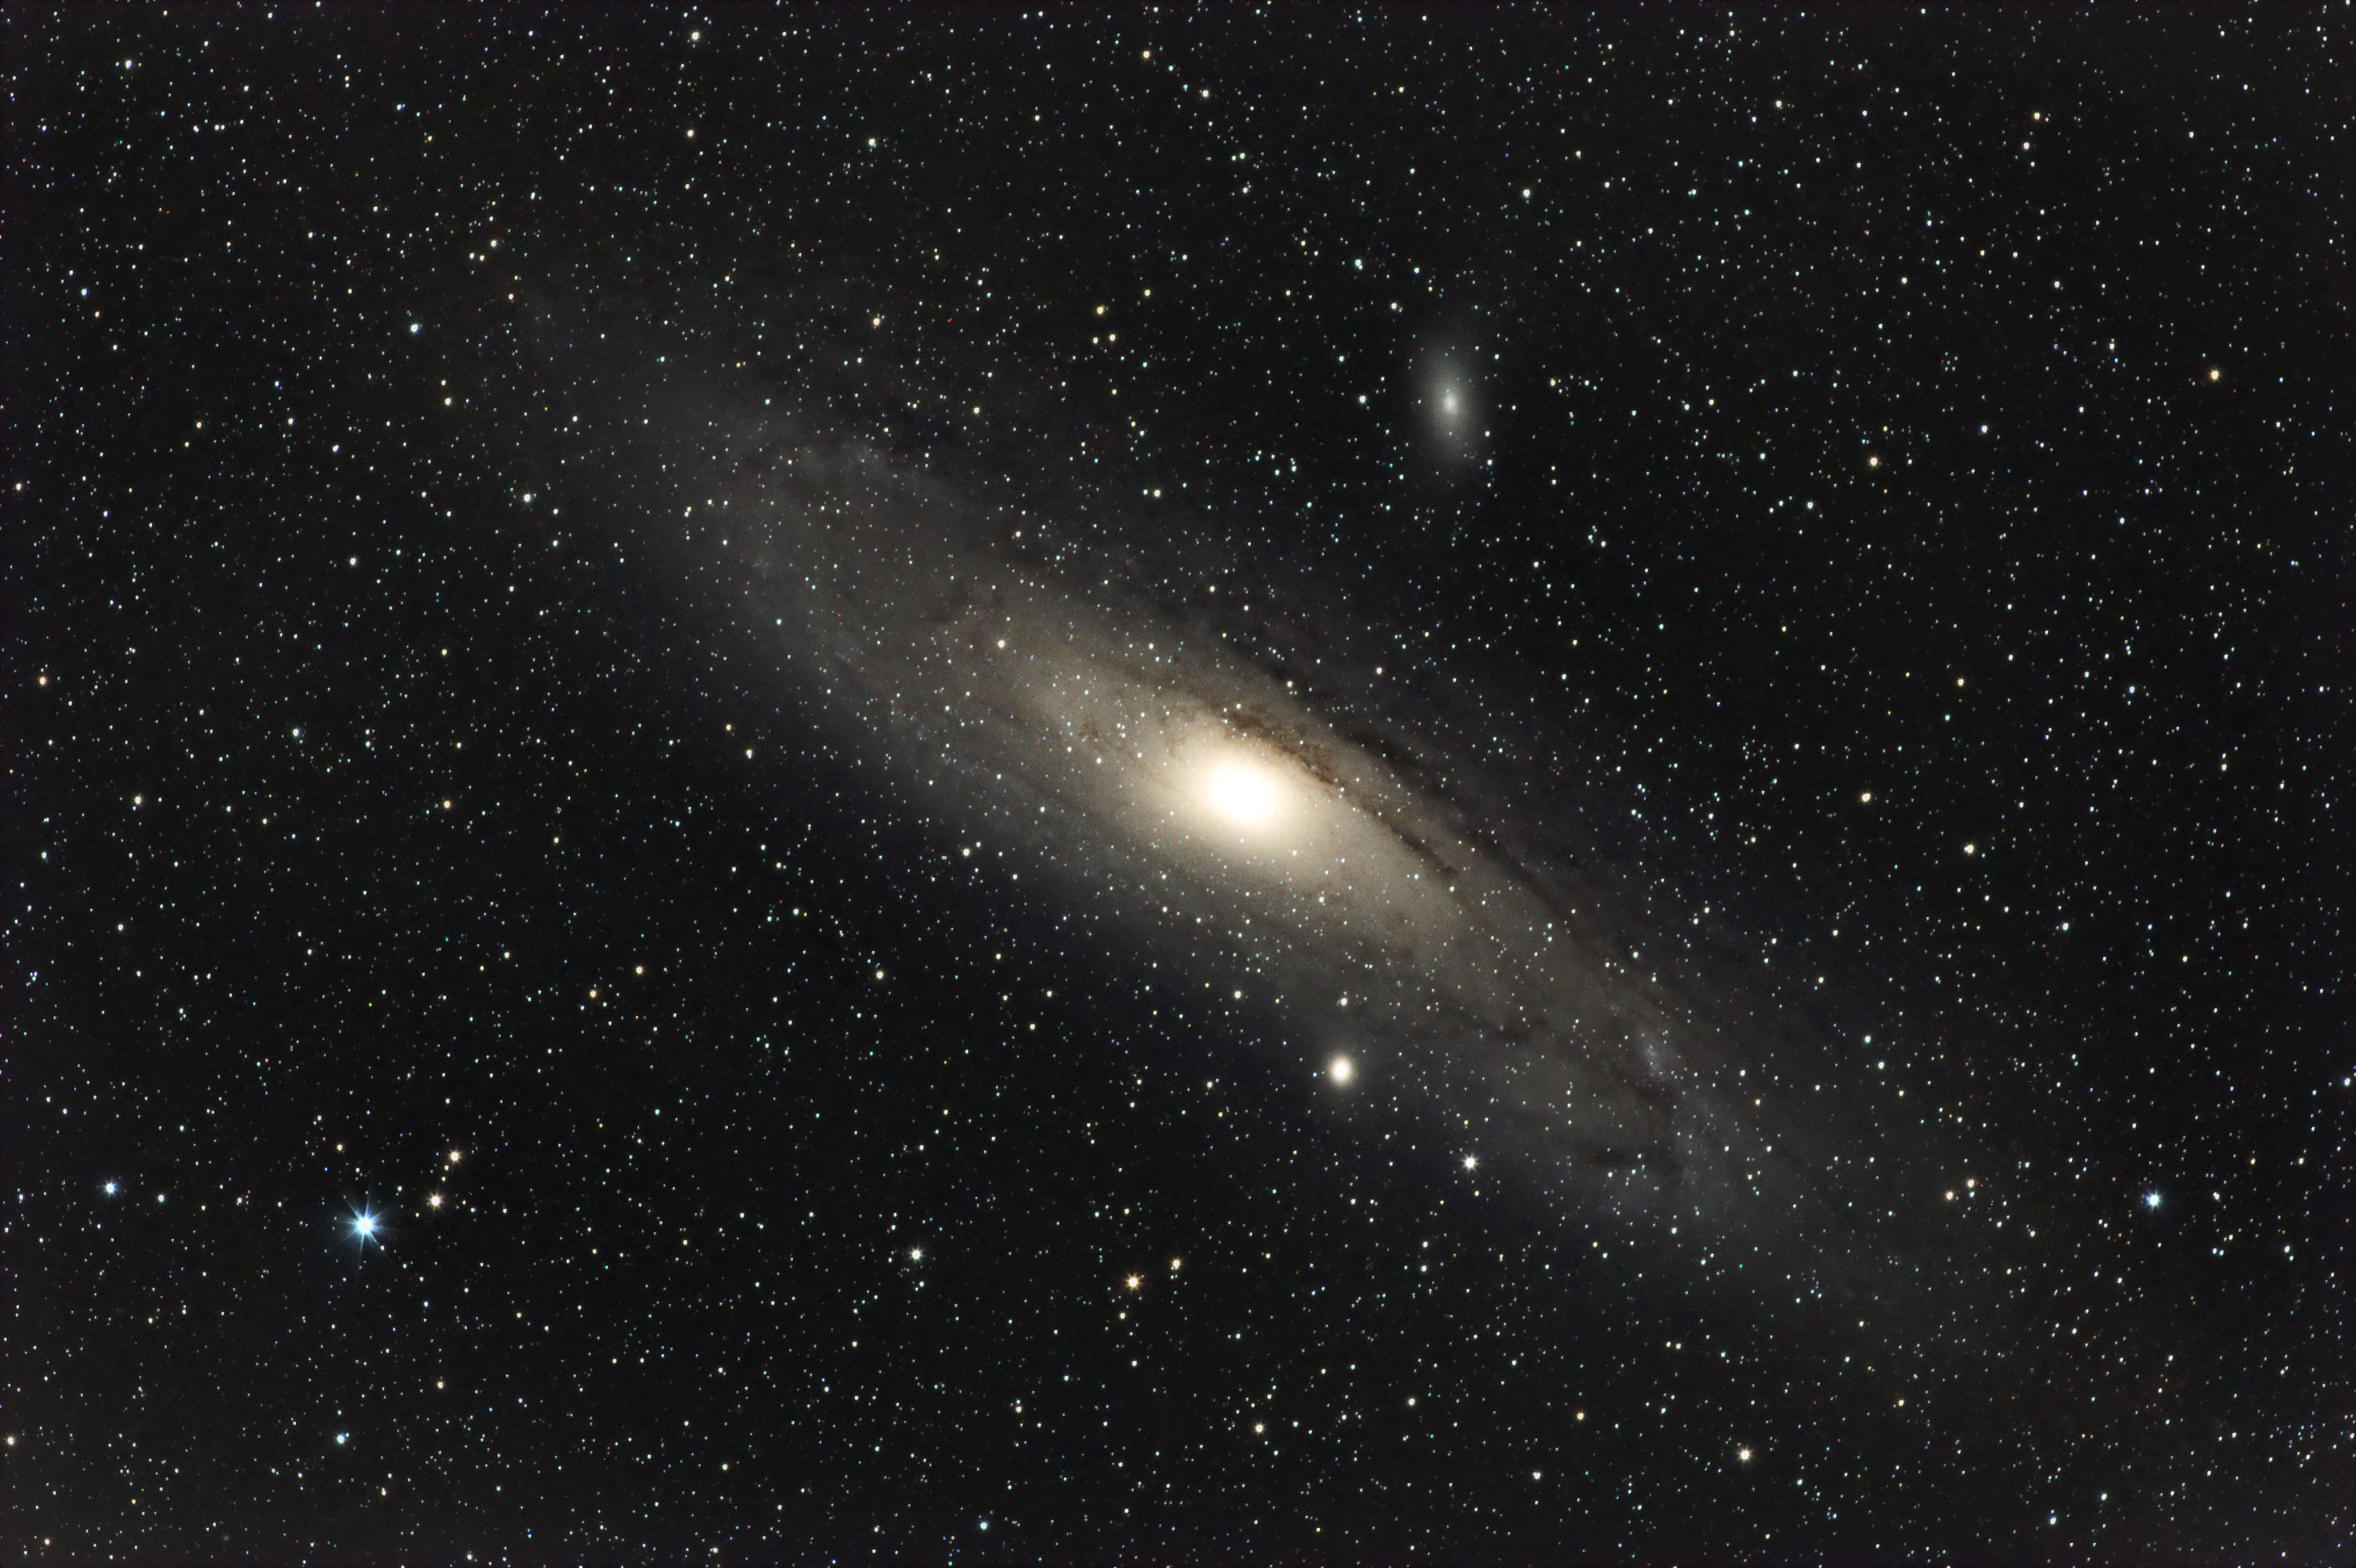
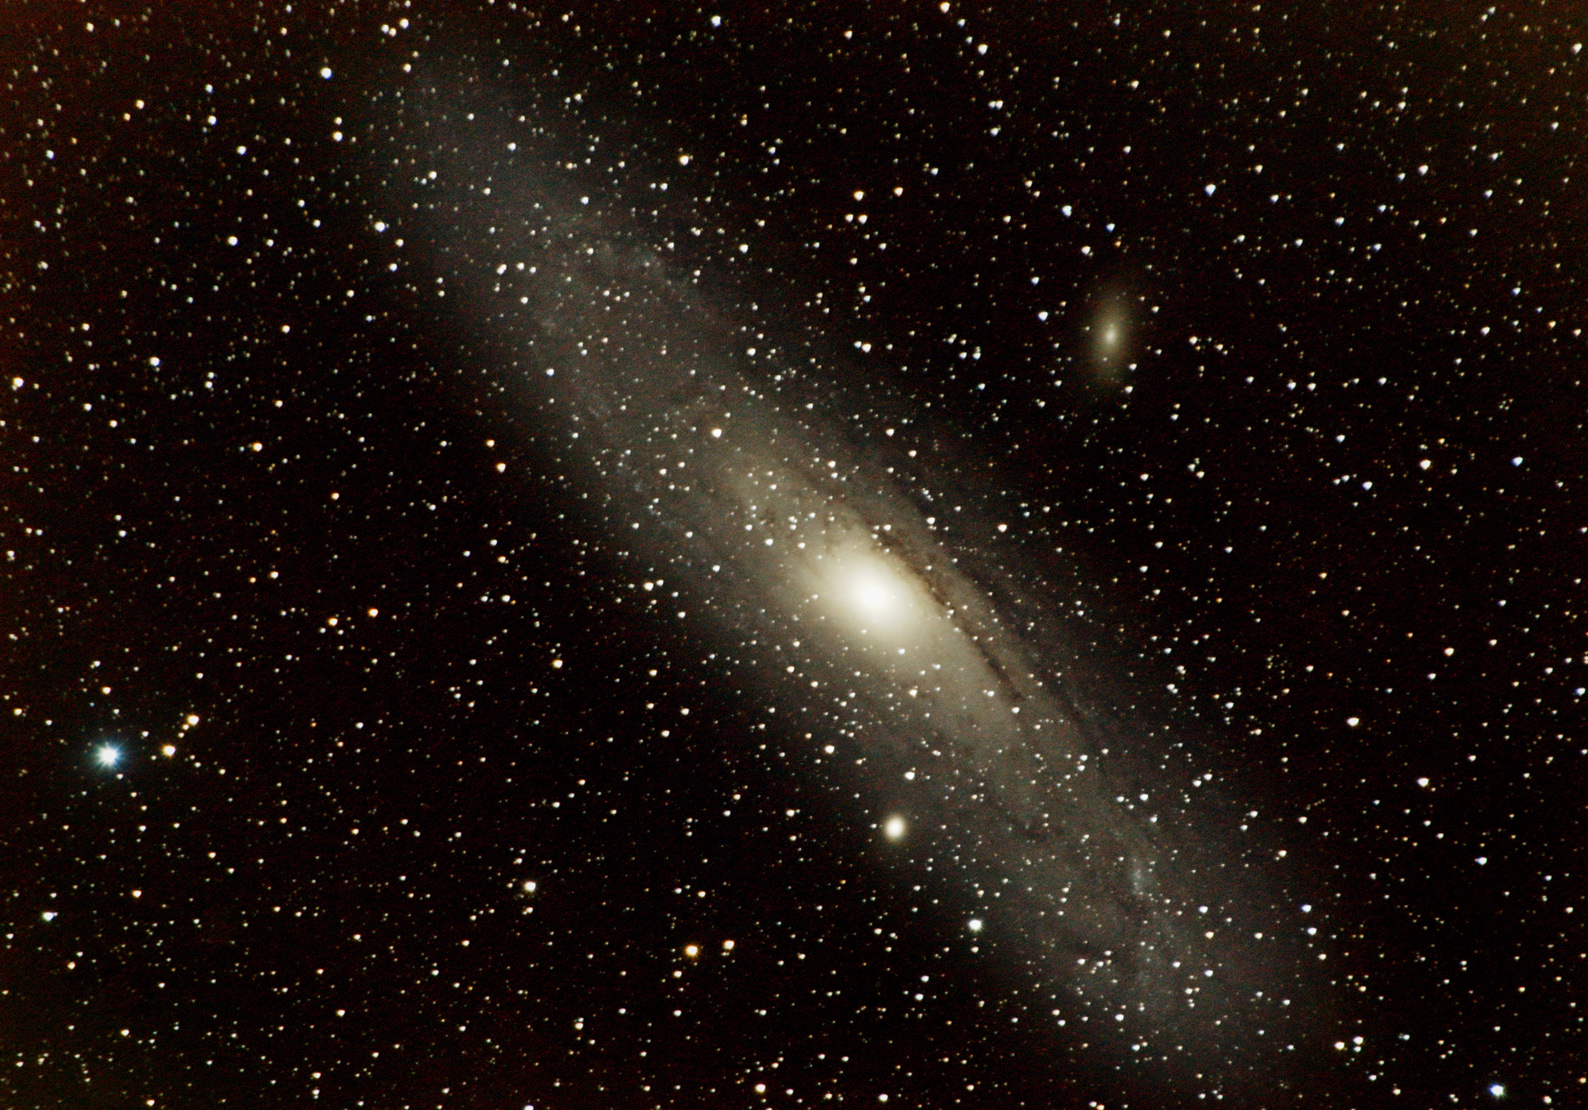


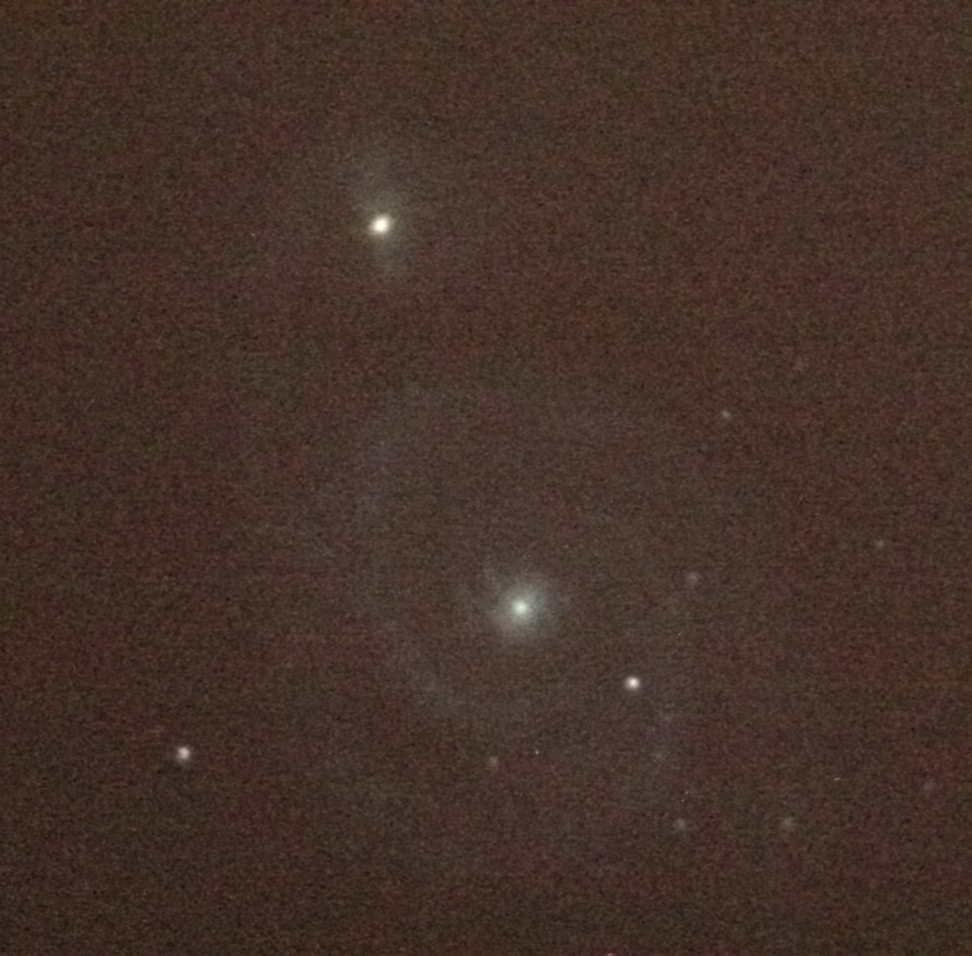
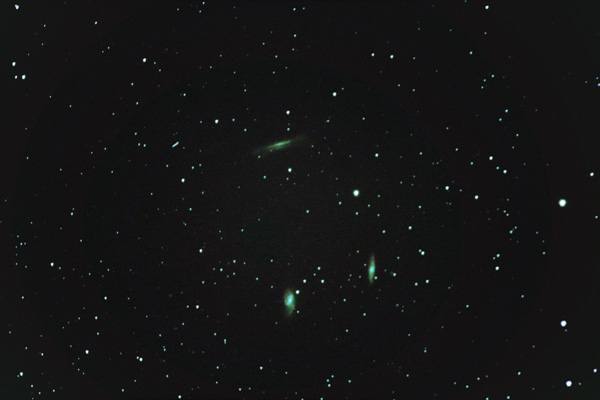
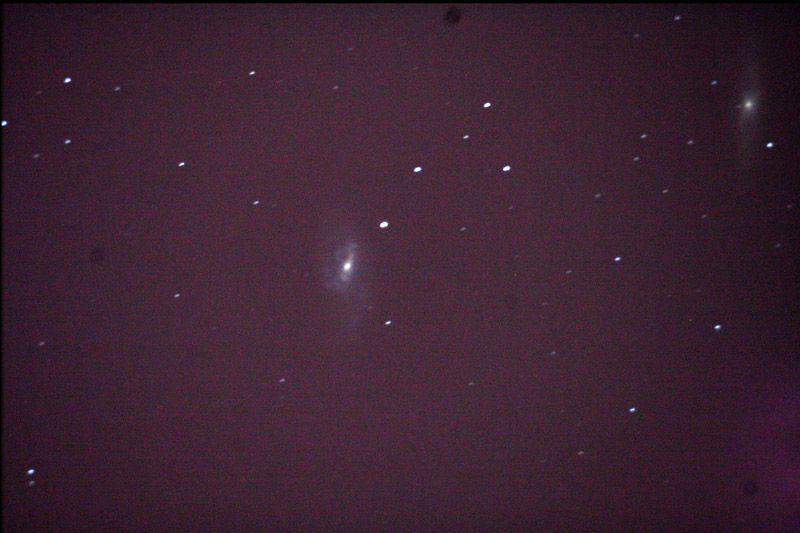
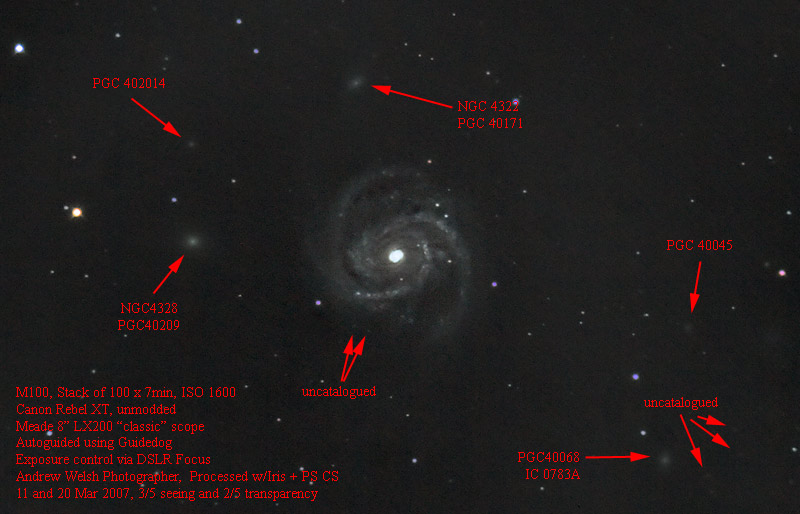
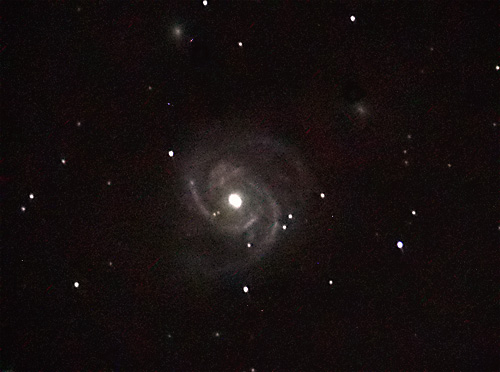
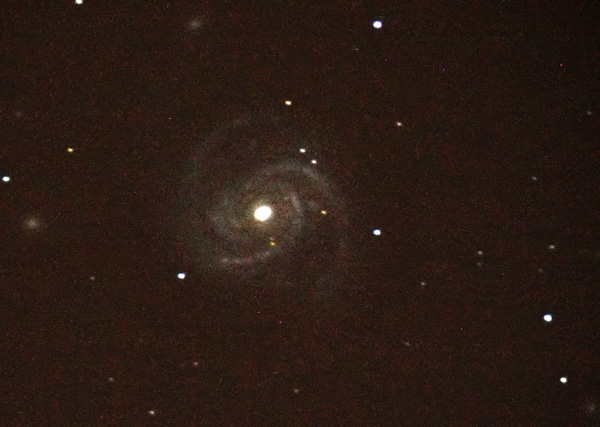
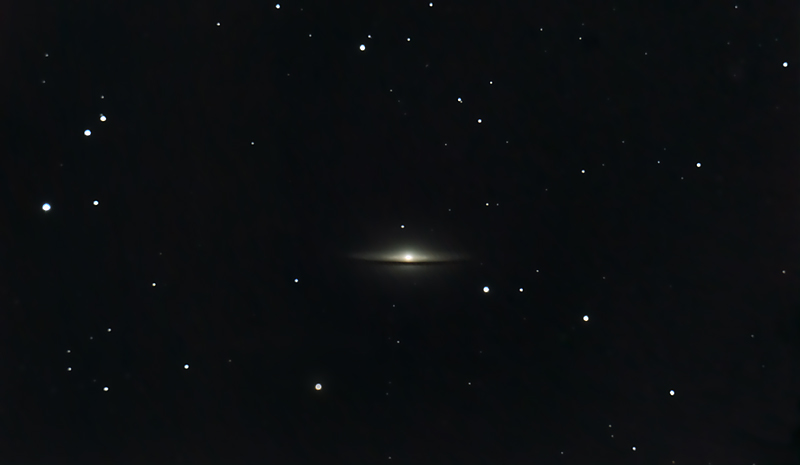
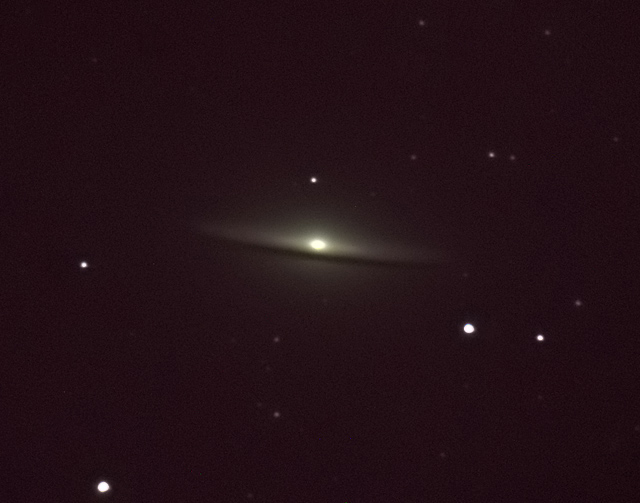
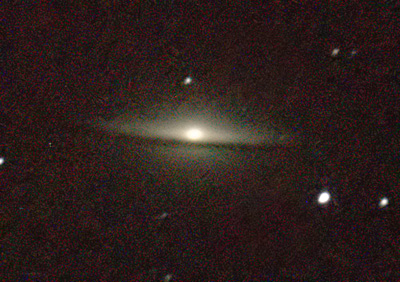
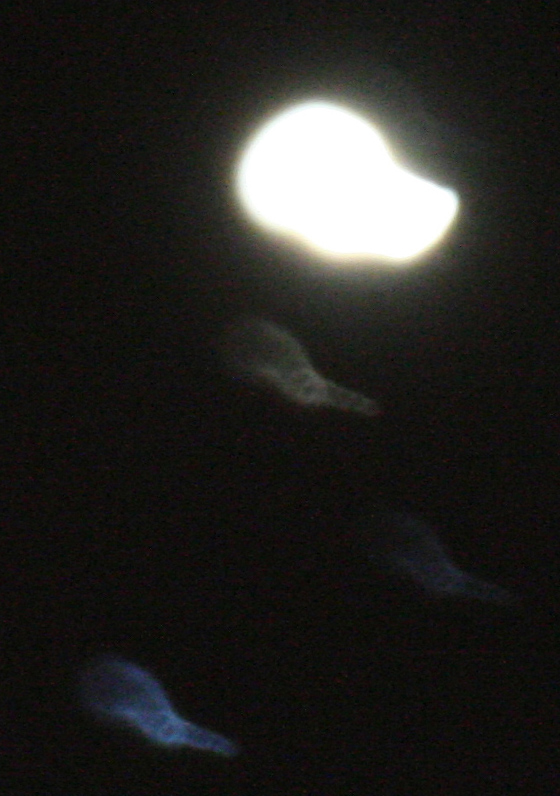
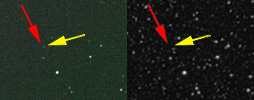
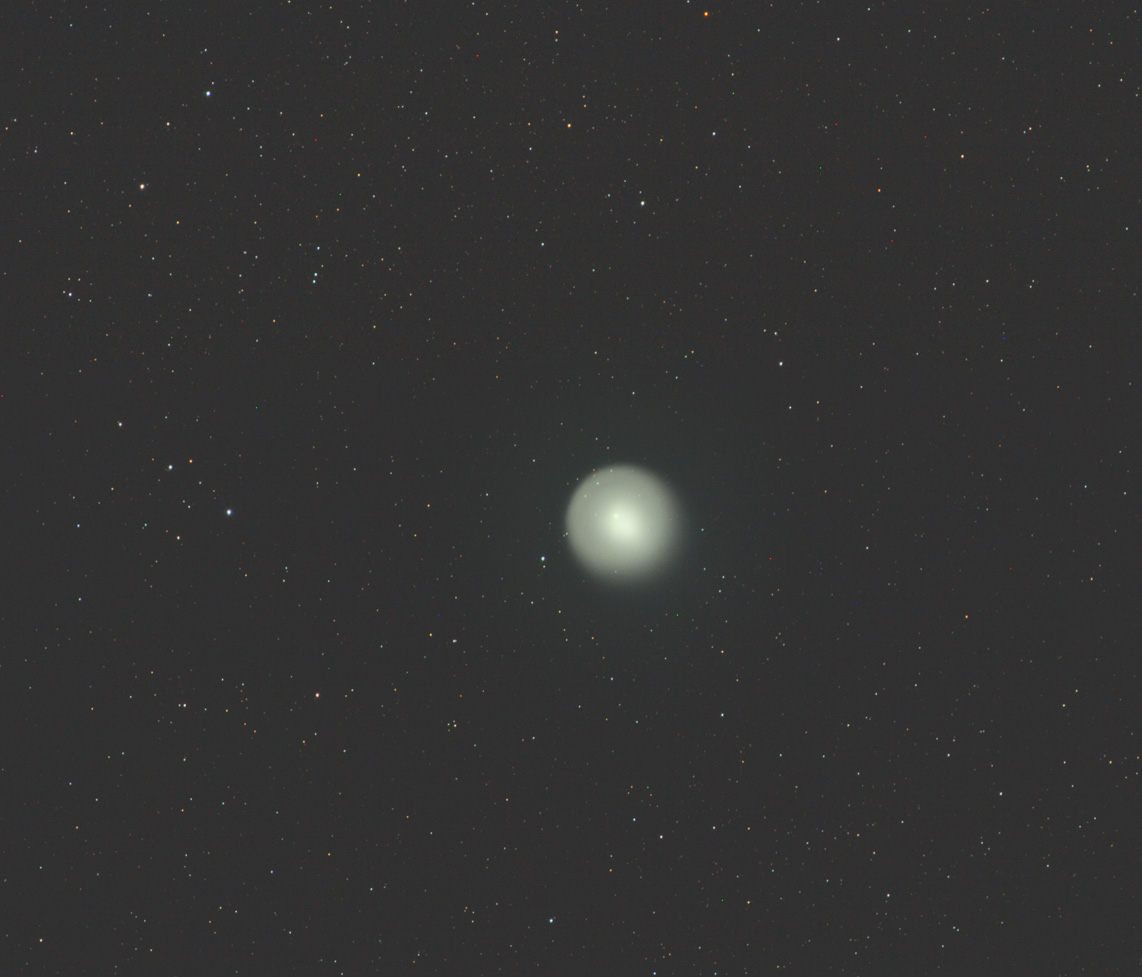
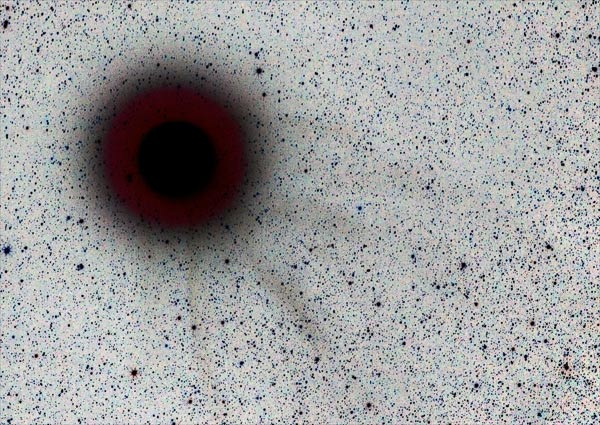
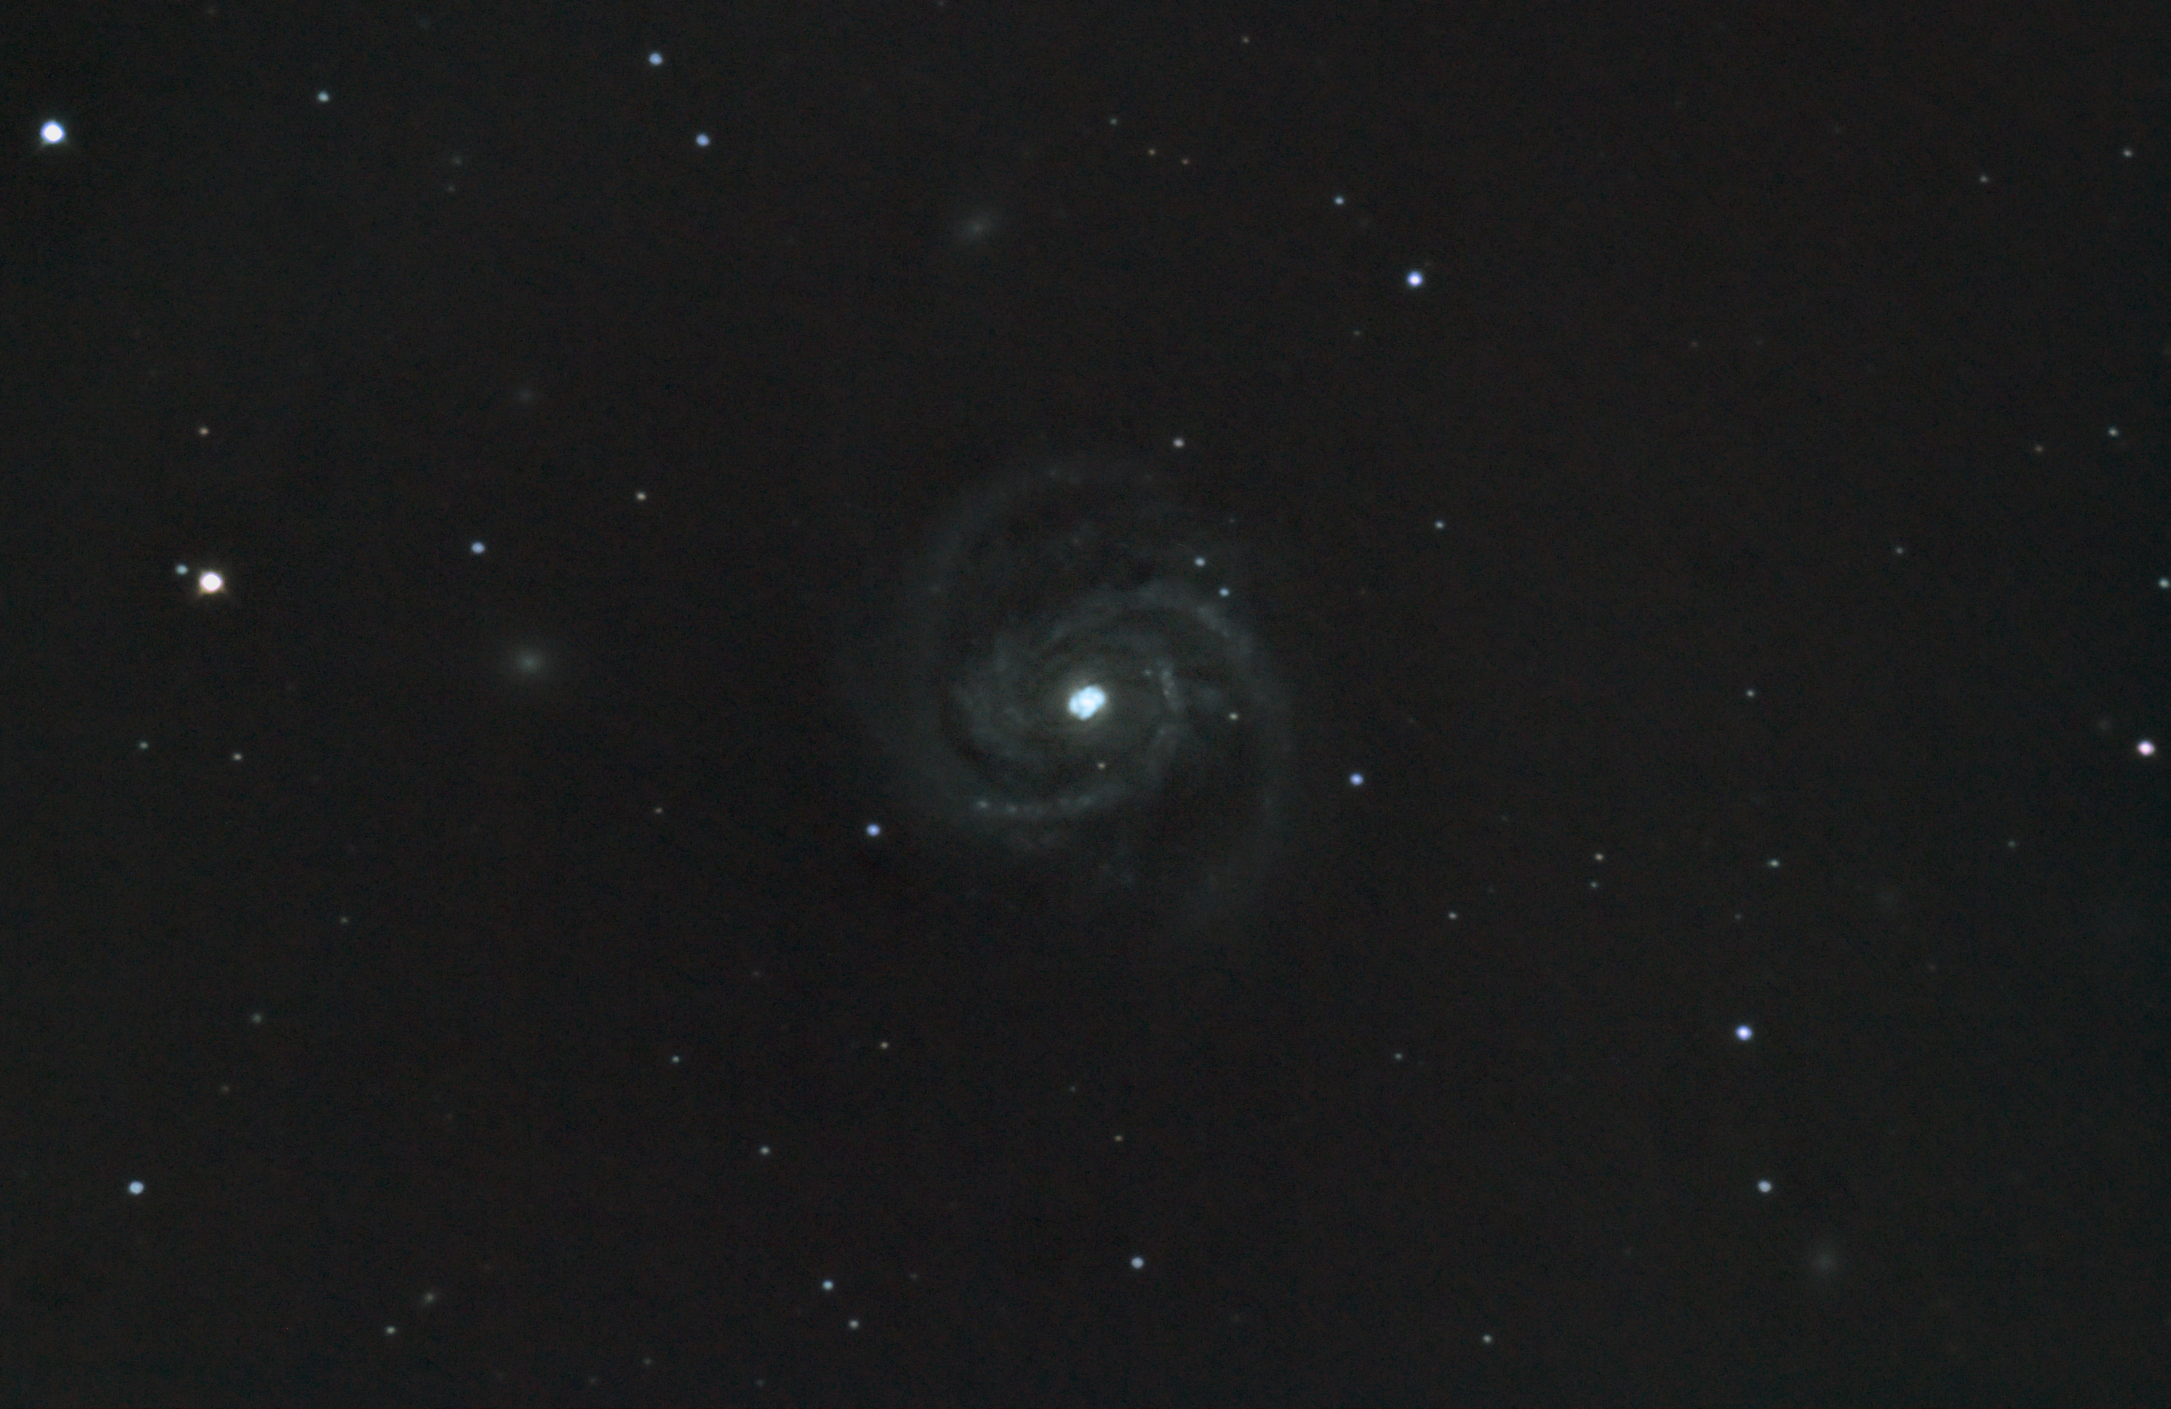
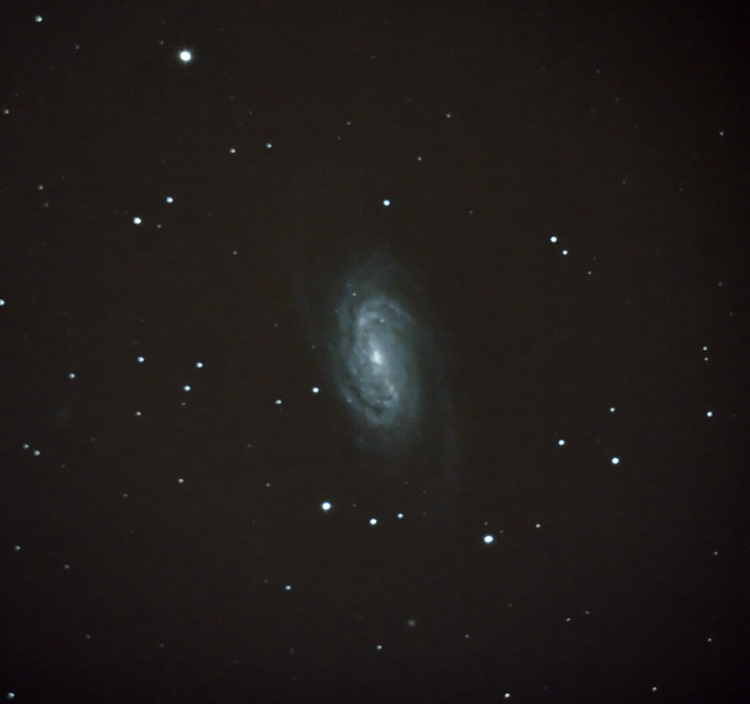
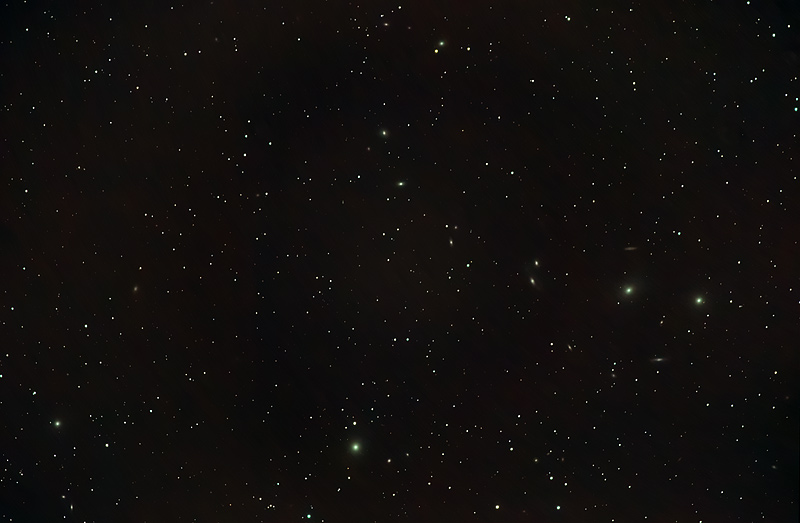
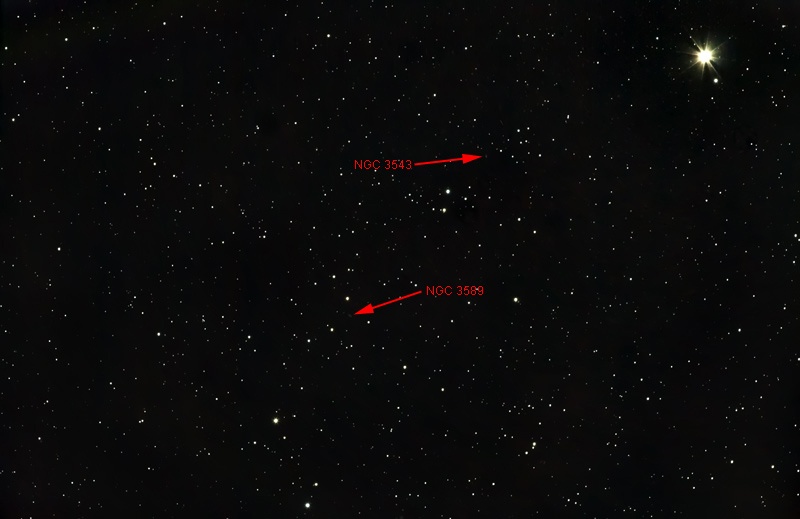
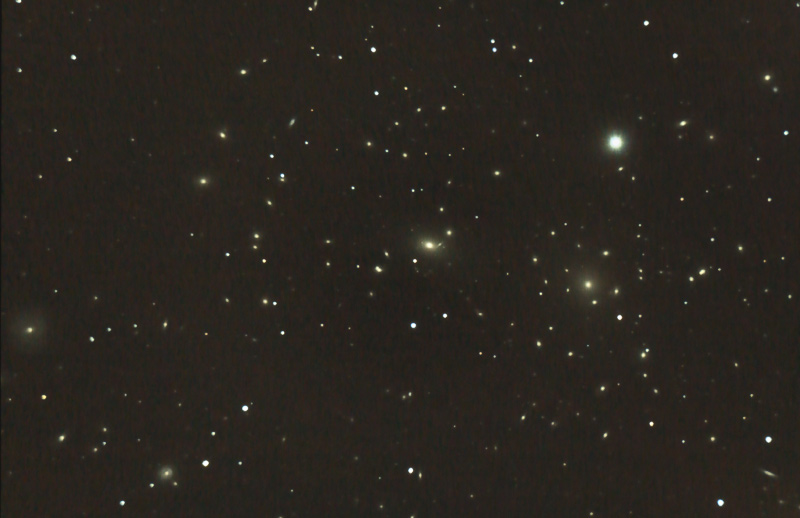
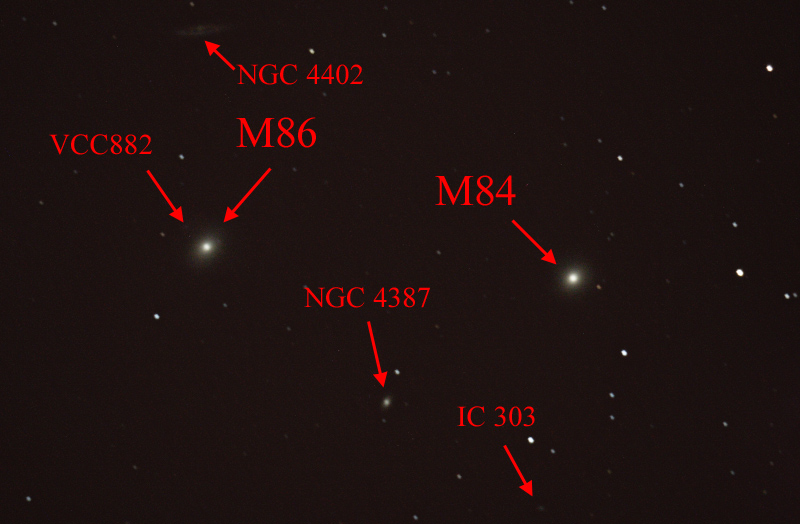
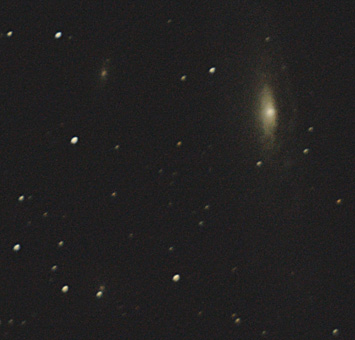
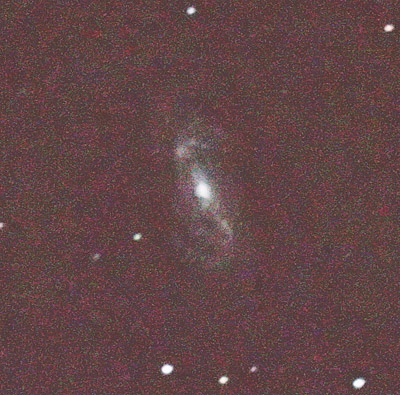
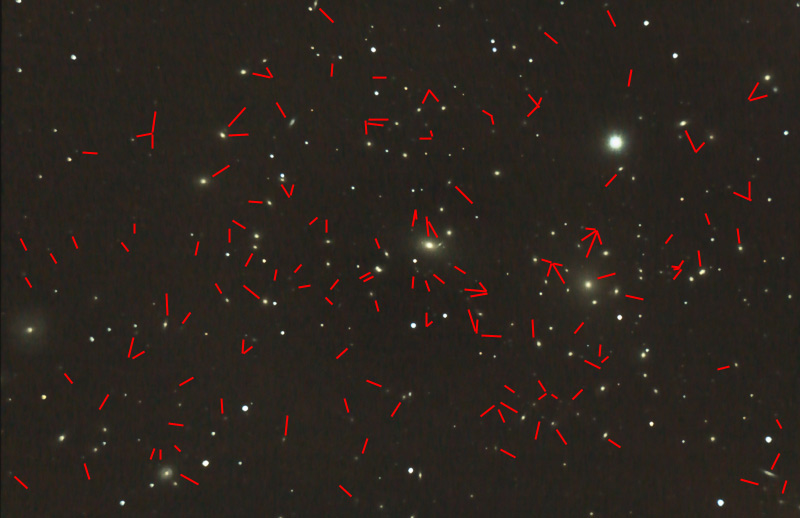
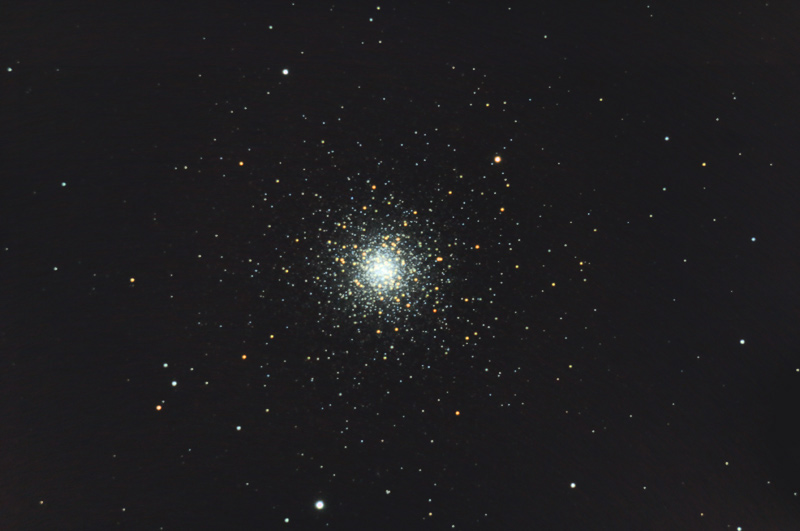
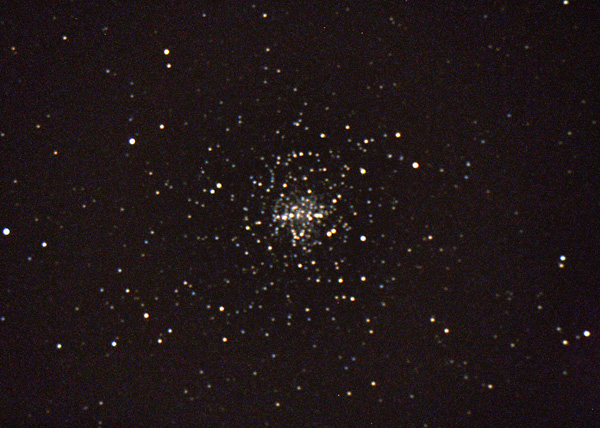
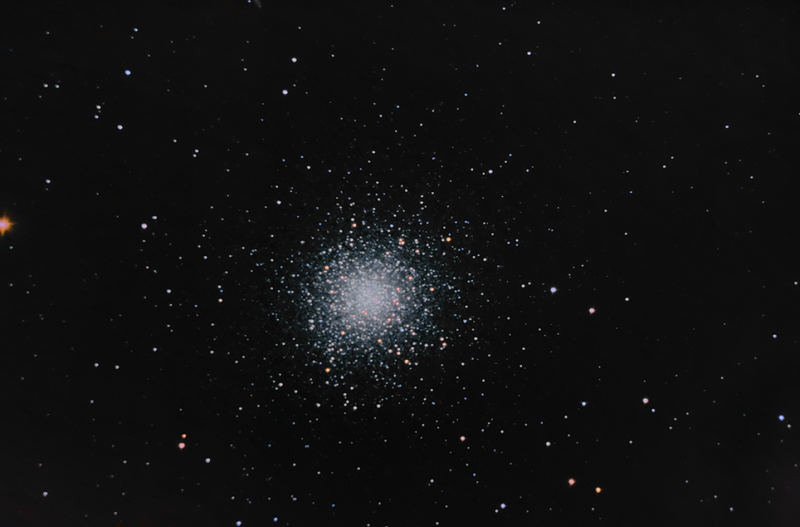
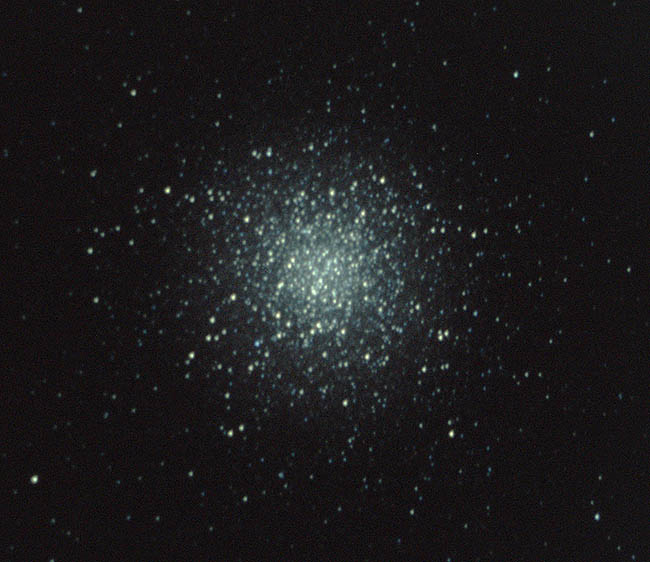
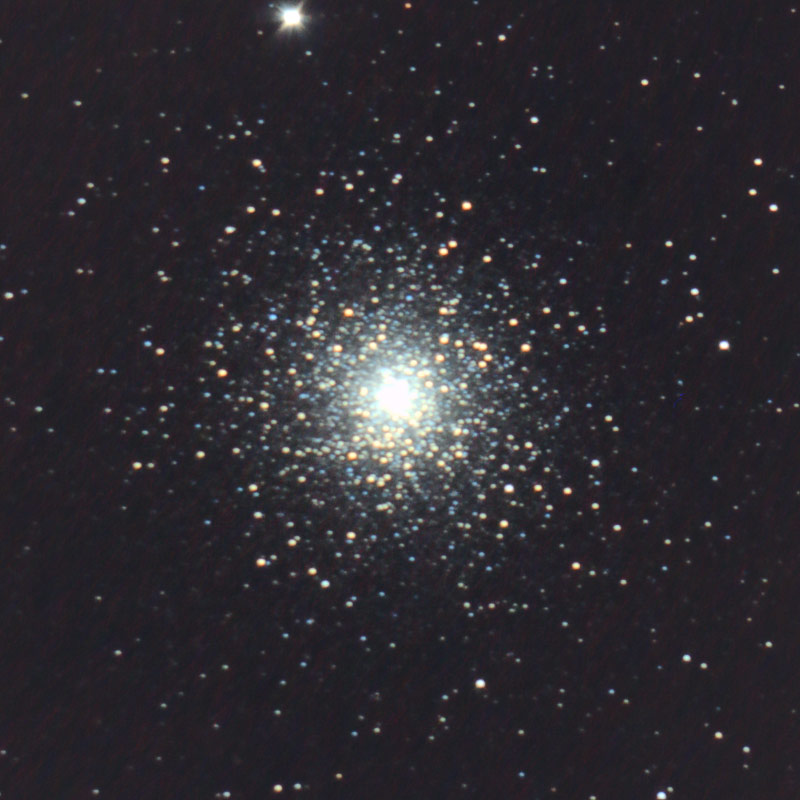
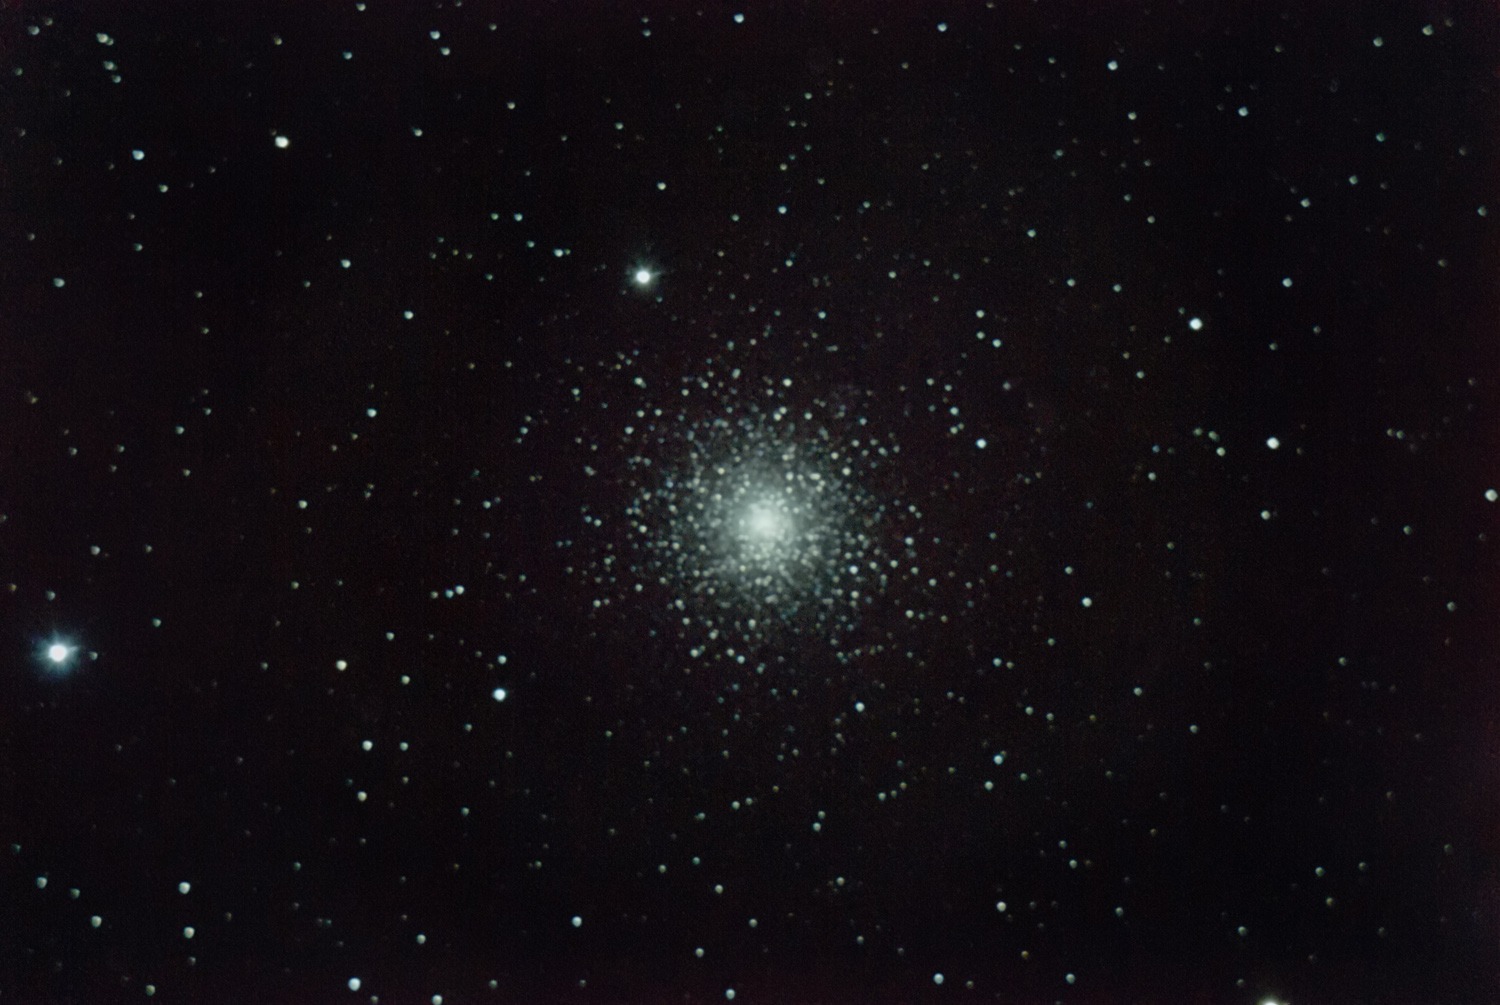
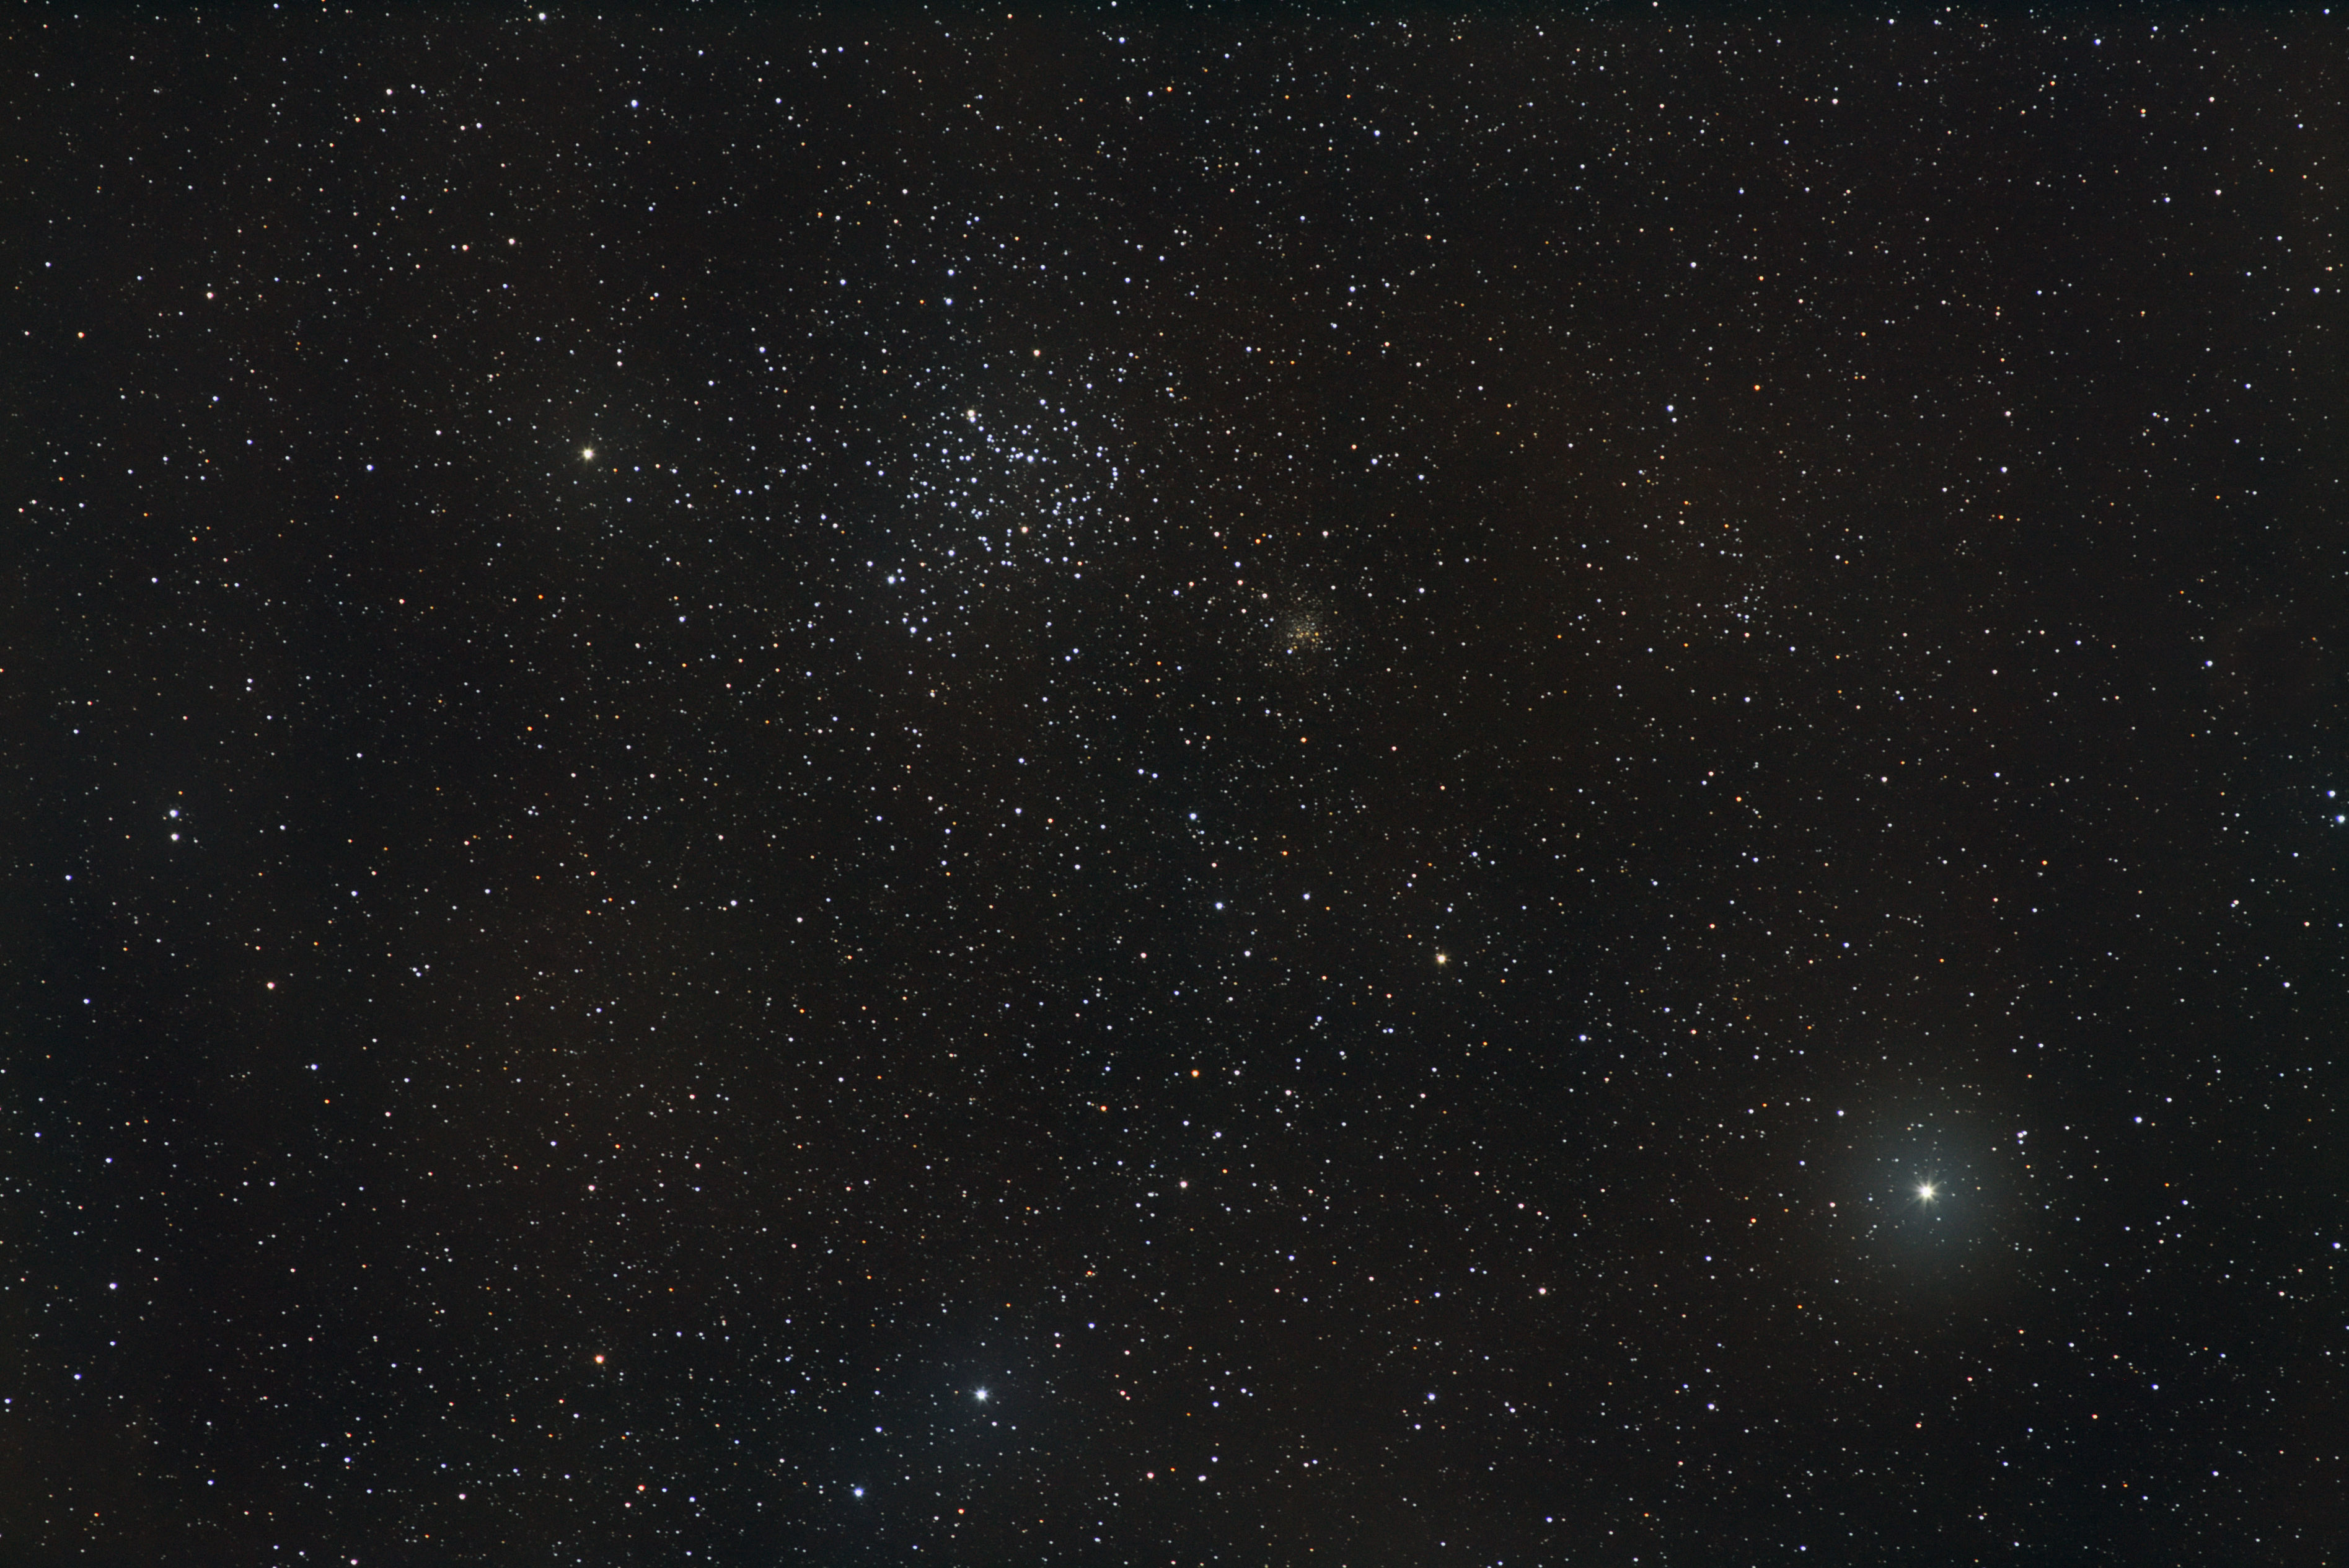

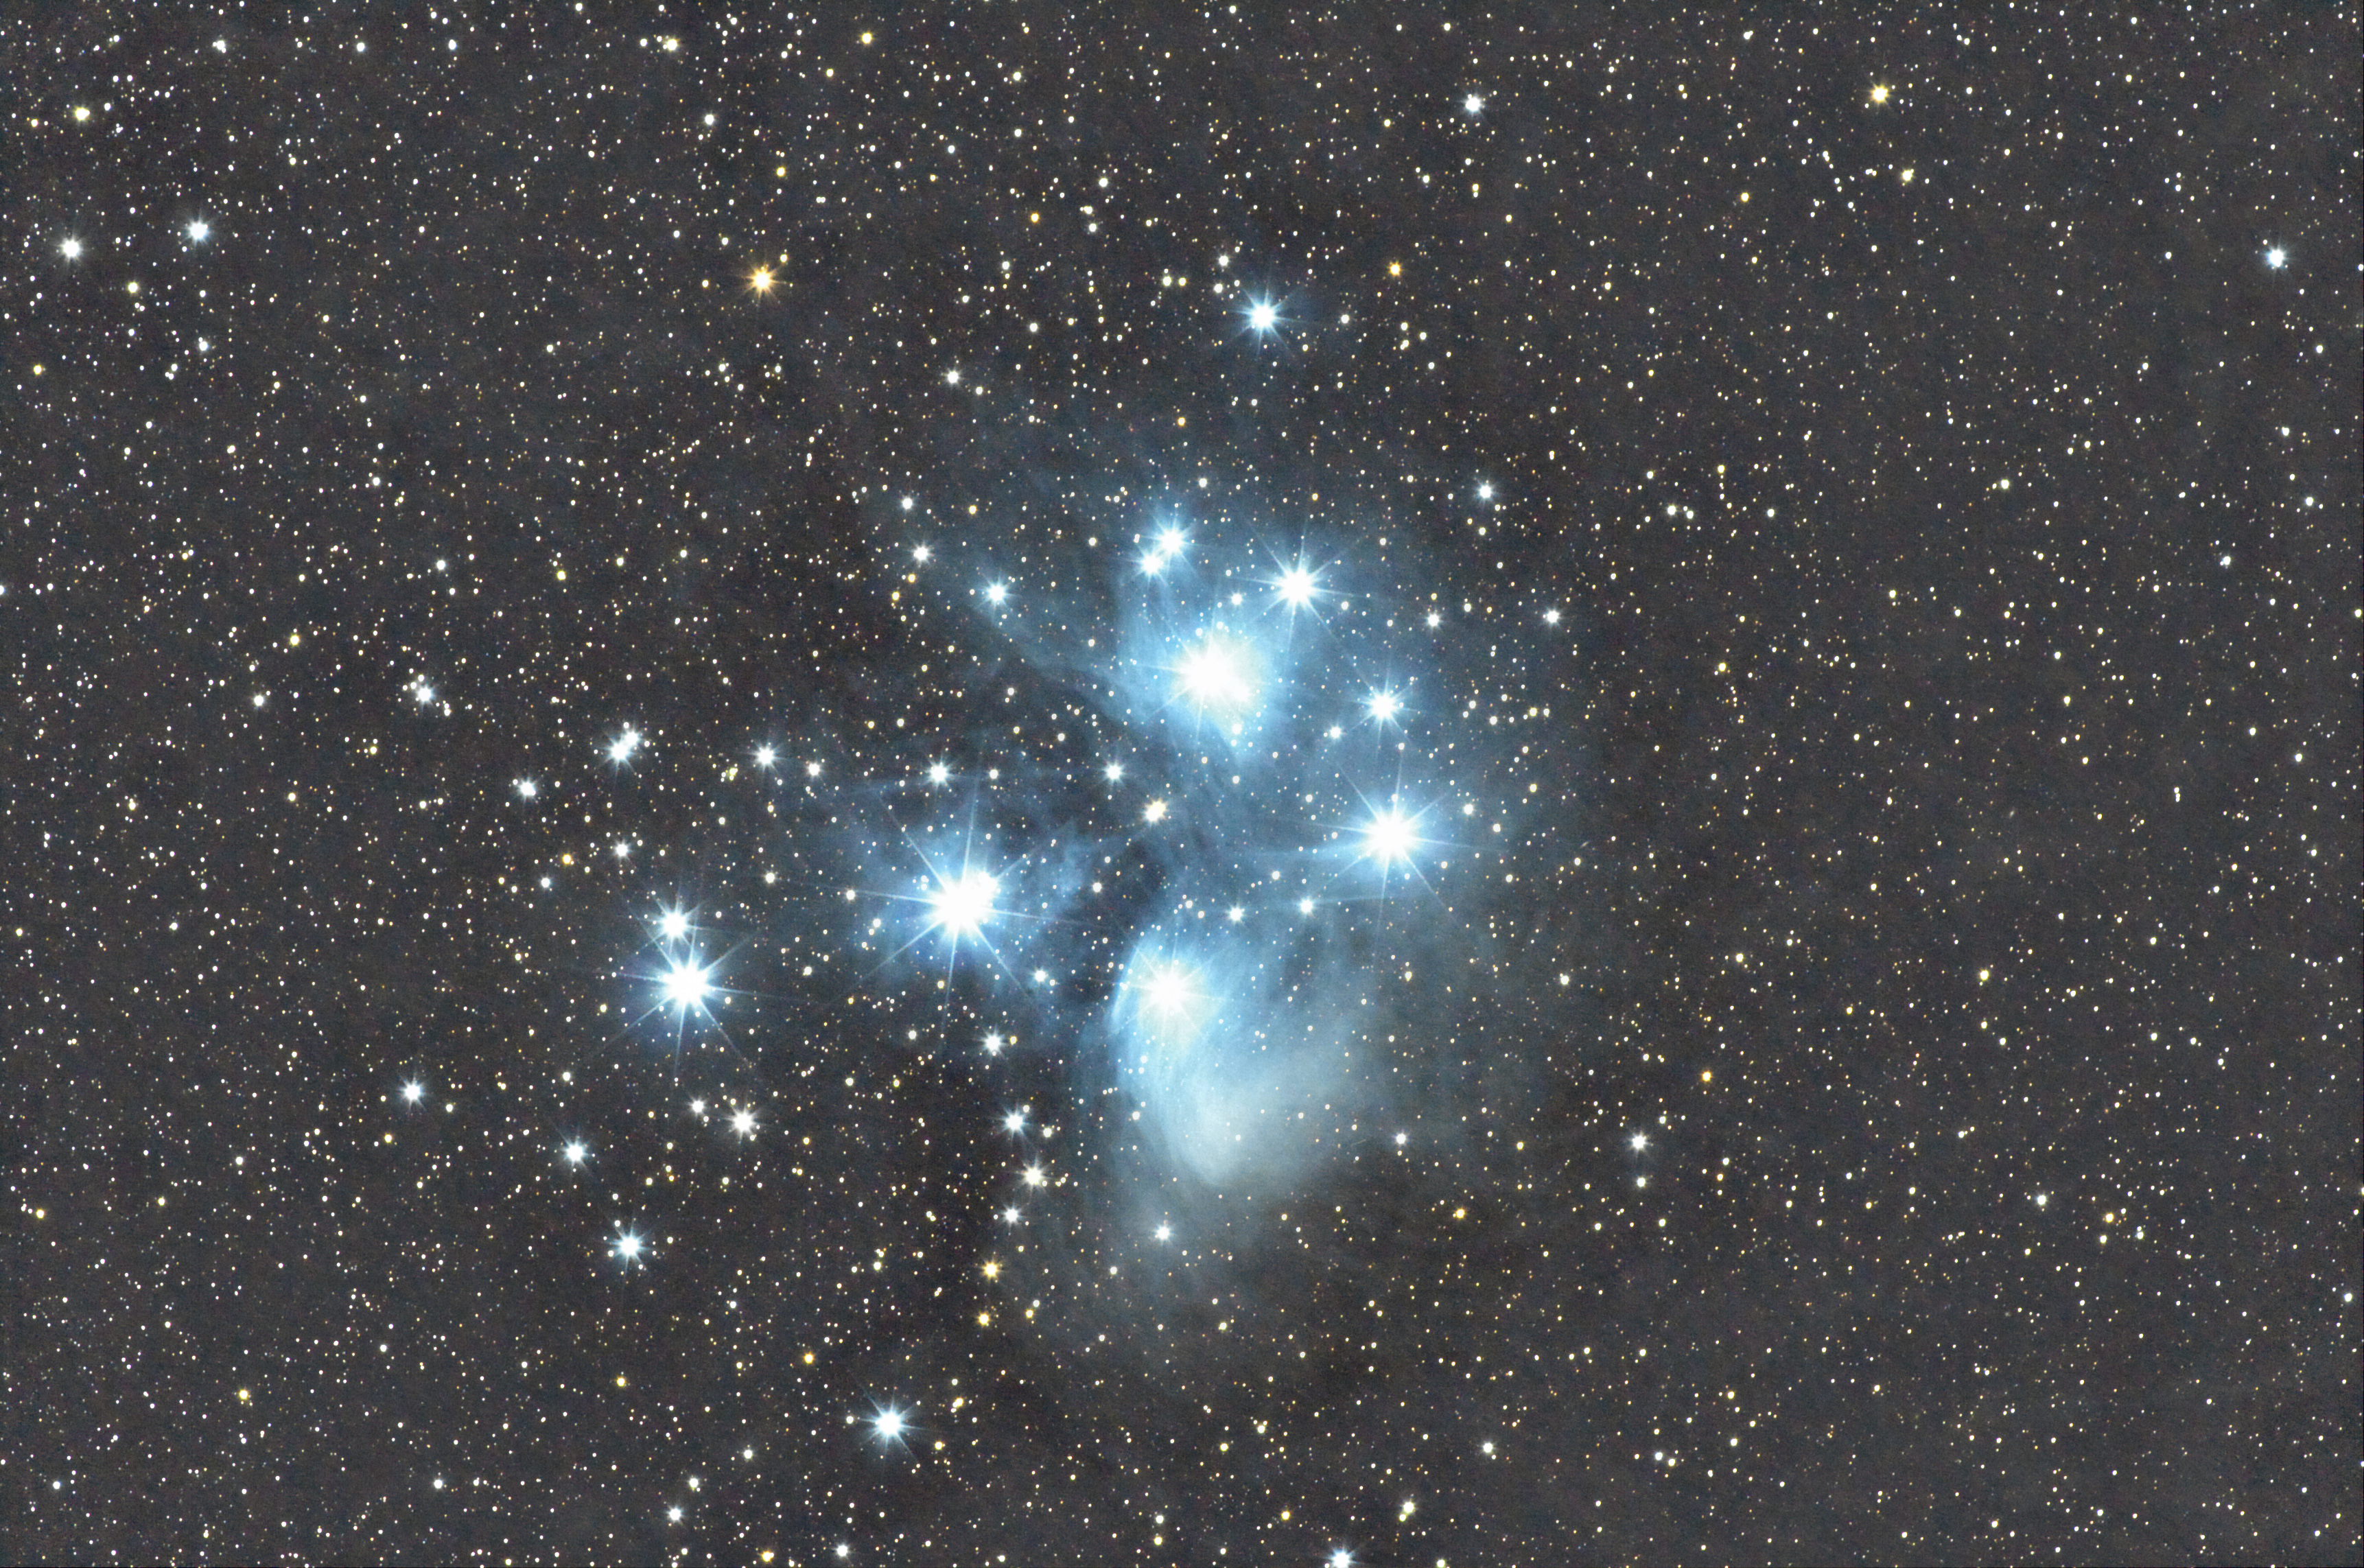
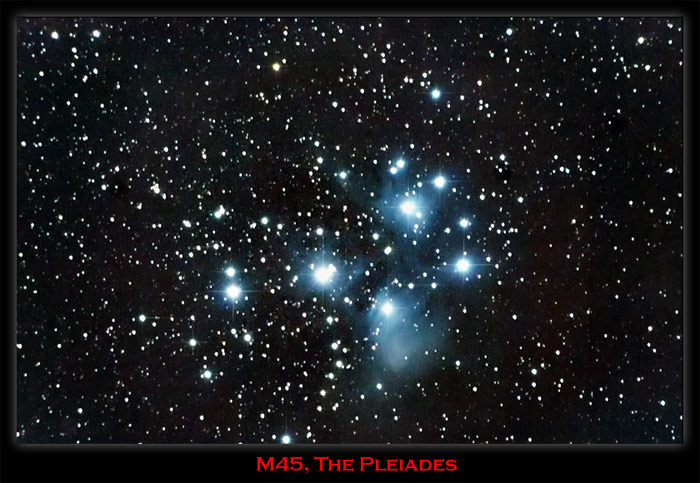
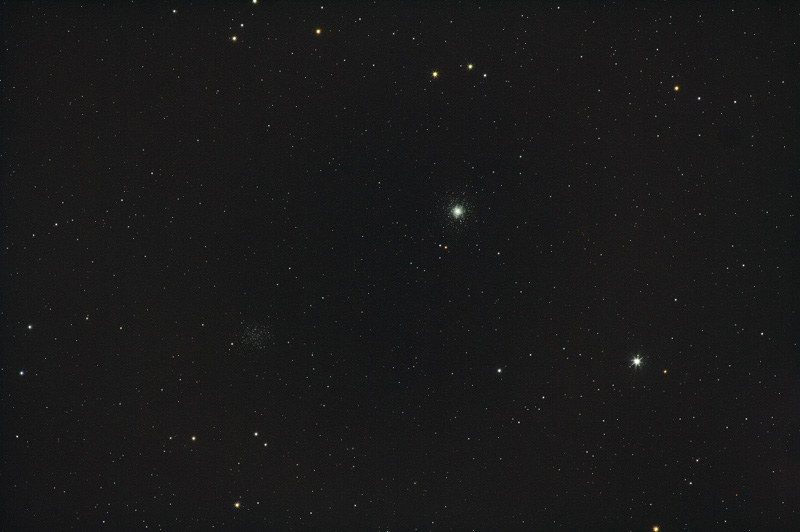
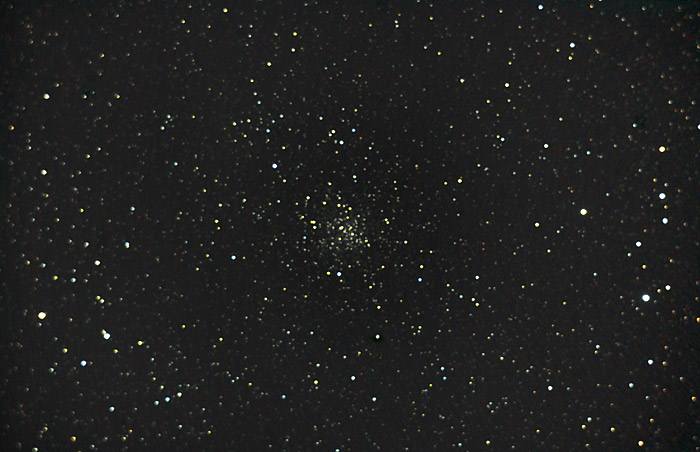
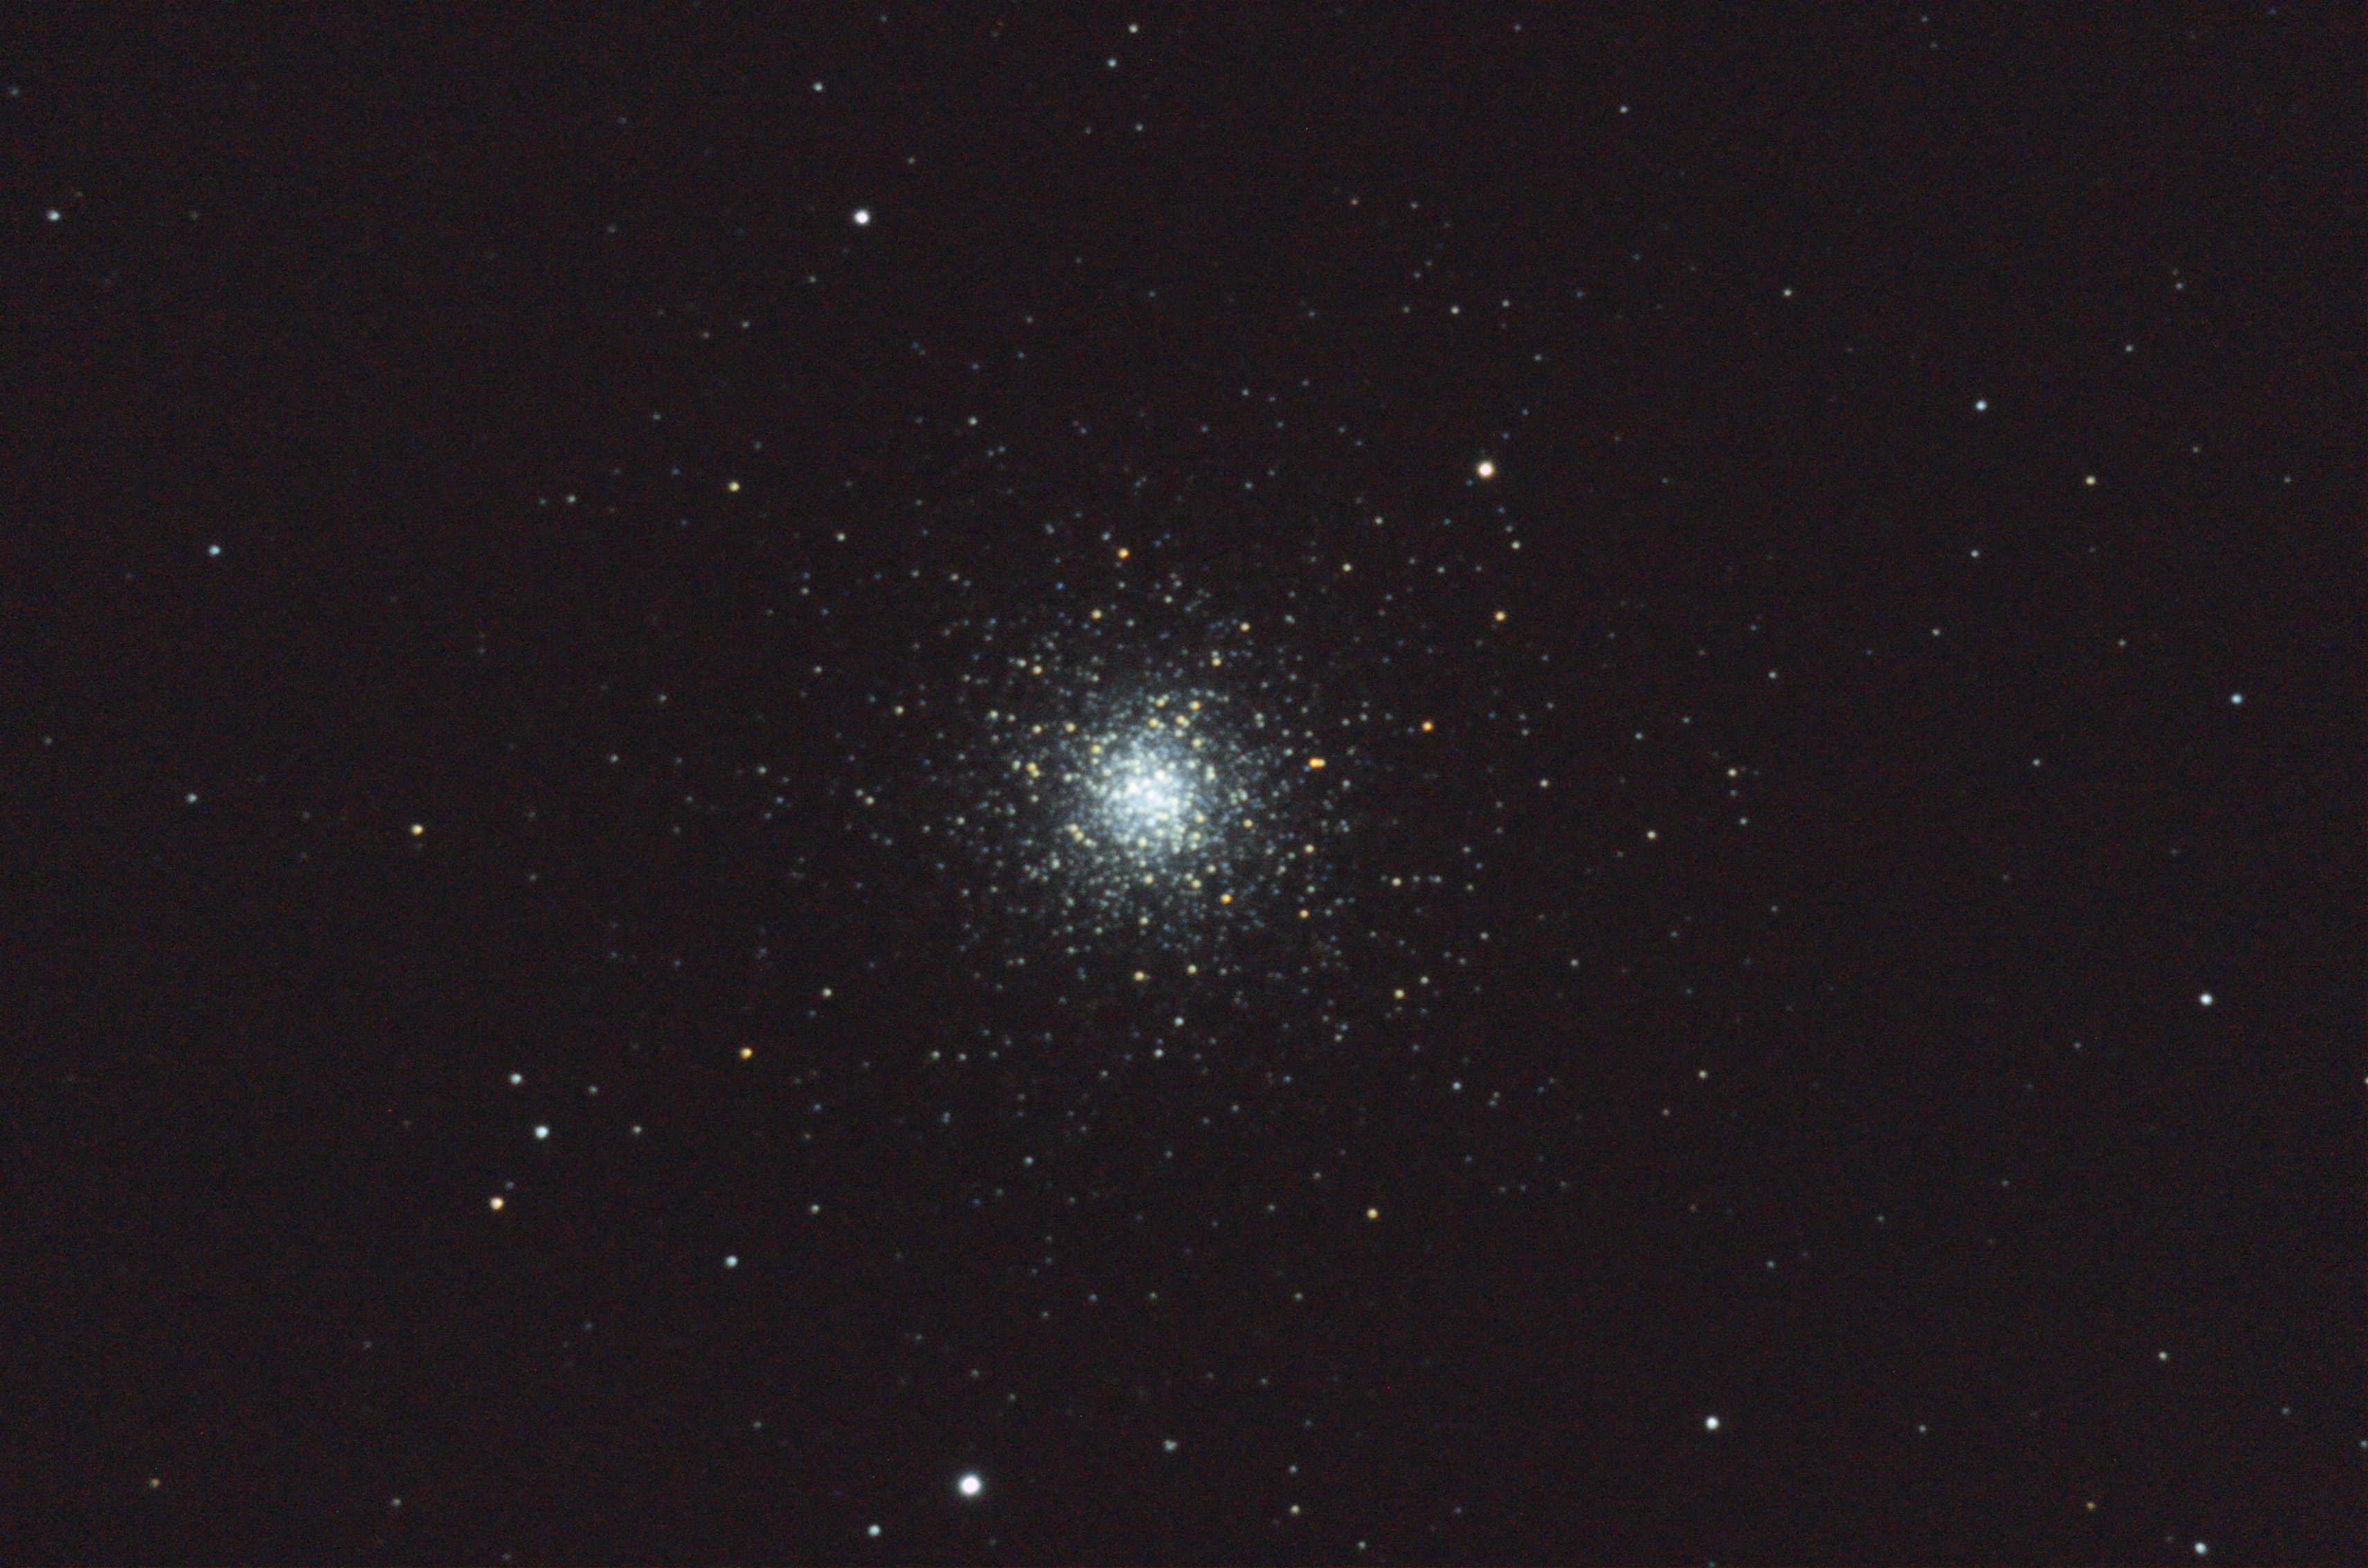
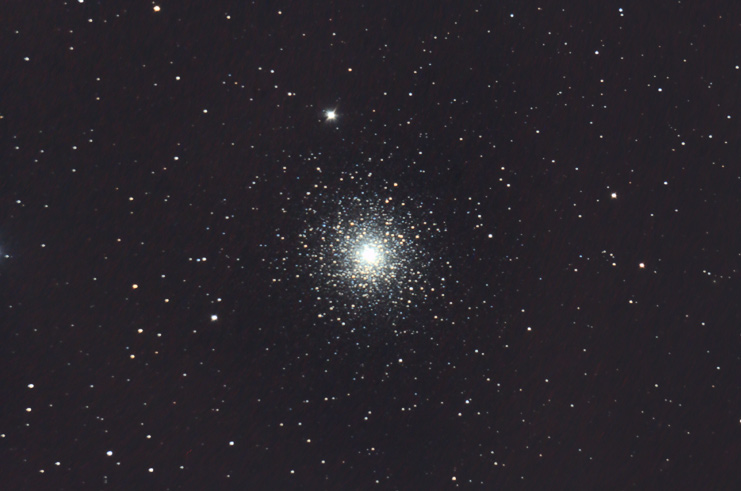
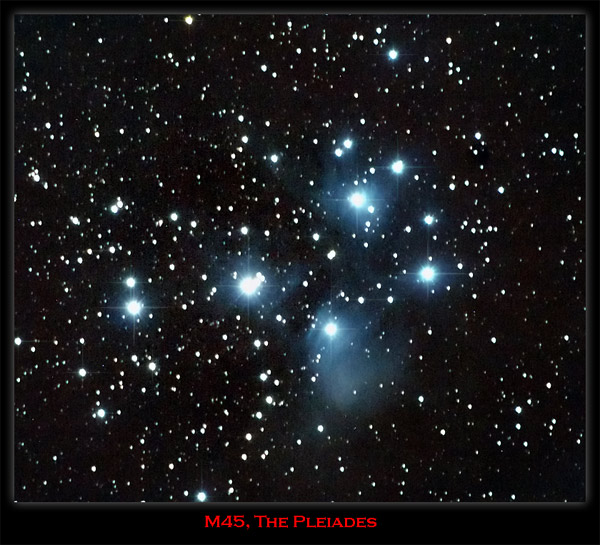
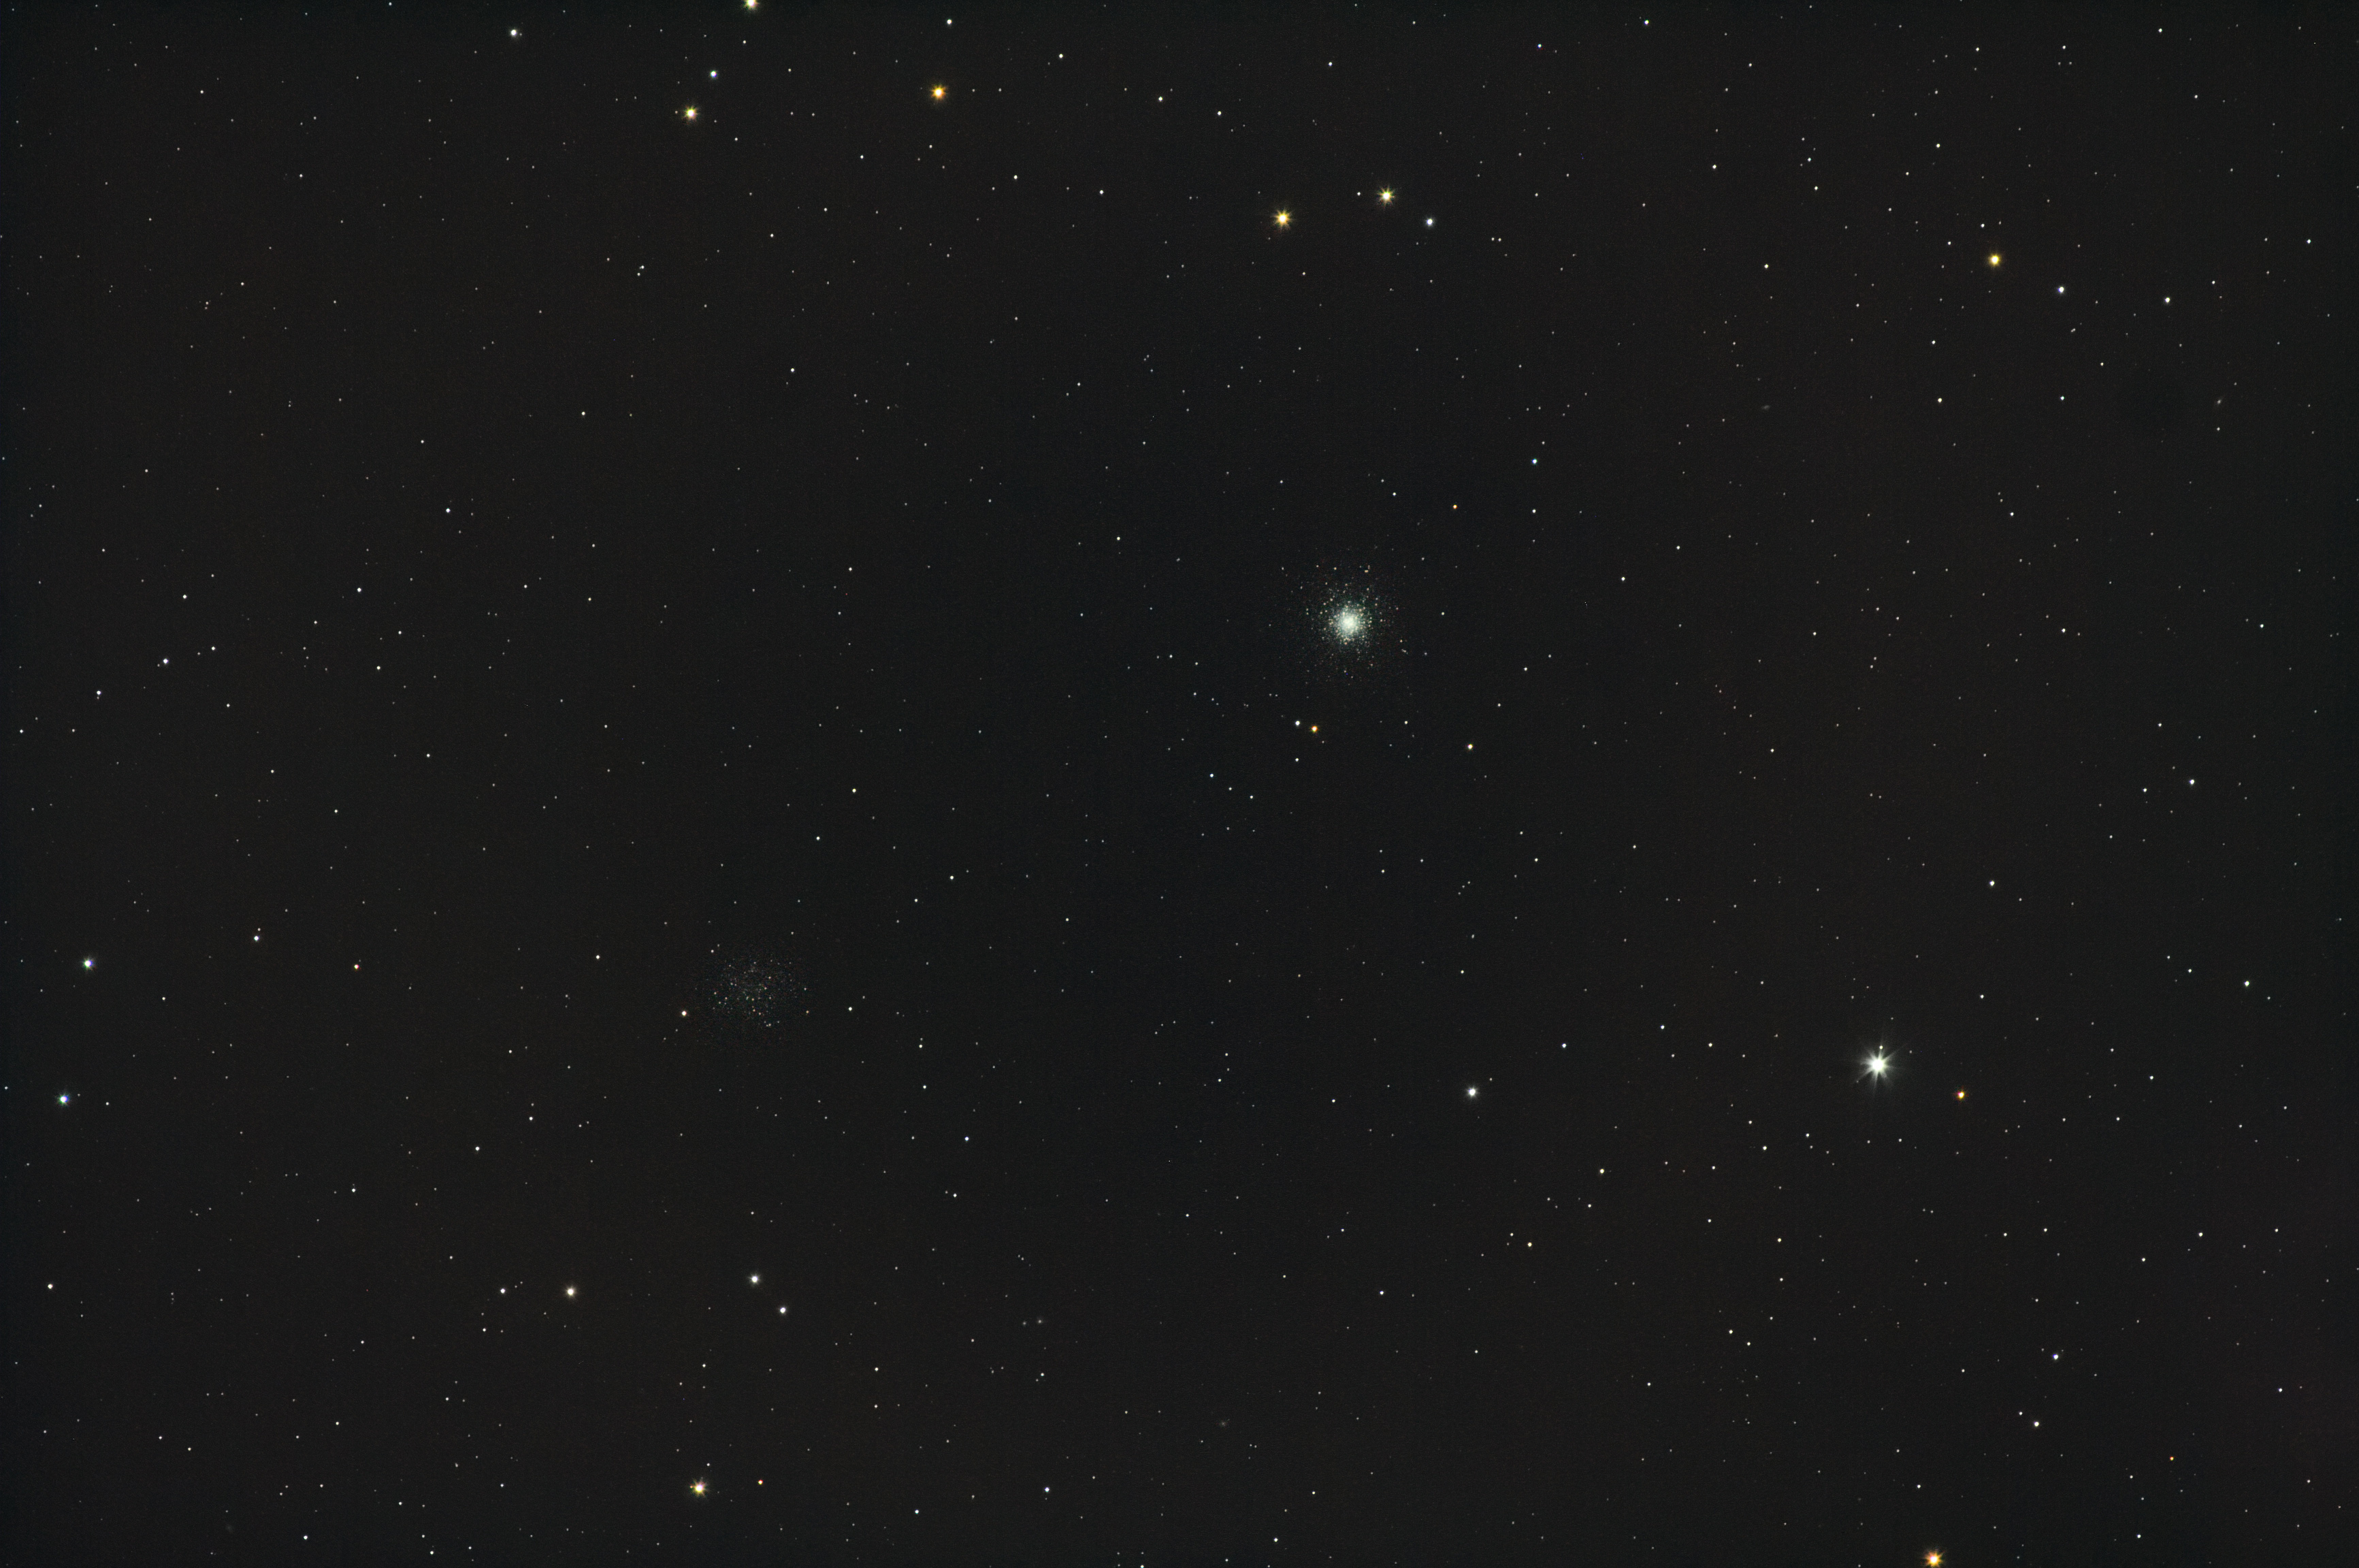
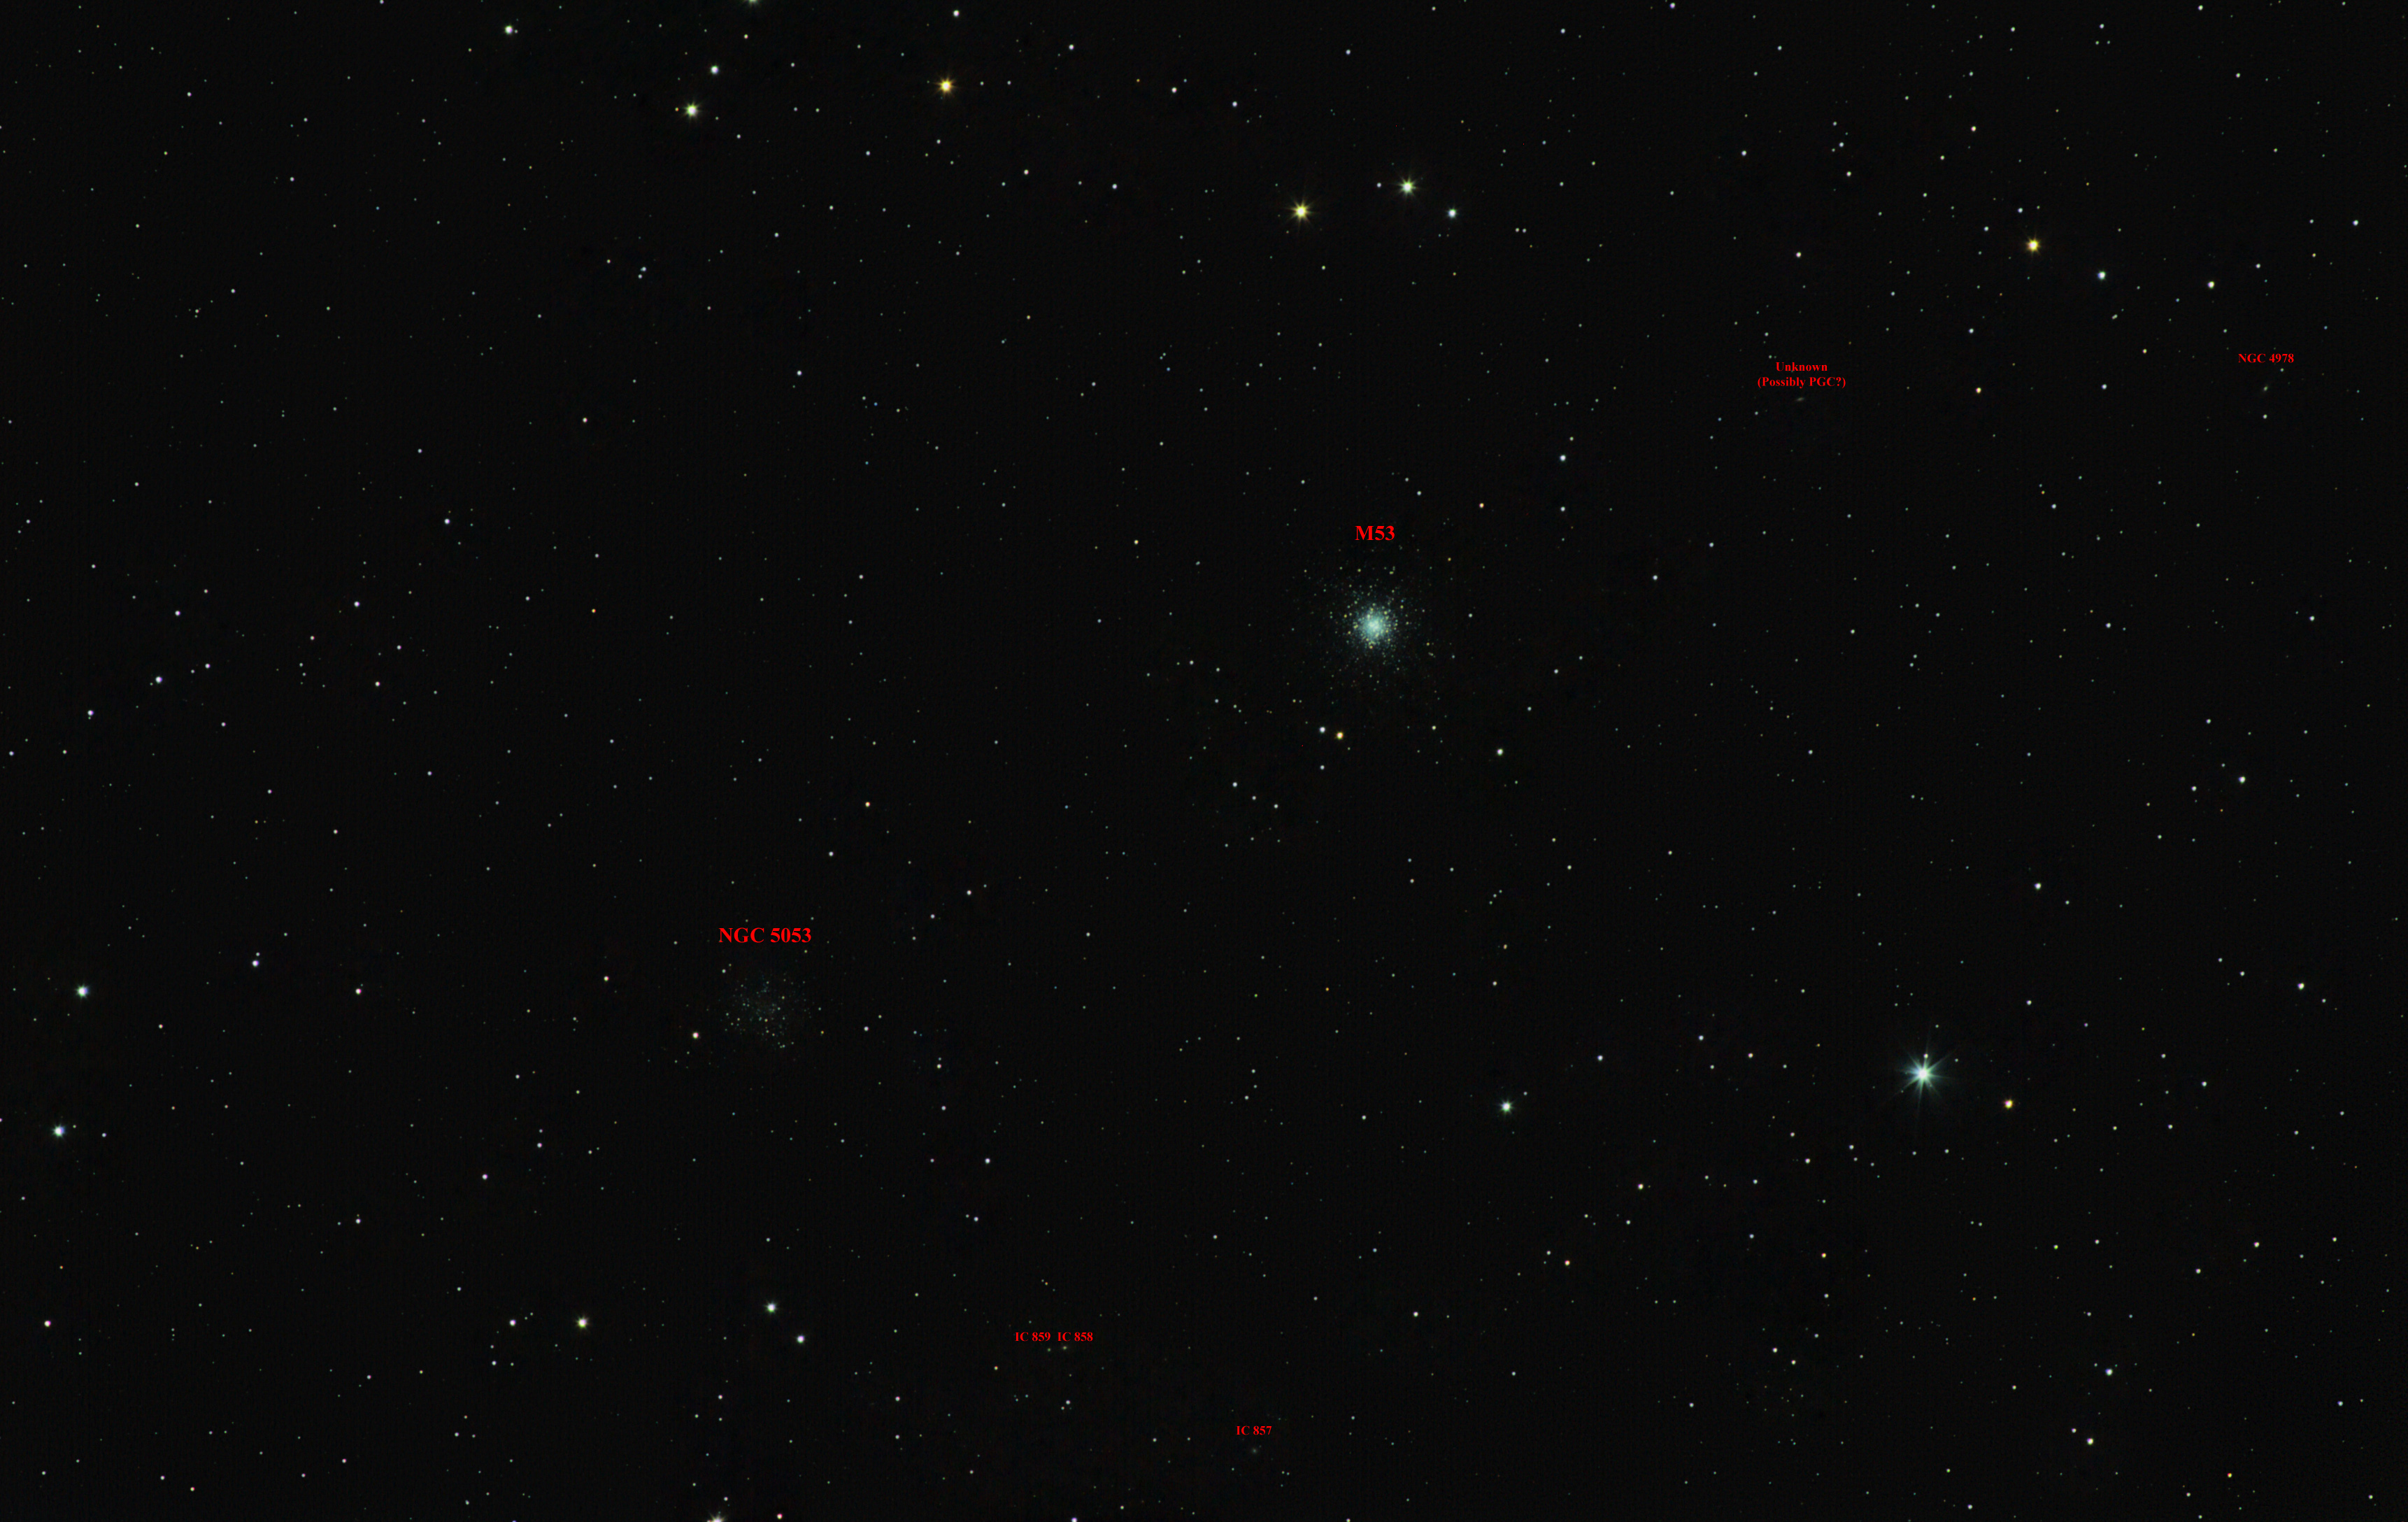
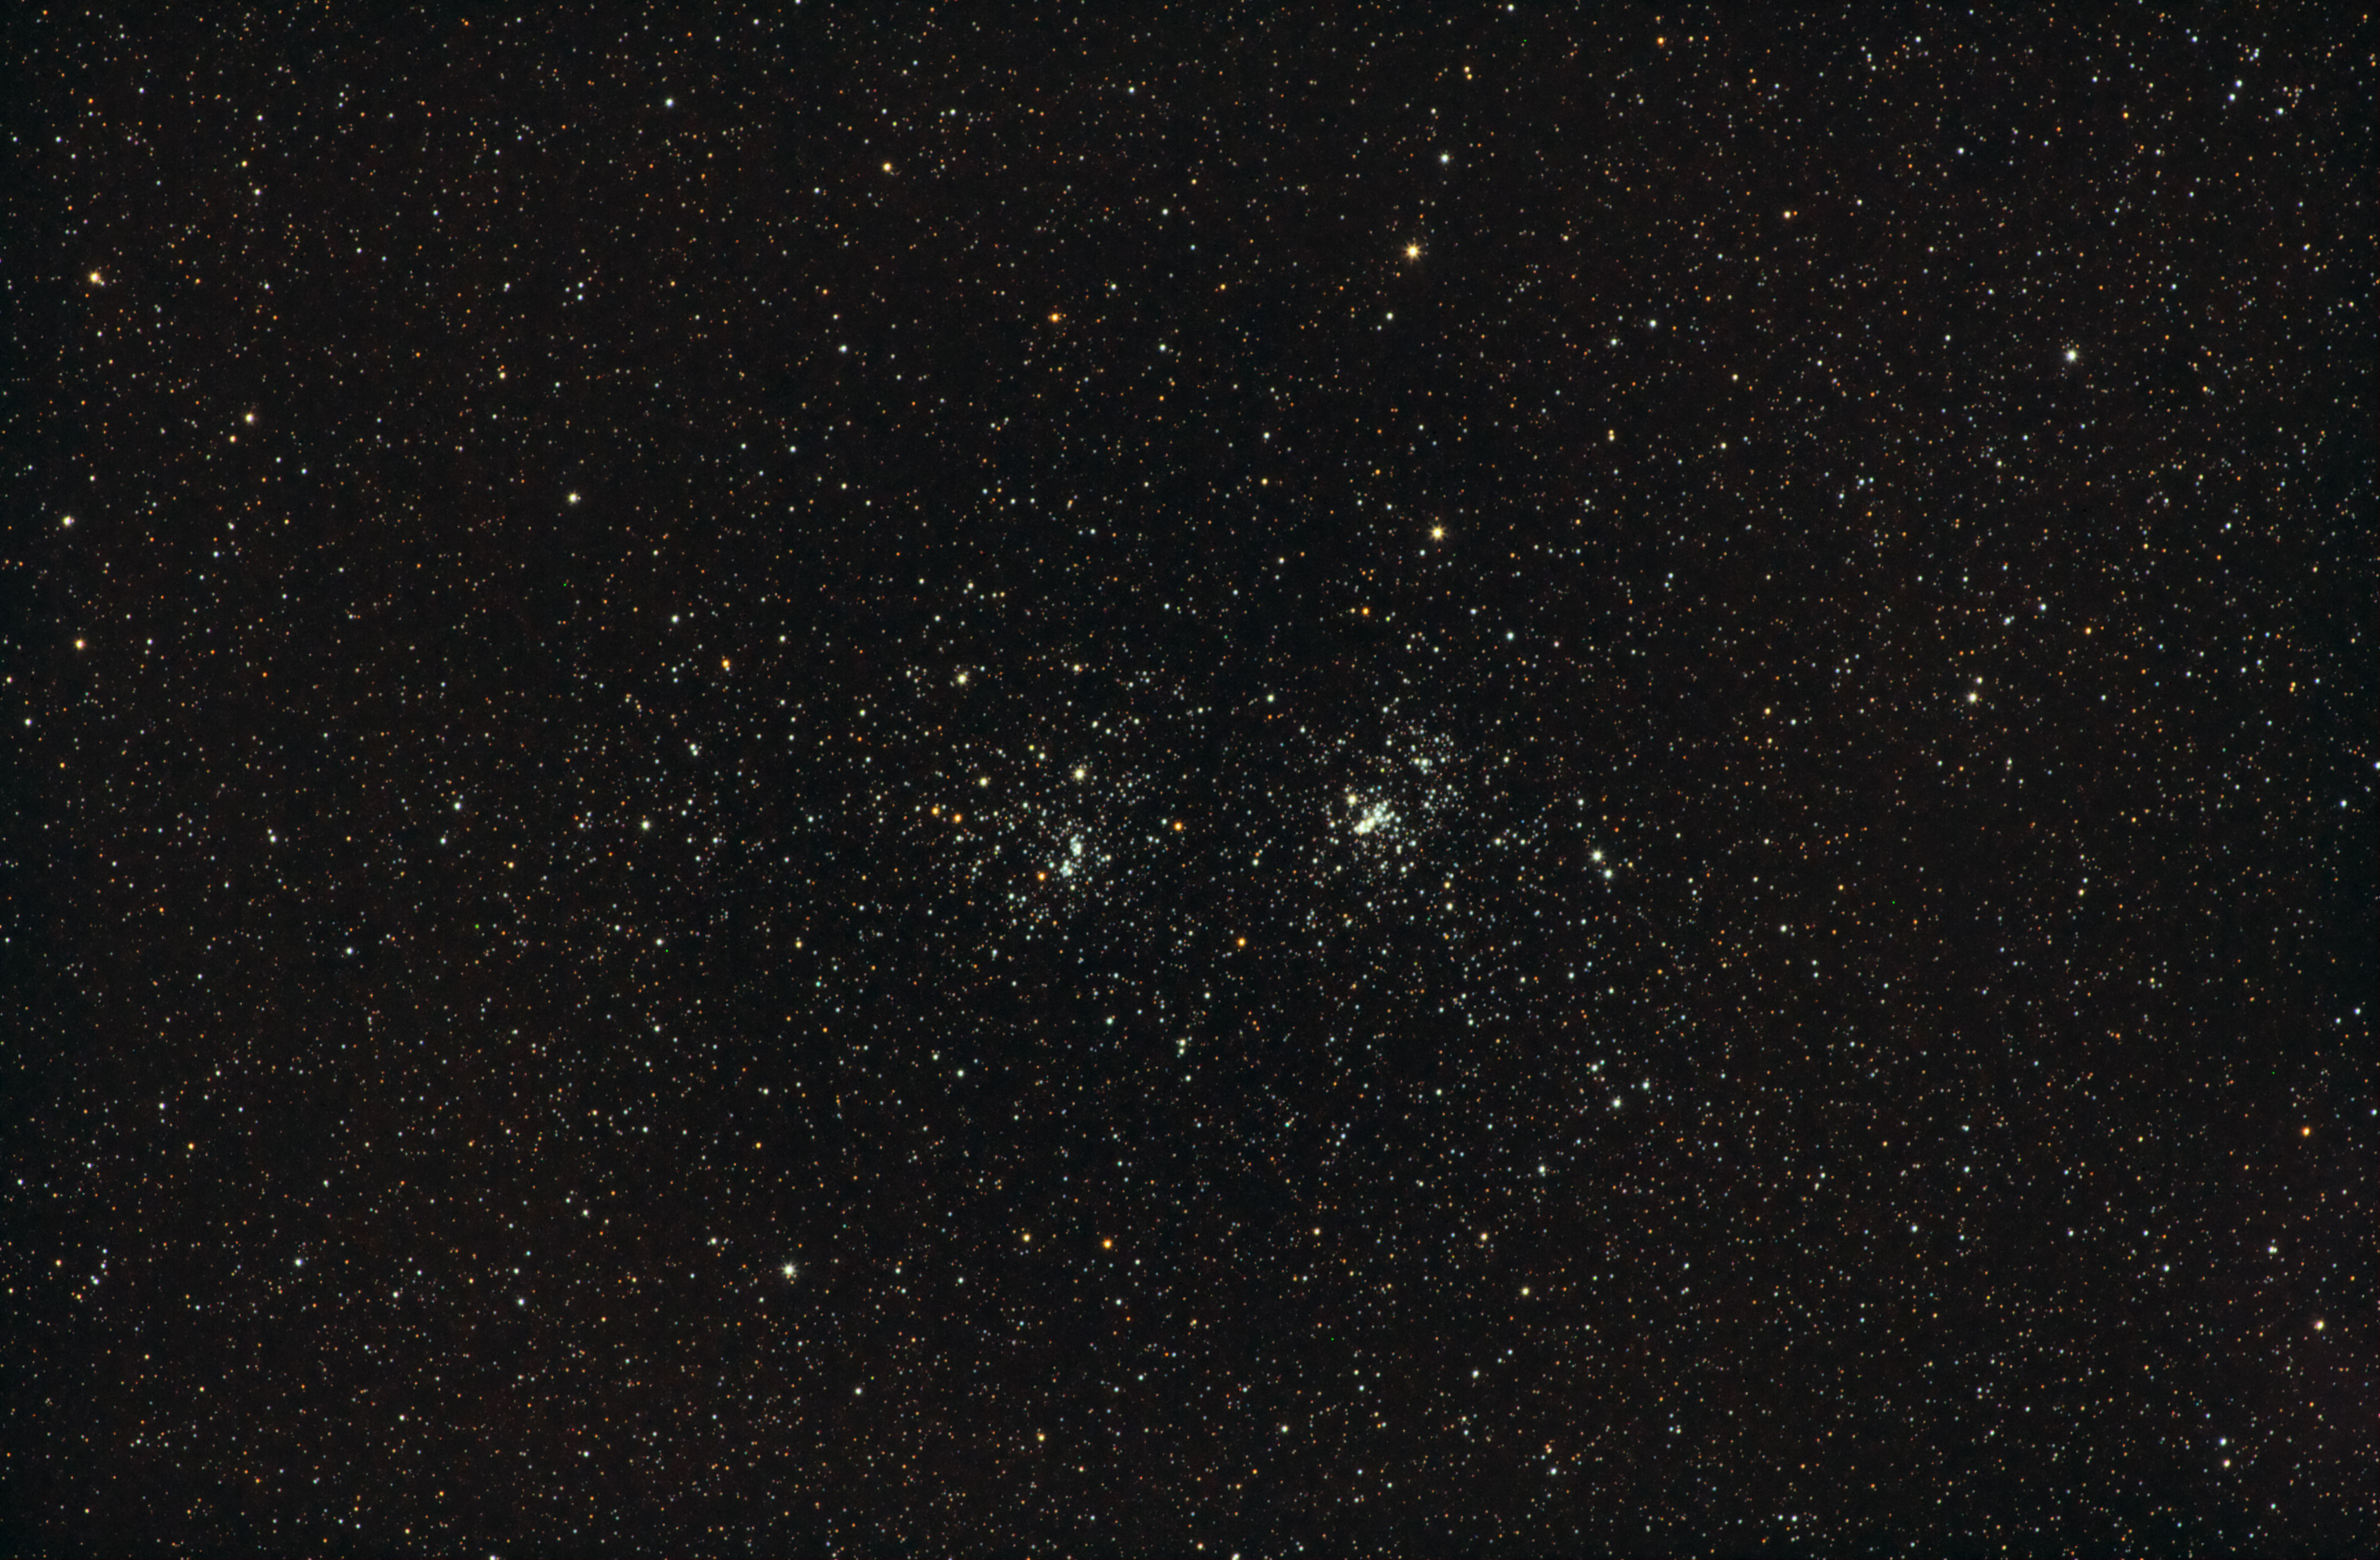
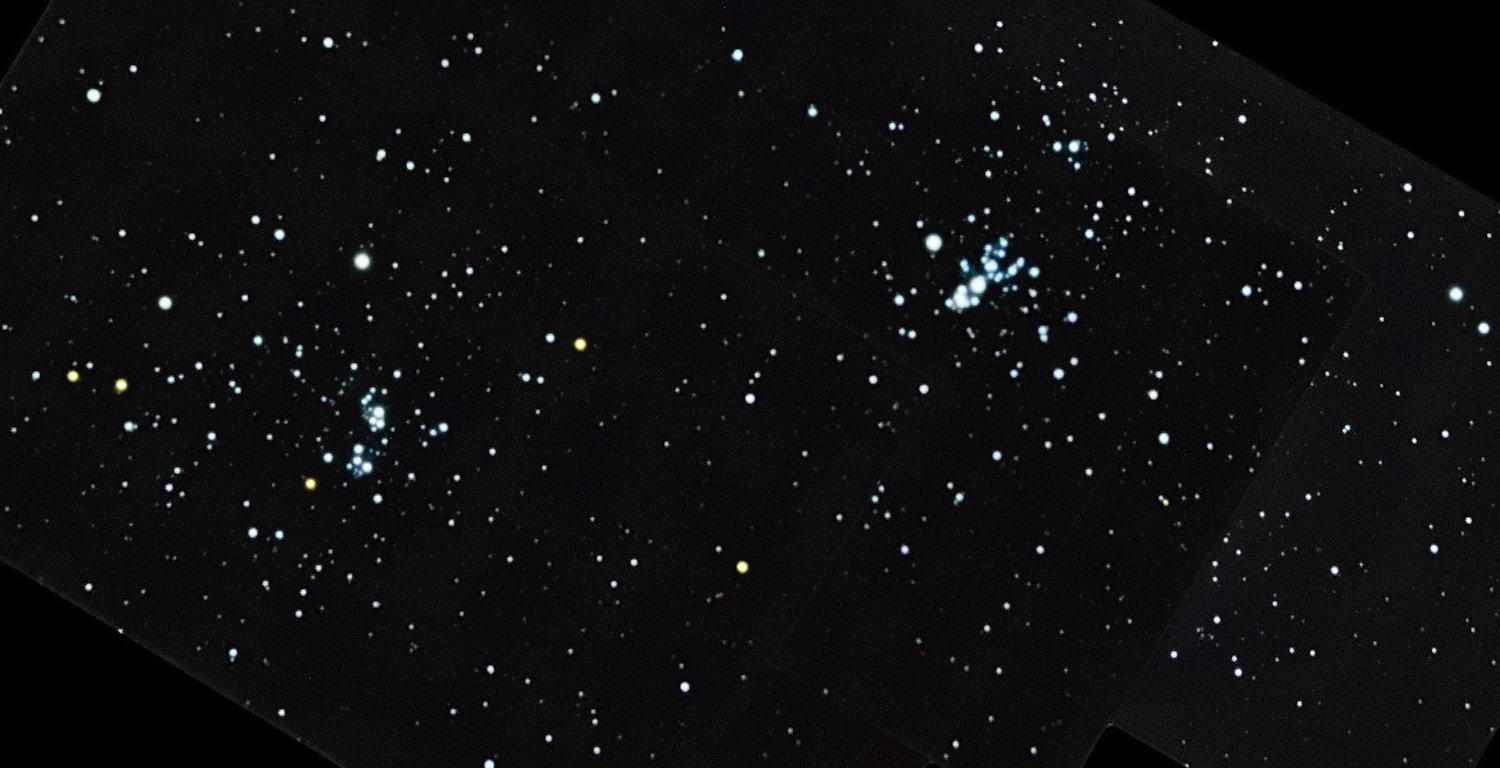
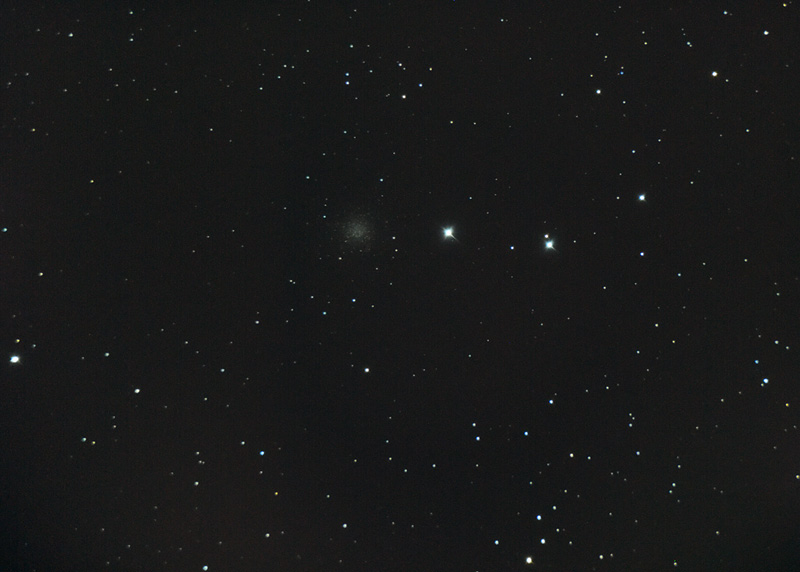
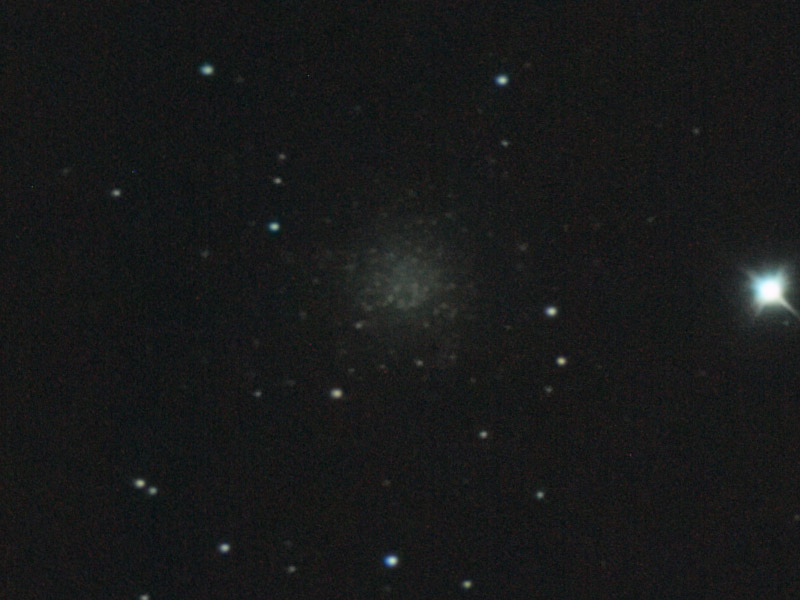
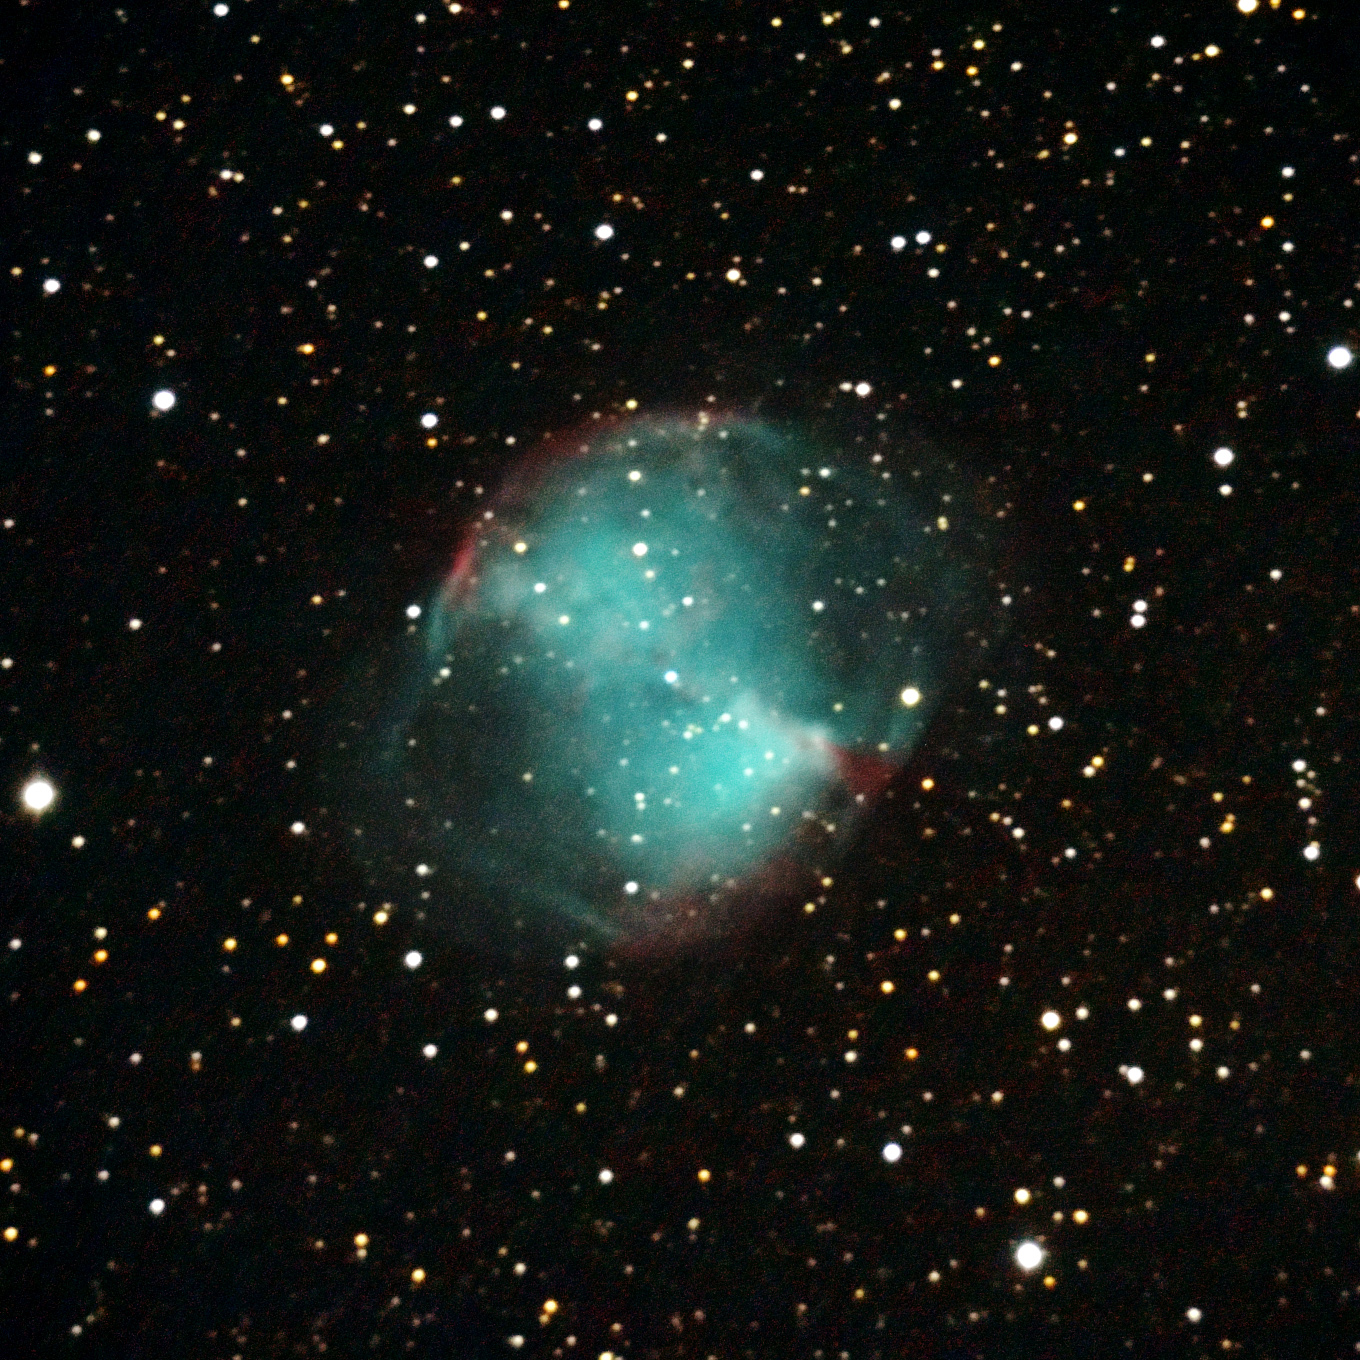
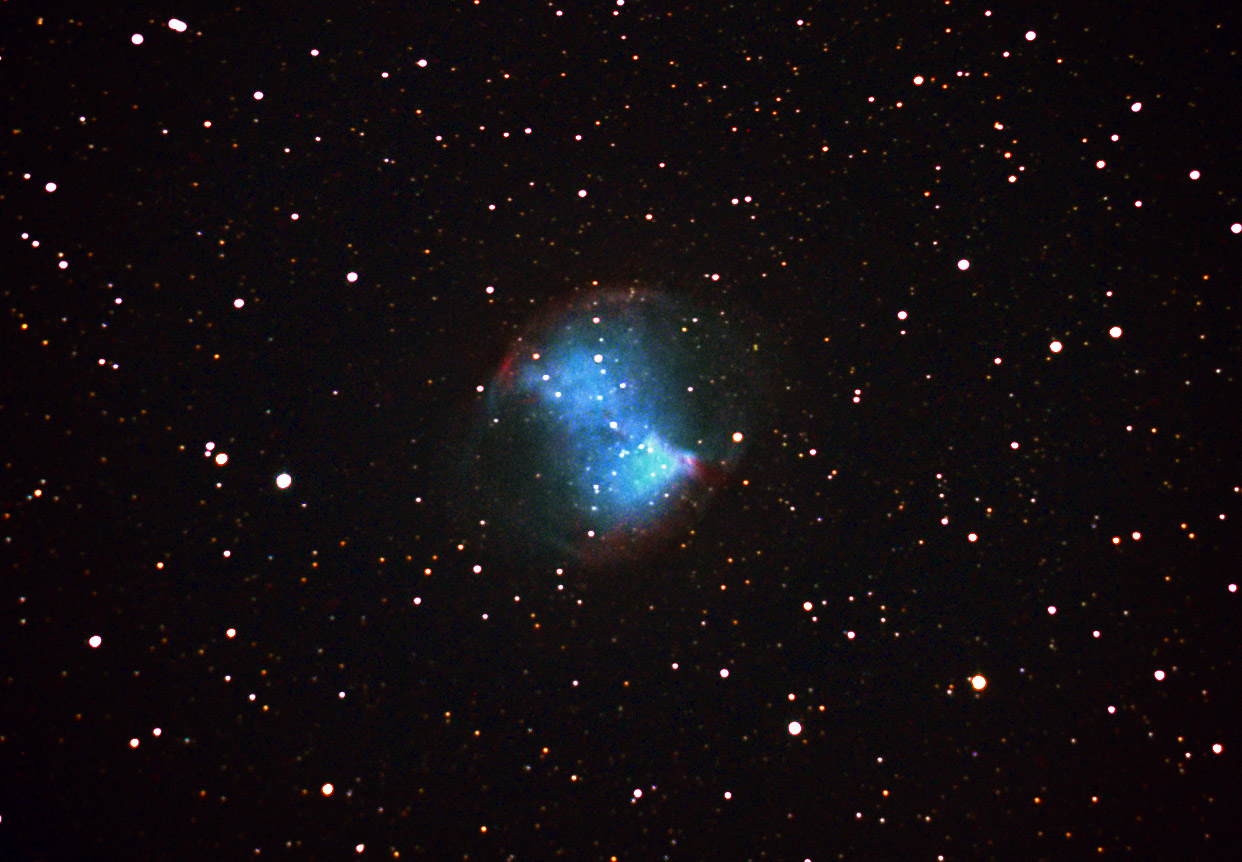
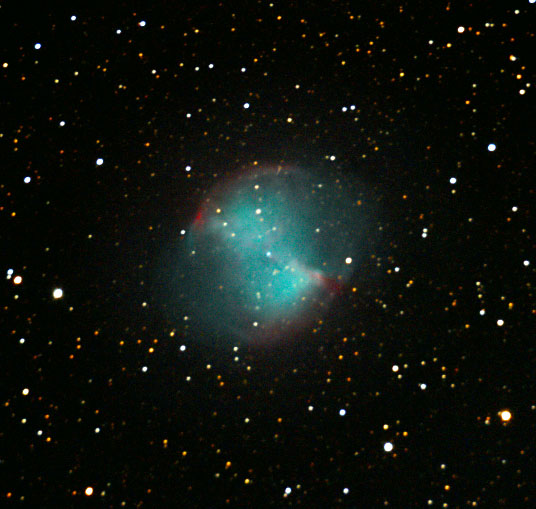

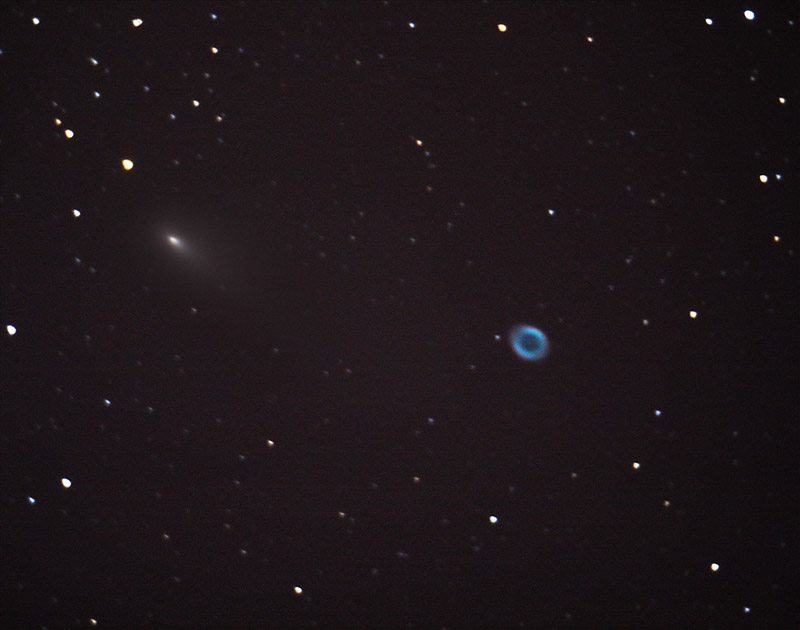
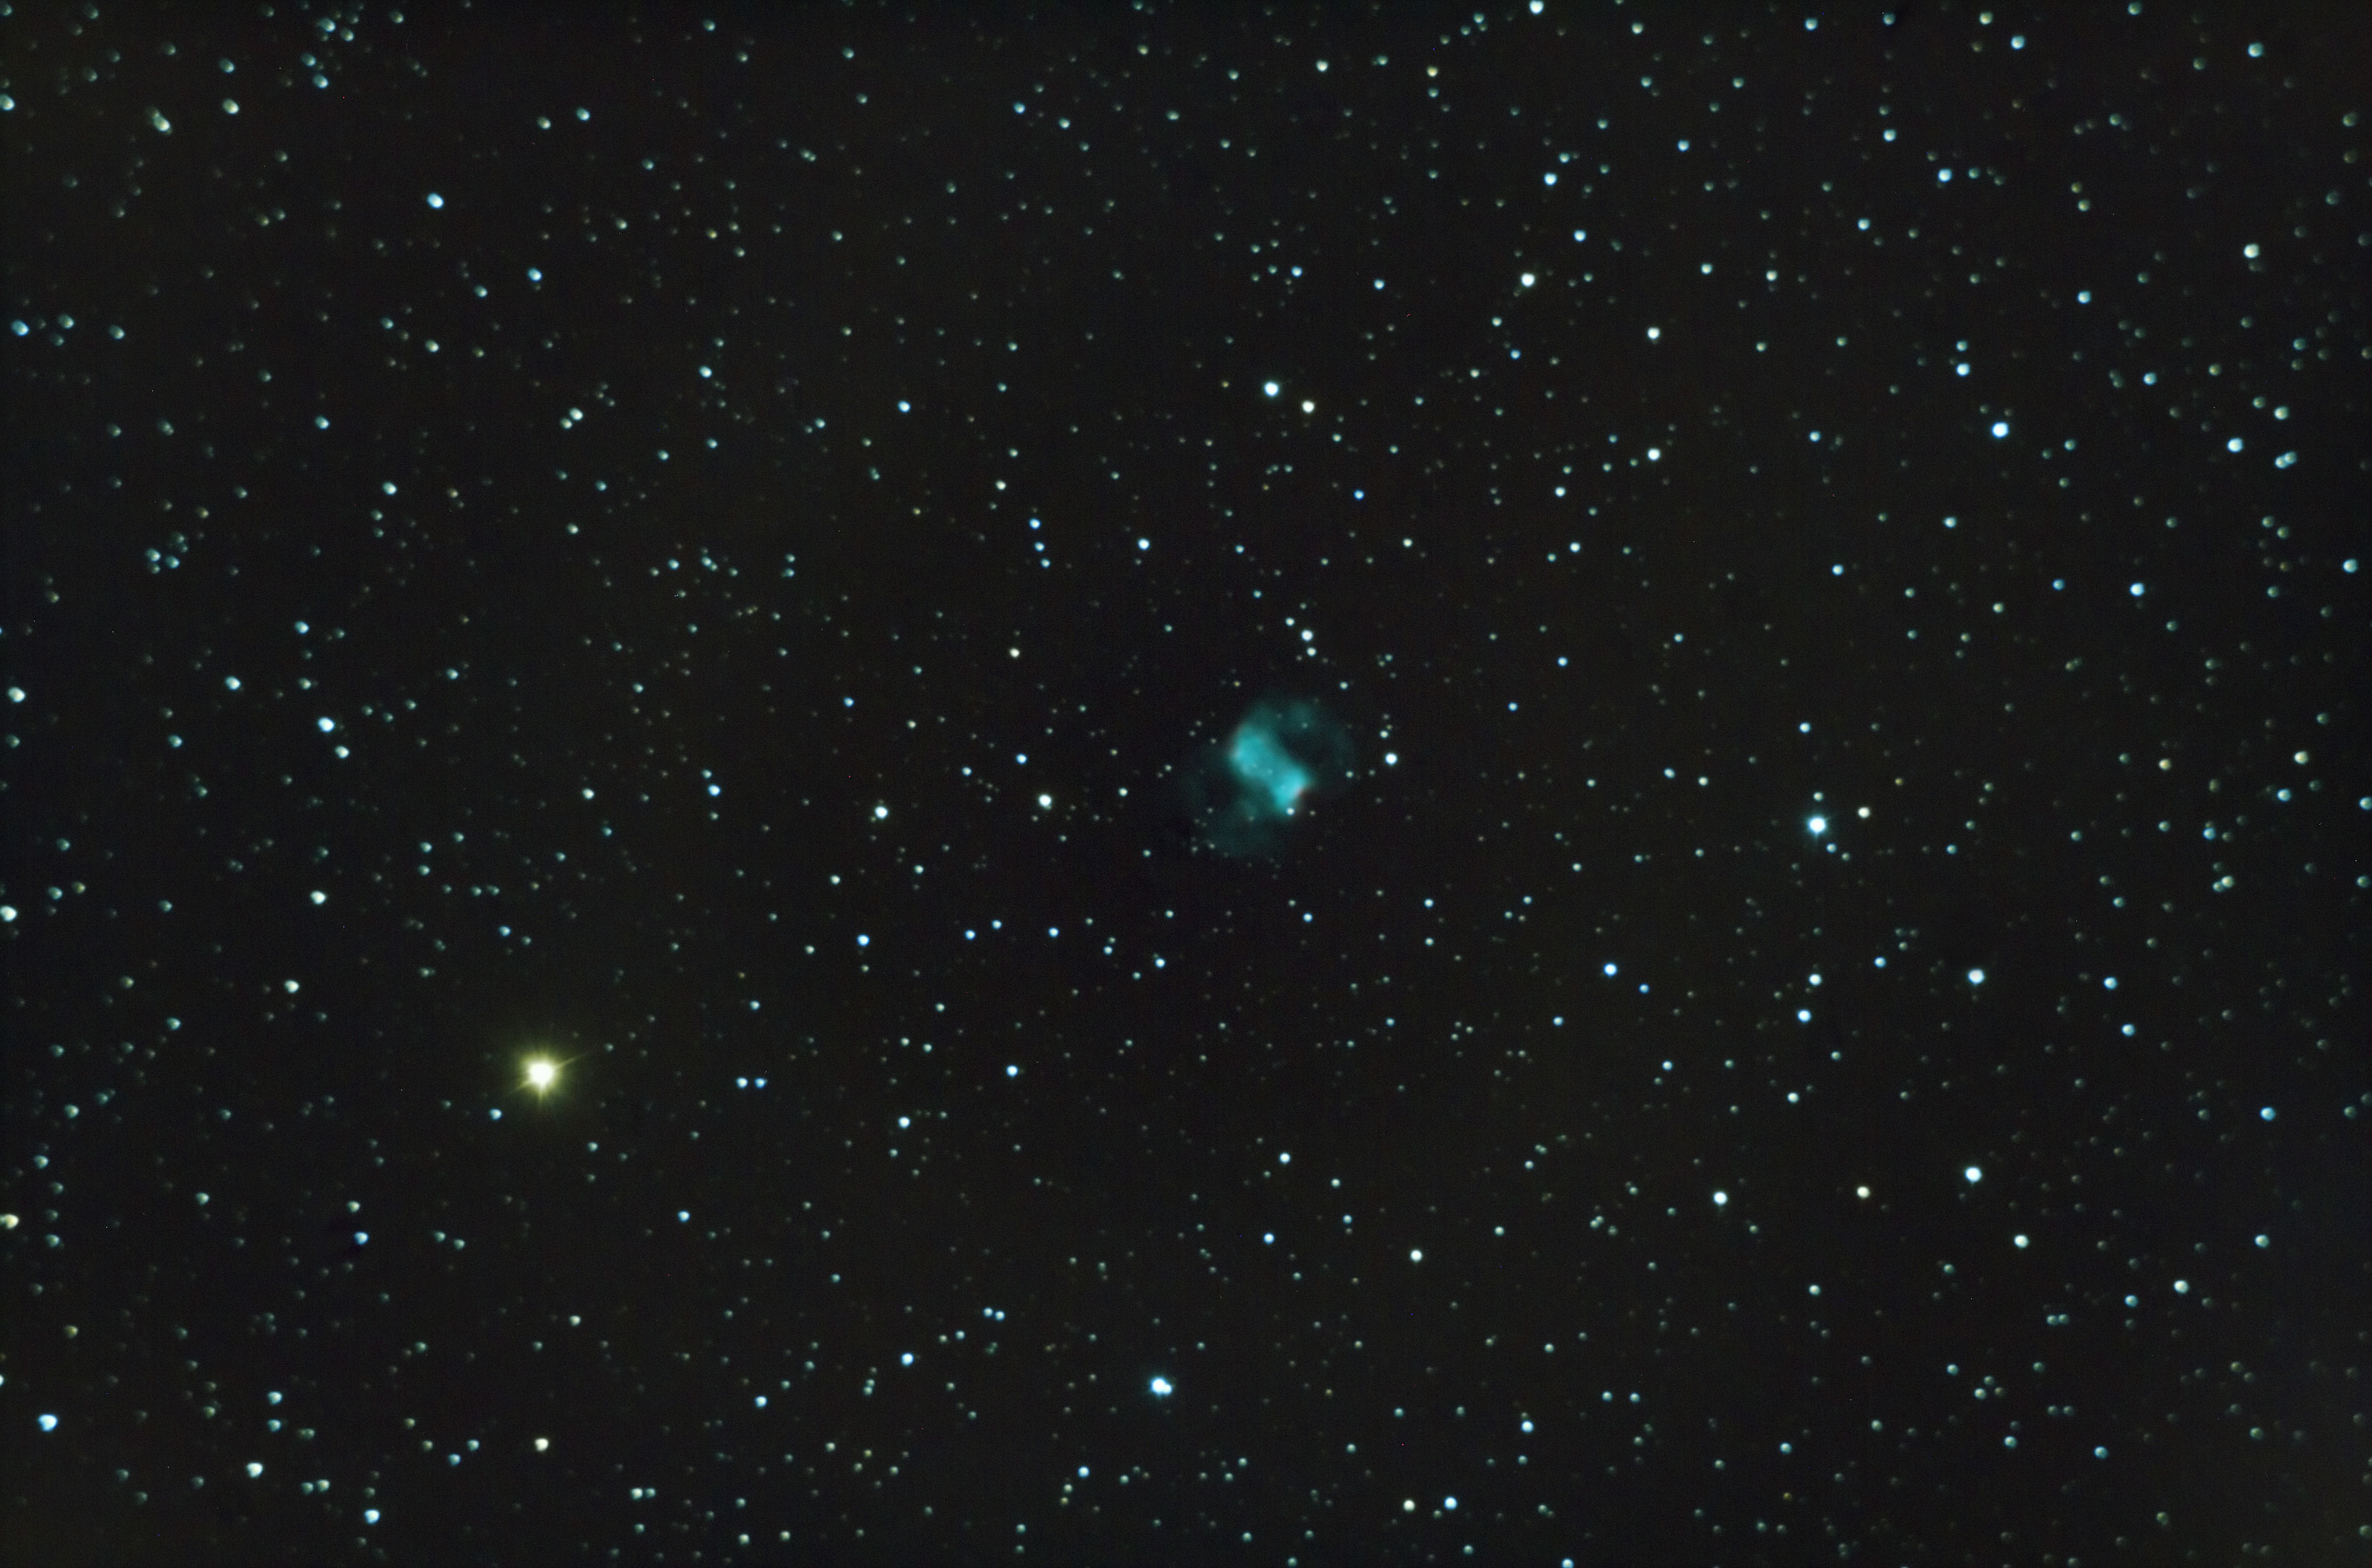
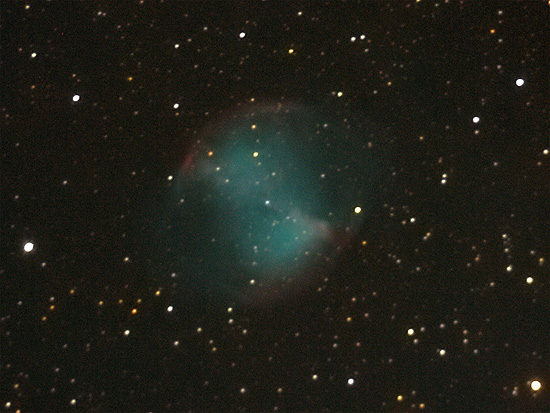
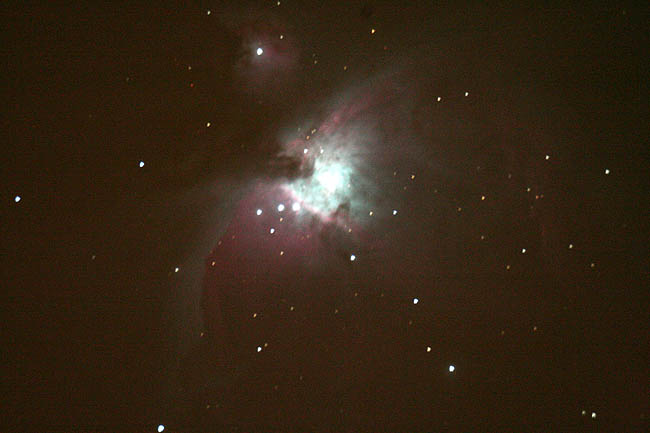
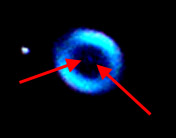
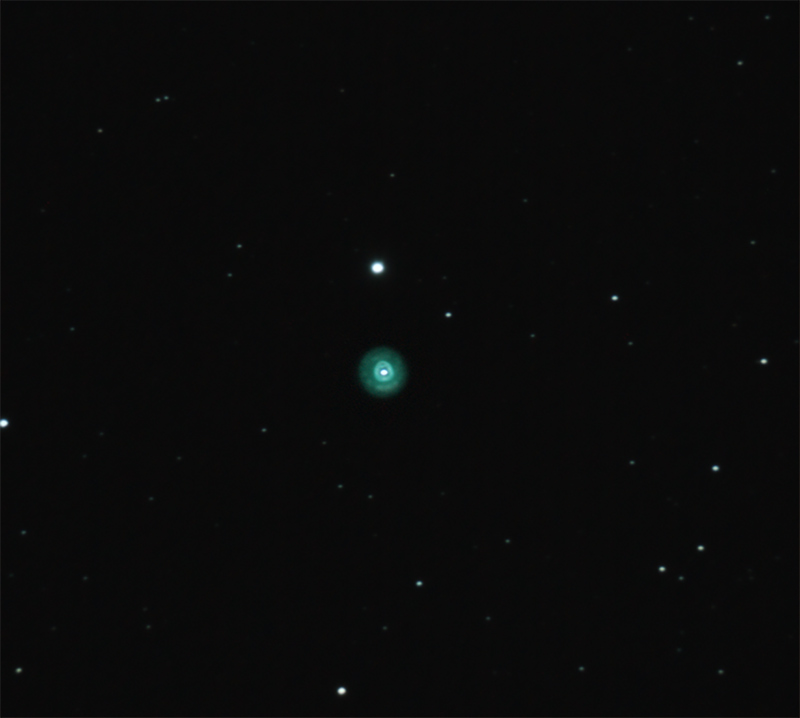
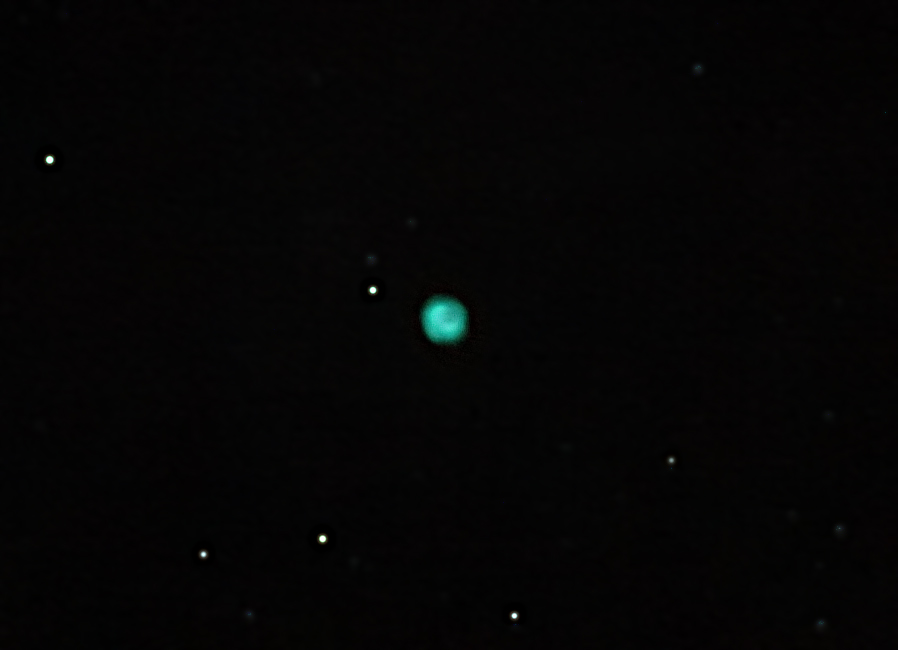

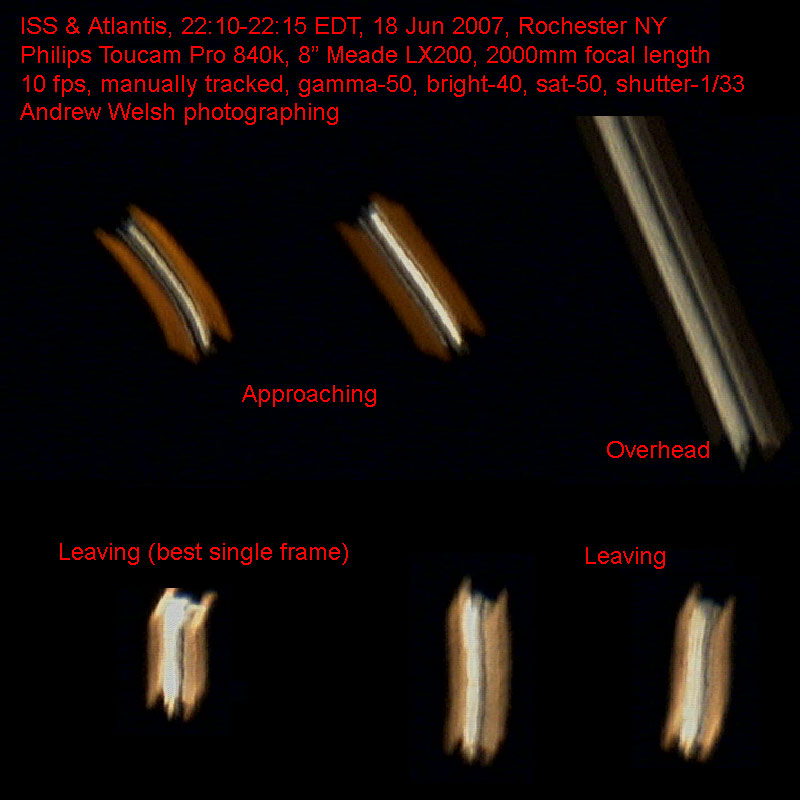
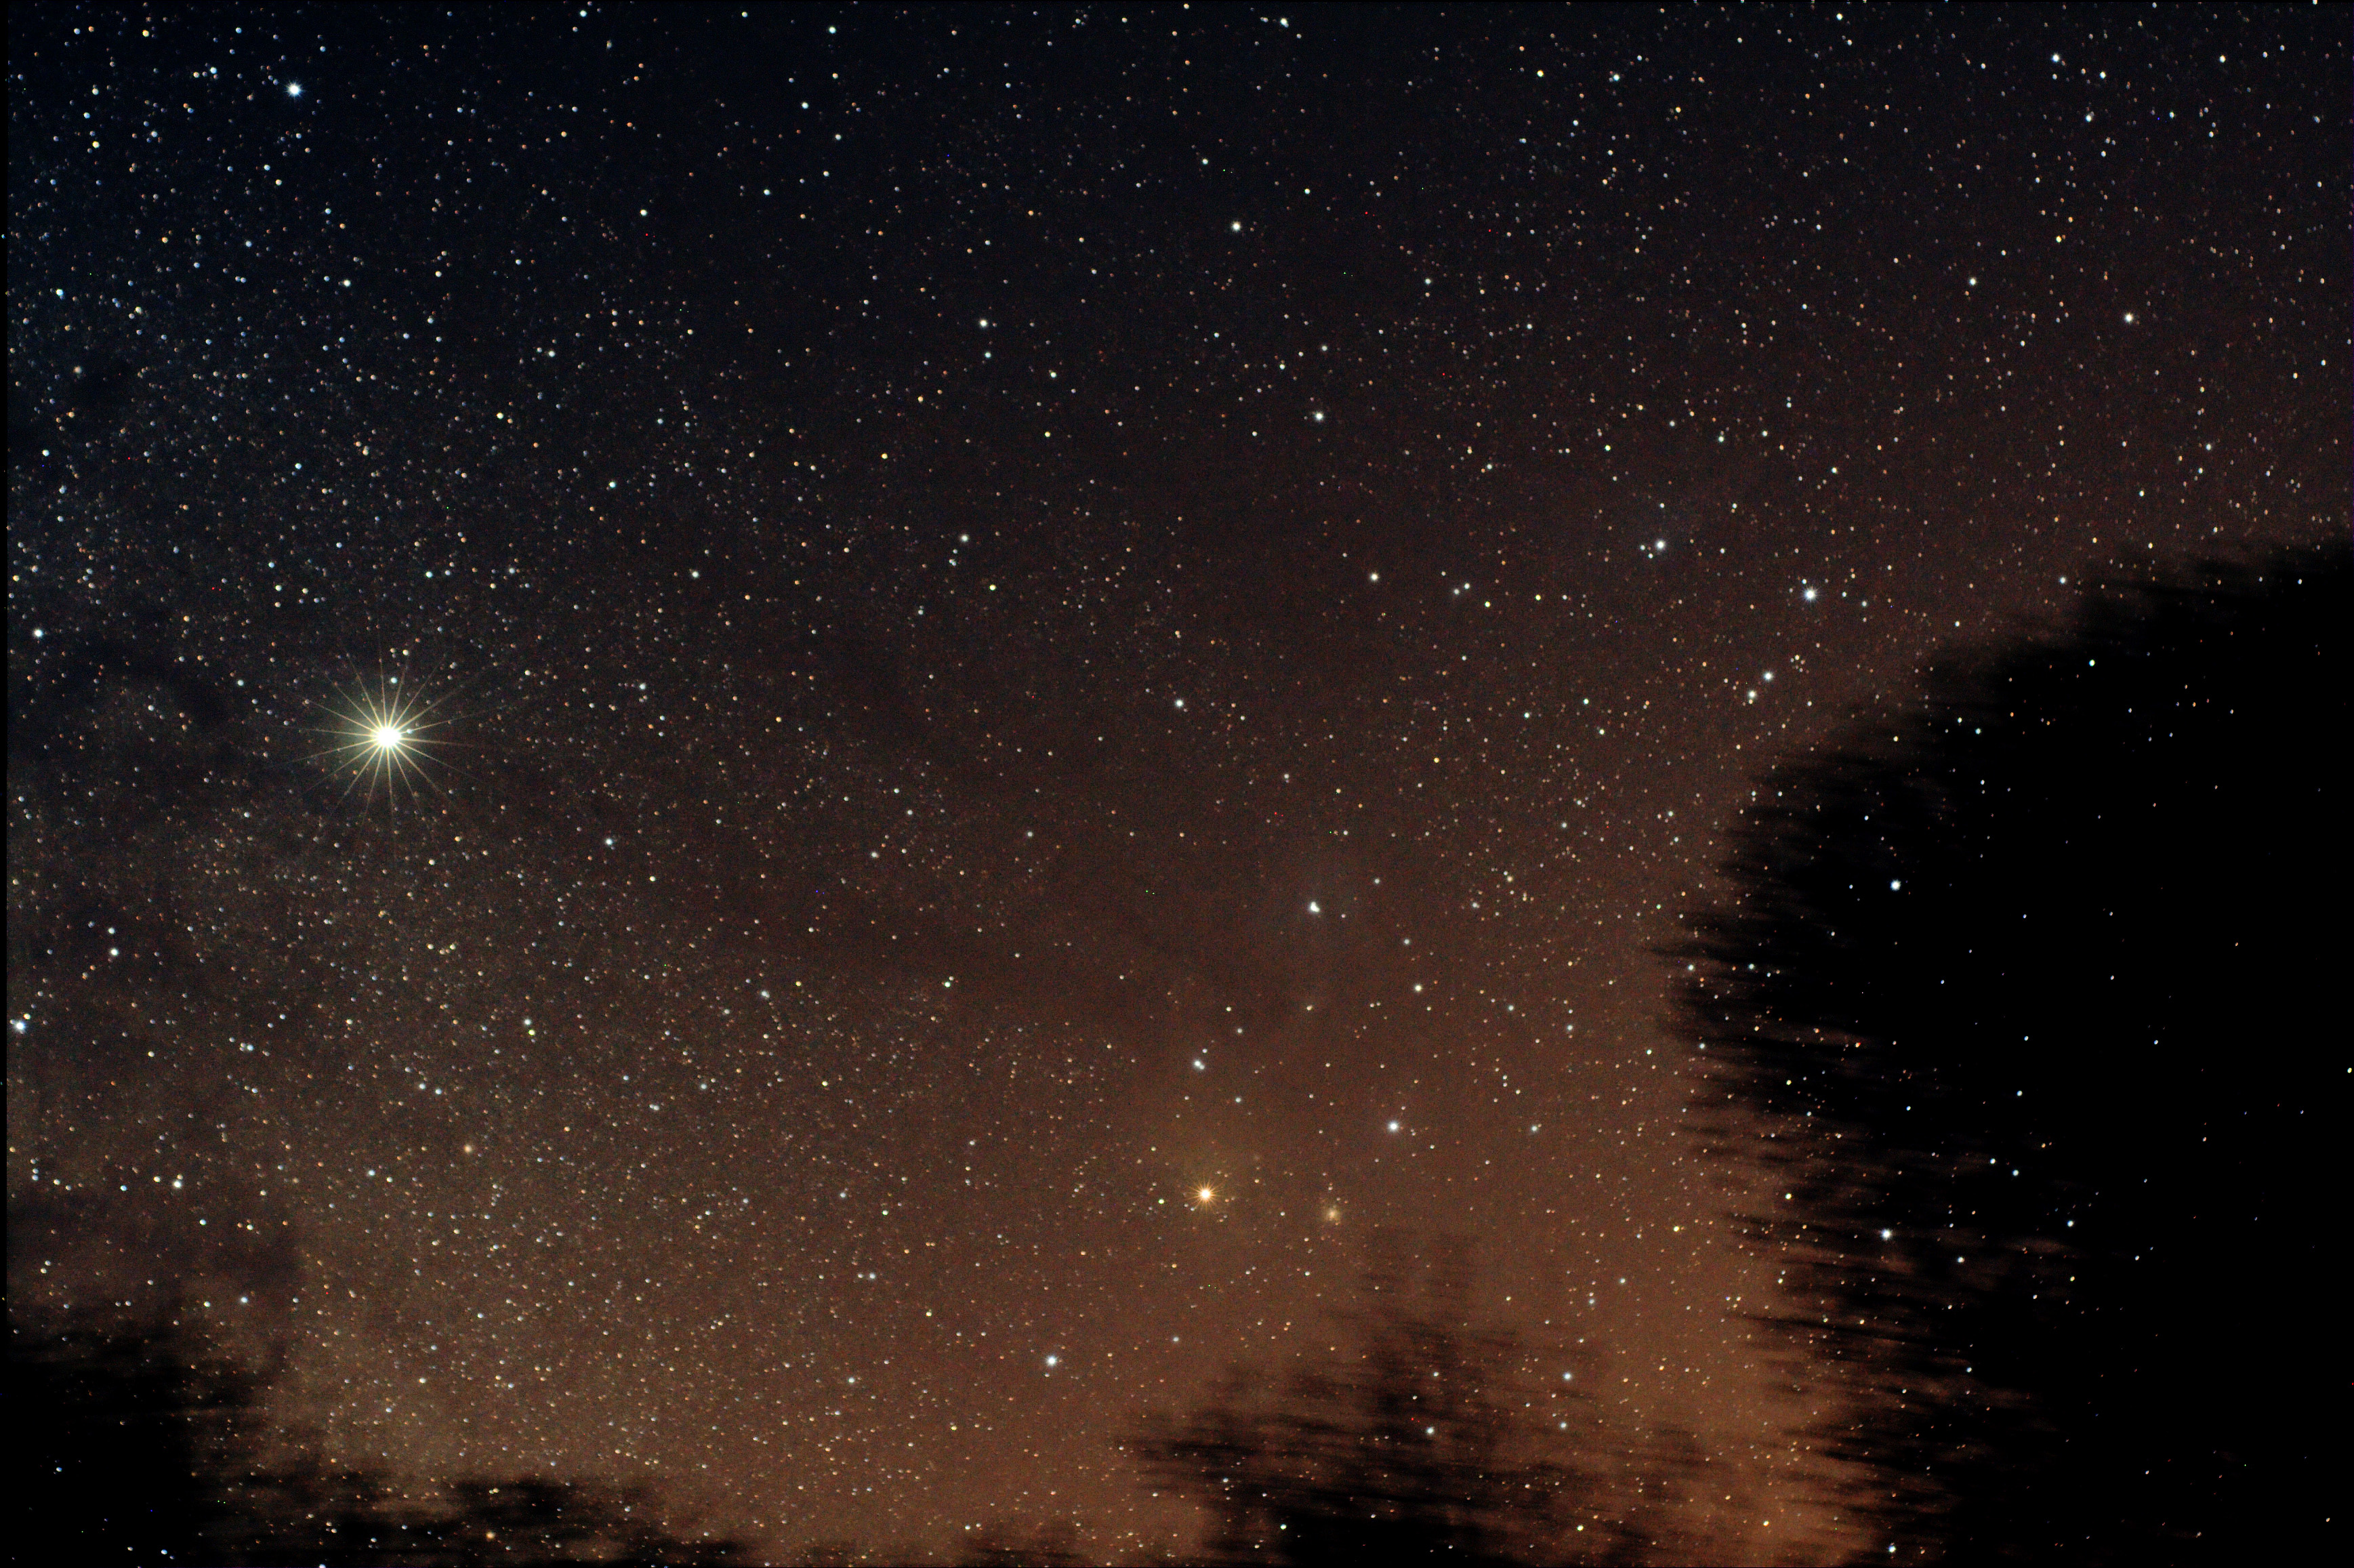
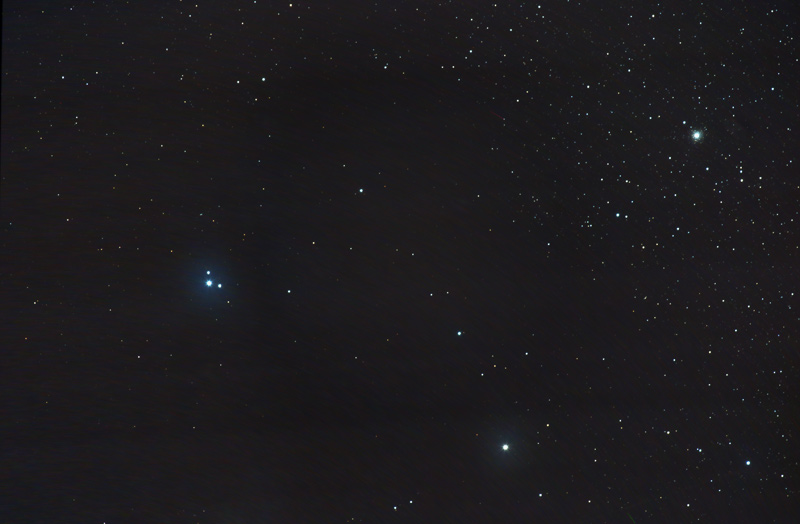
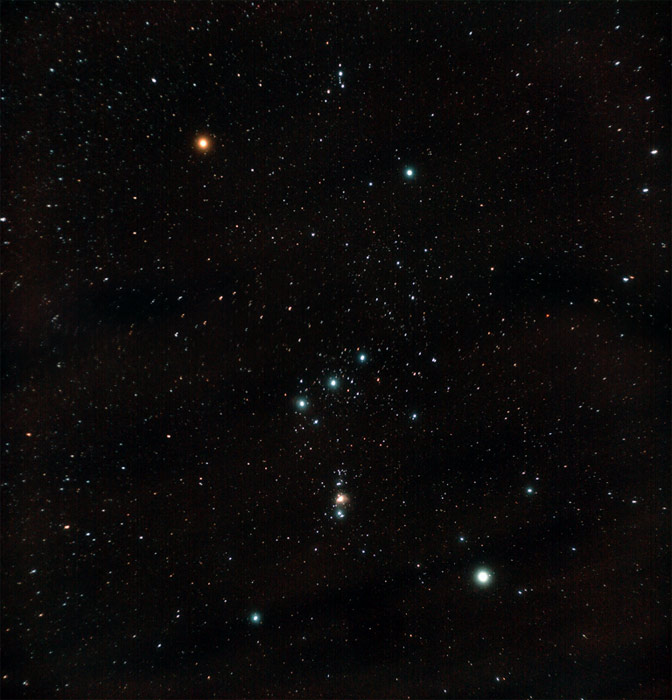
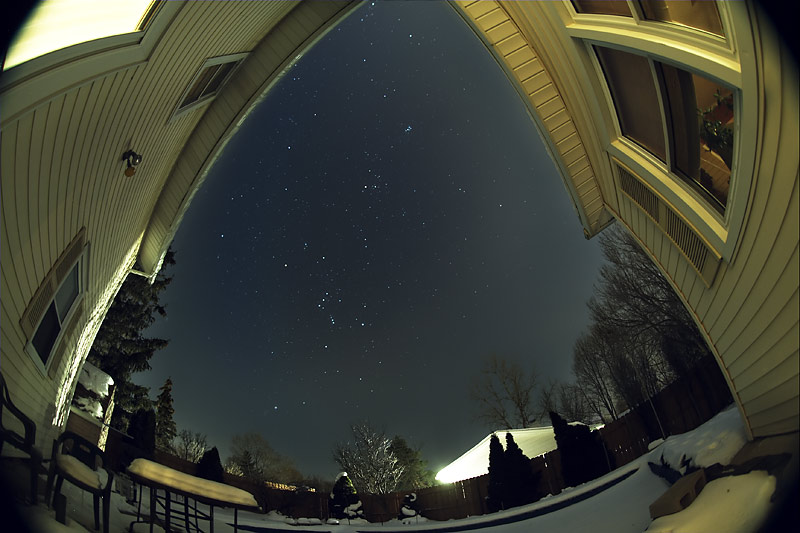
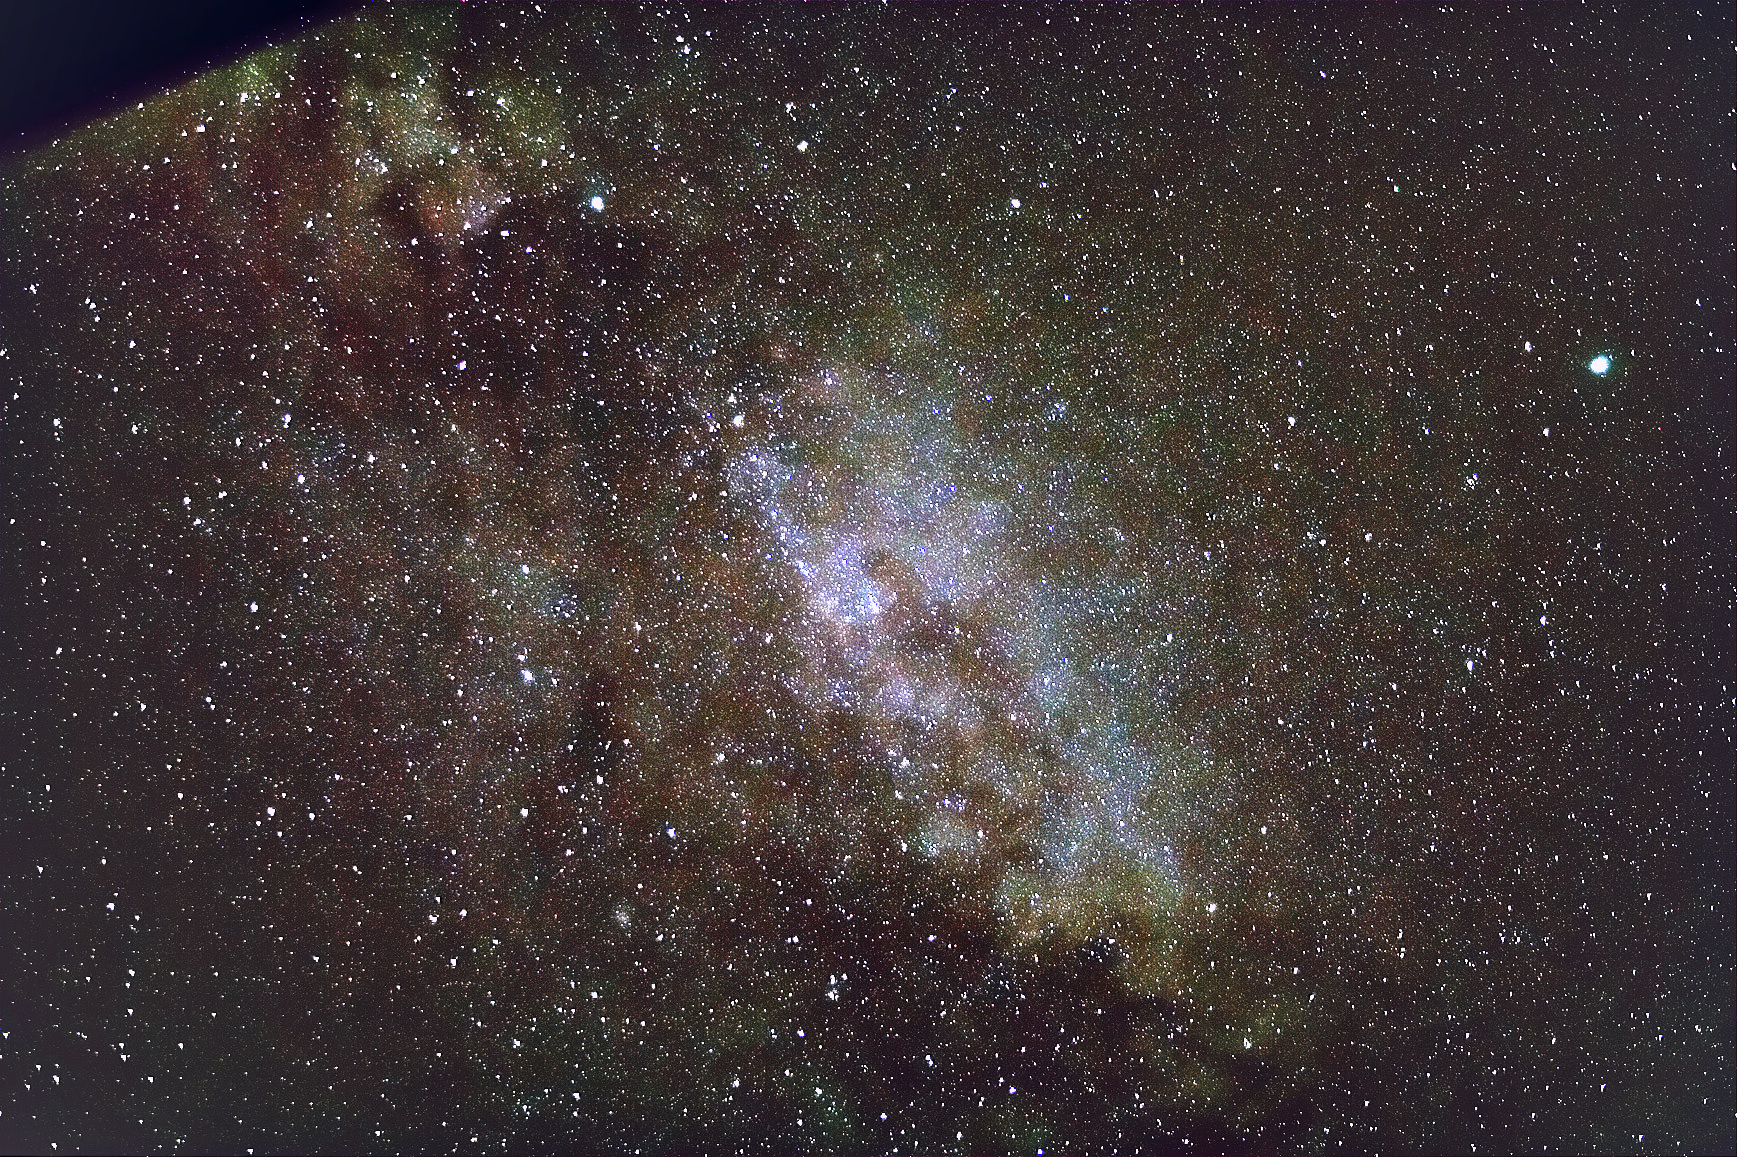
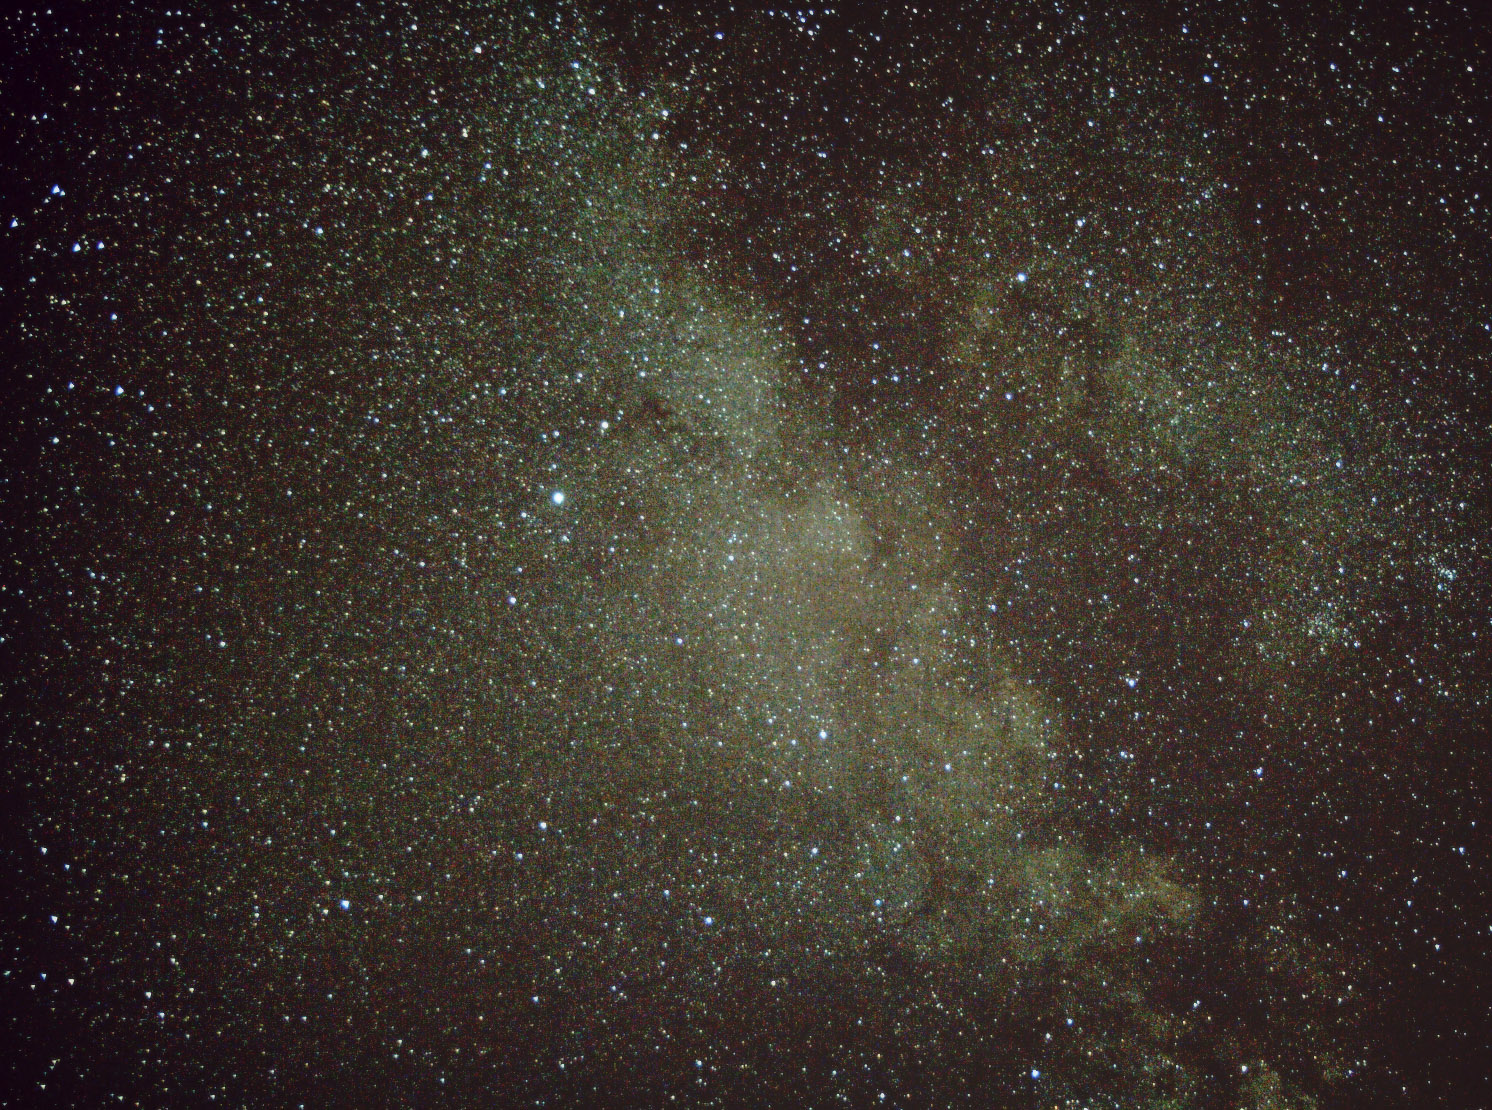
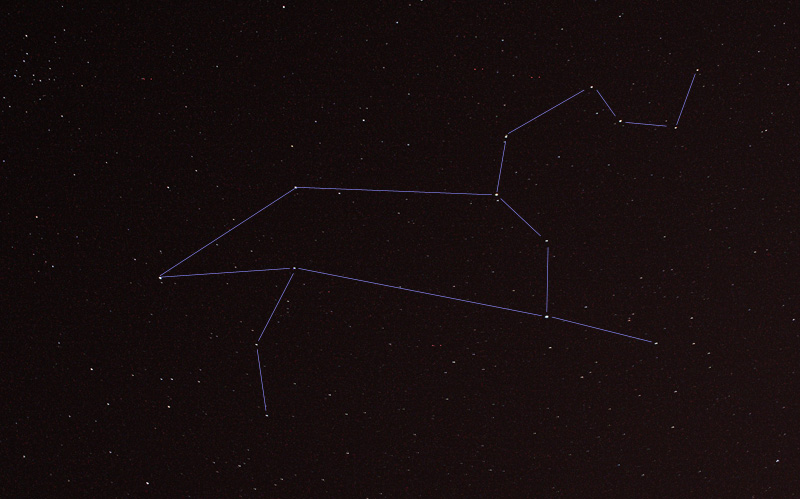
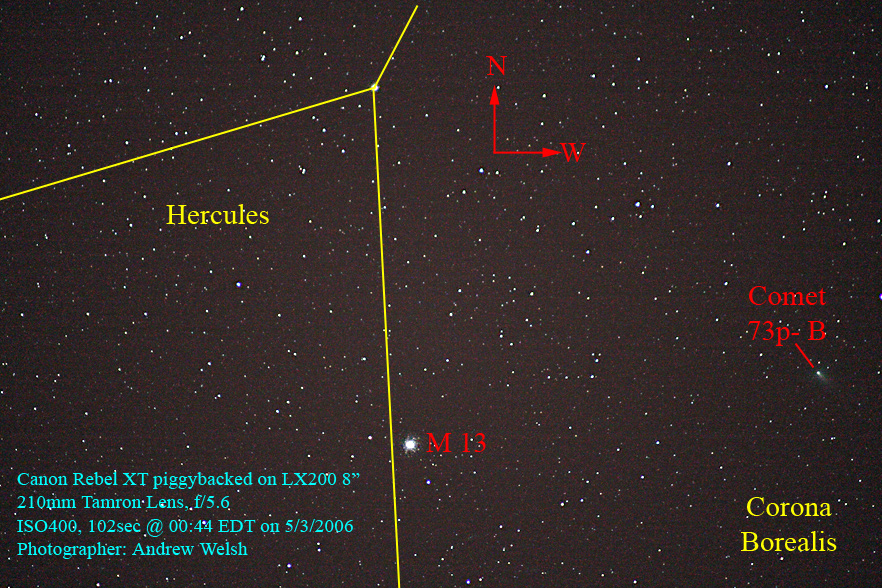
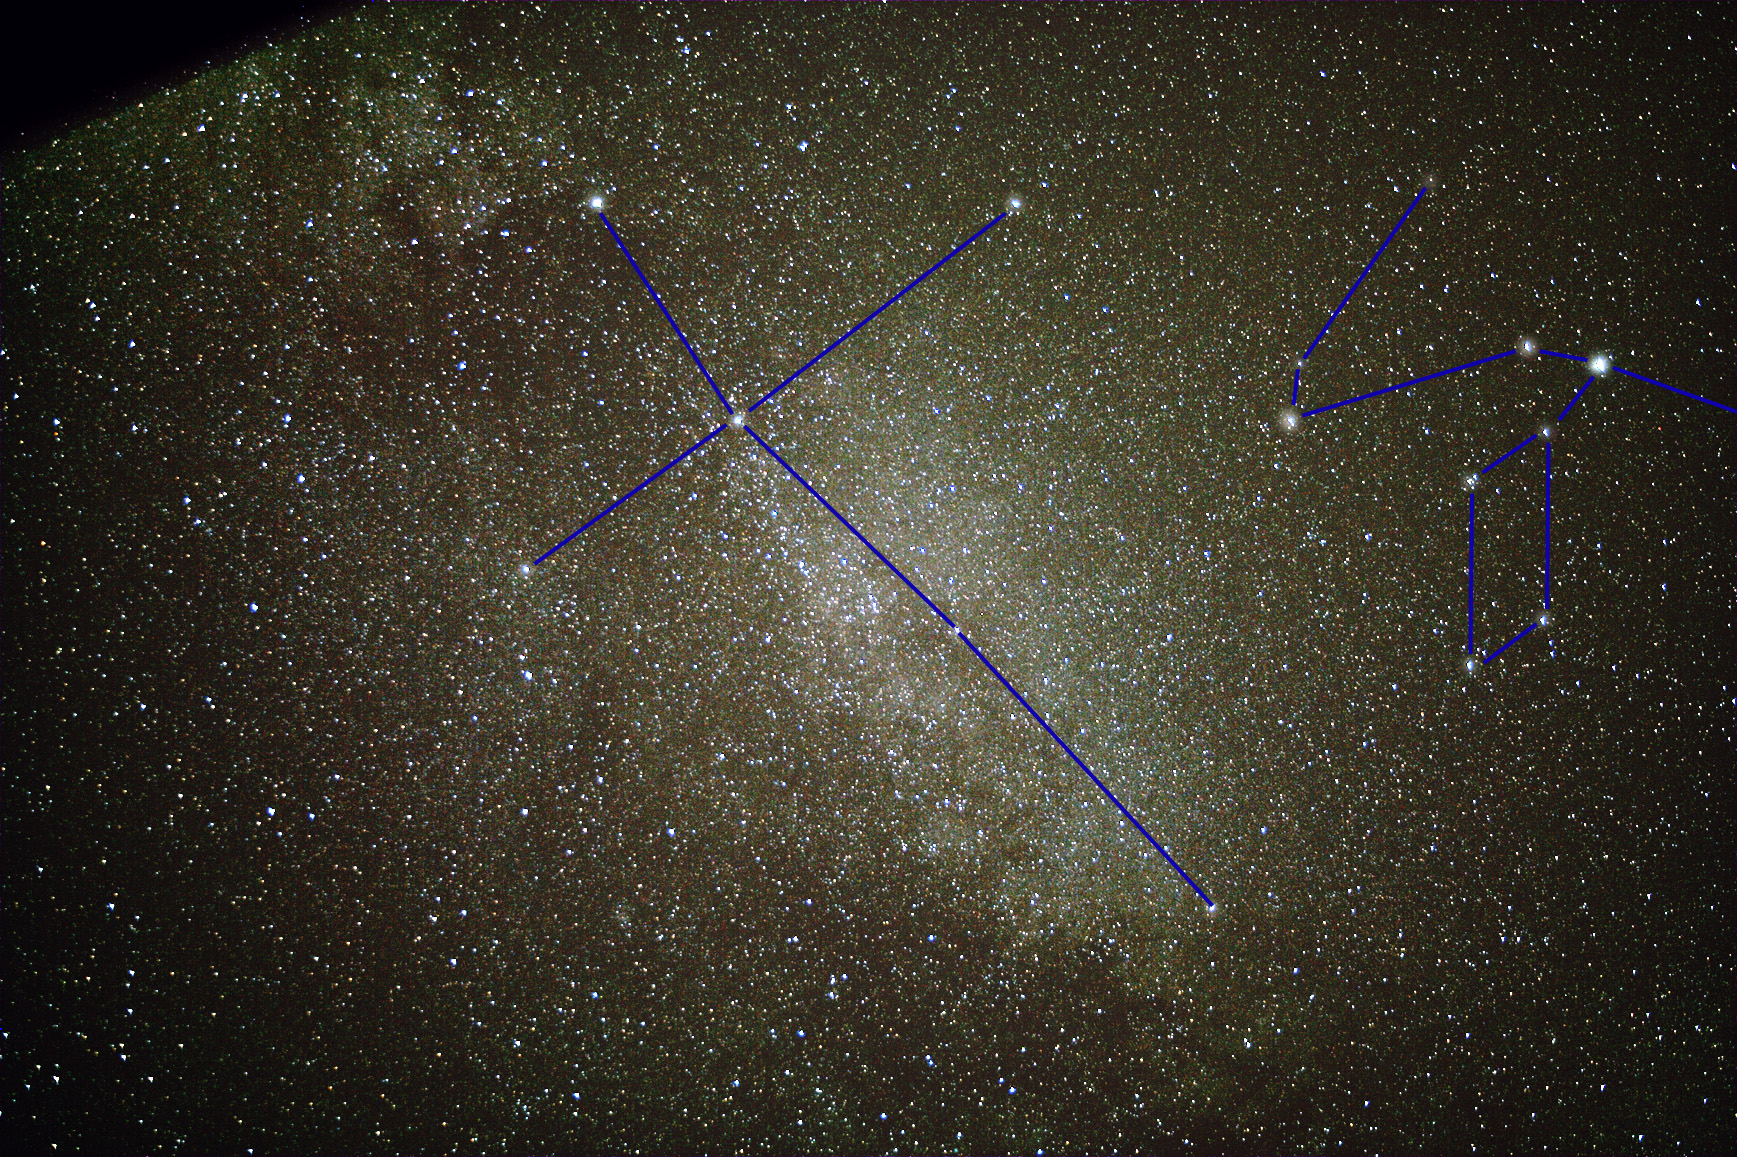
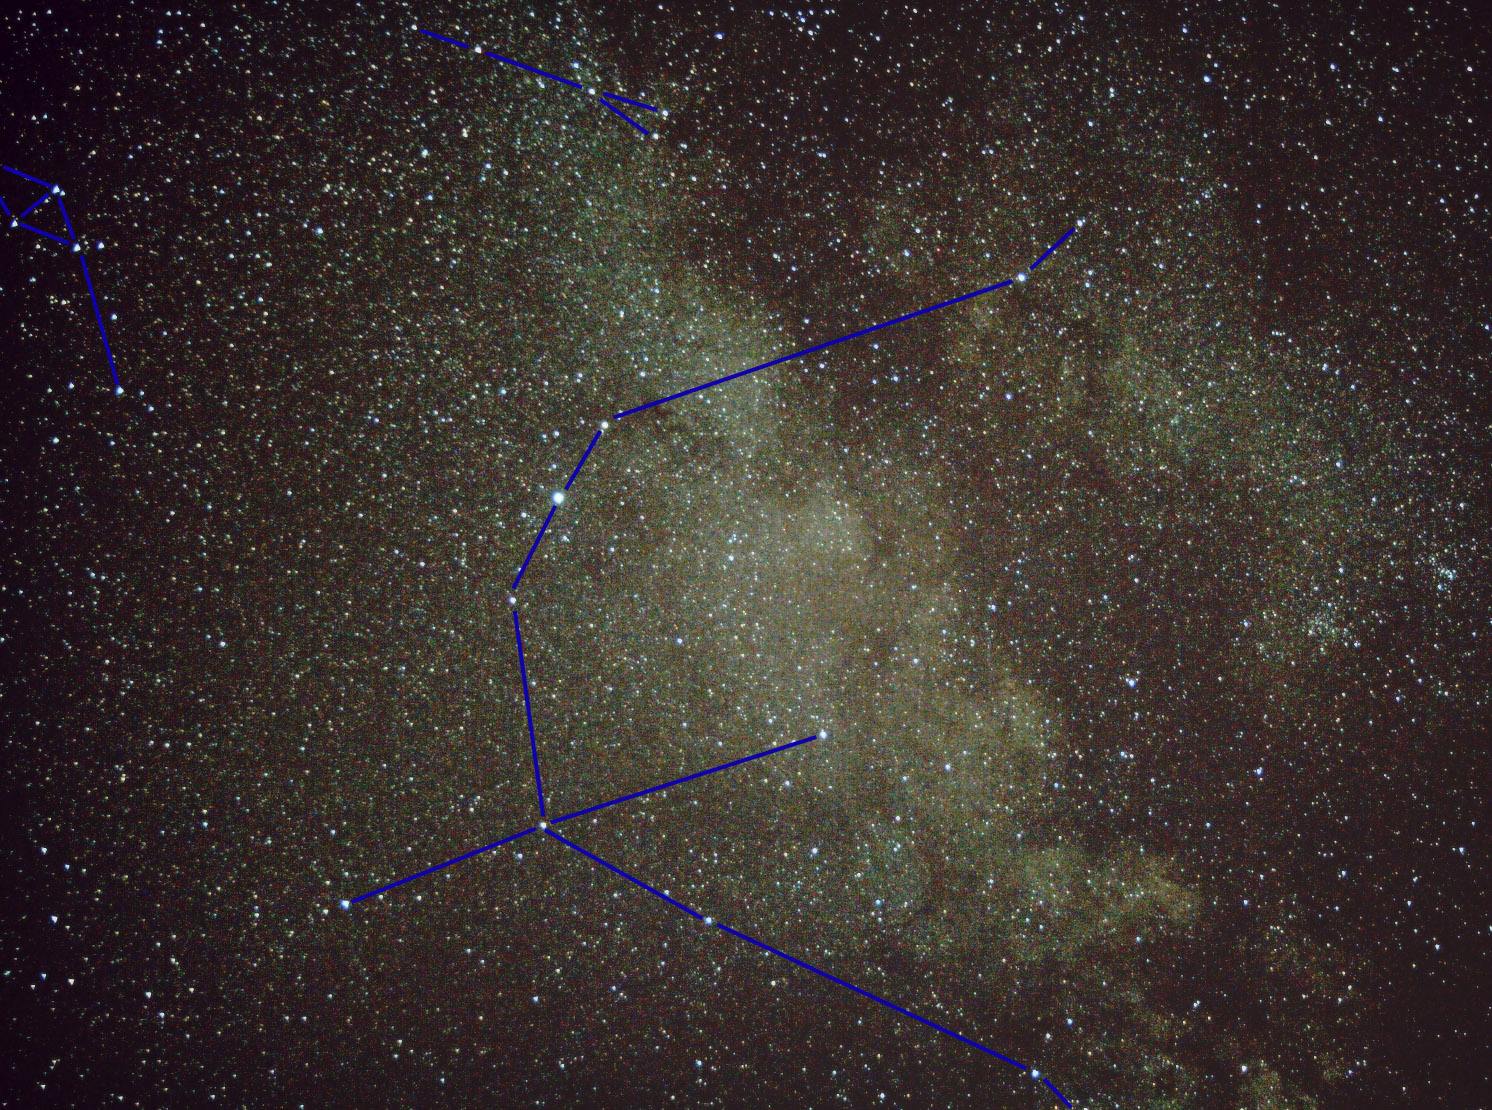